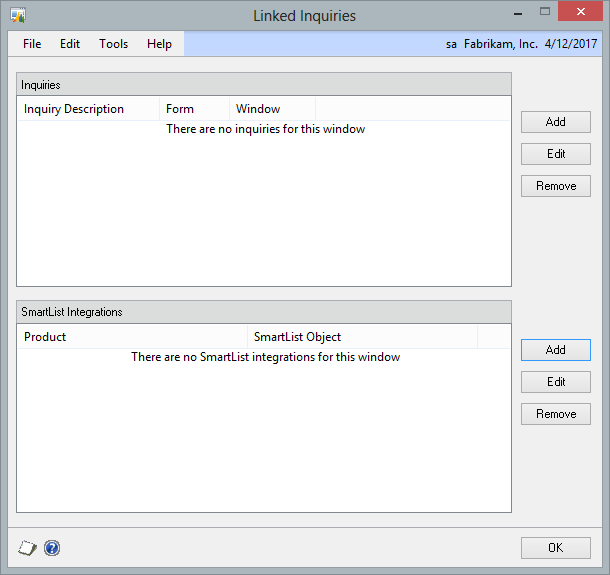
Use the Linked Inquiries window to add your Extender Window fields into an existing SmartList. In addition to the SmartLists created with SmartList Builder, Extender Window fields can be added to the following Dynamics GP SmartLists.
| • | Receivables Transactions |
When an Extender Resource is added to one of the above SmartLists, the fields are added to the available columns list. The user will need to open the SmartList and select the Extender columns to display using the Columns button and, if desired, save the new view as a Favorite. The Extender fields will not be added to any of the current Favorites. It becomes available as a column to add to any favorite, however.
Although Extender windows are specific to a company, no fields are available to make SmartList specific to a company. Therefore, any Extender updates to a SmartList list affect the SmartList lists in all the companies. Therefore, conflicts in SmartList may occur when you create an Extender window in multiple companies. Extender fields from one or more of the other companies may not appear. The fields may also appear as Undefined in the SmartList list.
When you add fields to SmartList from Extender, consider the following guidelines:
| • | If you add an Extender window to a SmartList list, the same Extender window must appear in all the companies. Any difference in the name of a field or of a data type in the Extender windows in the companies will cause conflicts in SmartList. Any difference in the name of the Extender window will also cause conflicts in SmartList. The easiest way to prevent these conflicts is to use the Extender export function to export the window. Then, use the import feature in another company. This guideline guarantees that the fields and the data types are identical in the Extender windows and in the SmartList lists. |
| • | Select one company as the main company, and then do all your Extender development work in this main company. After you select a company as the main company, verify that SmartList lists are automatically updated by that company. To do this, click Tools, click Extender, and then click Options. In the main company, the Auto-update SmartLists check box is already selected. By default, all the Auto-update SmartLists check boxes are selected. |
| • | For the other companies, click to clear the Auto-update SmartLists check box. When you click to clear the check box for the other companies, this action guarantees that only the main company updates the SmartList lists. Because SmartList lists are global, SmartList lists only have to be updated one time. |
| • | After you set up the Extender window for the main company, export the window from the main company, and then import the window into the other companies. |
| • | The information from the SmartList Integrations window will not appear when Extender imports the window. After Extender imports the window, open the Extender window in another company, and then click the SmartList button. Set up the SmartList Integrations window by using the same Key field and the same SmartList field that you used in the original Extender window. The original Extender window is the window that you set up for the main company. |
To add Window fields to a SmartList:
| 1. | Click the Inquiry button. |
| 2. | Click the Add button to the right of the SmartList Integrations list. |
| 3. | Select the SmartList Product and SmartList Object. |
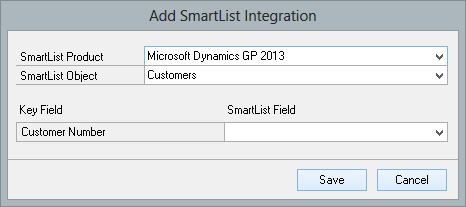
| 4. | Match the Extender Window Key Field(s) to the SmartList field(s). |

|
You can add a window to more than one SmartList.
|
To remove Window fields from a SmartList:
| 1. | Click the Inquiry button. |
| 2. | Select the SmartList from the SmartList Integrations list. |
| 3. | Click the Remove button to the right of the SmartList Integrations list. |
| 4. | Click Delete to confirm the deletion when prompted. |