In this exercise, the user will create a new eConnect node to update a couple of fields on the Vendor Maintenance card that are not included on some versions of eConnect. This exercise is designed for the sample company Fabrikam, Inc.
Create Connection:
| 1. | Launch Node Builder. |
| 2. | Enter the needed credentials to connect to the SQL Server that has Dynamics installed on it. Make sure that a SQL Server user is entered in the connection details and not an Active Directory user. |
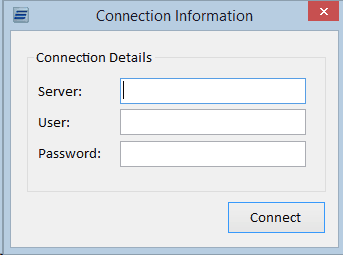
| 3. | Click Connect |
Configure Setup:
| 1. | On the setup screen, enter VENDOR1099 as the Node ID and Node Description |
| 2. | Select “TWO” as the Default Company Database. |
| 3. | For the eConnect Procedure name, it should default in E1_VENDOR1099, but is if does not, enter it in. |
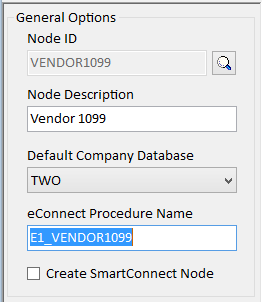
| 4. | If SmartConnect is installed on this system, check the Create SmartConnect Node option. |
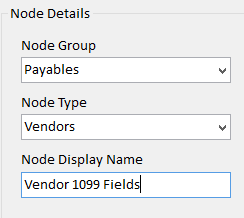
| 5. | Select “Payables” as the Node Group and “Vendors” as the Node Type in the Node Details section. |
| 6. | For the display name of the node, enter “Vendor 1099 Fields” or another name to be displayed when using SmartConnect. |
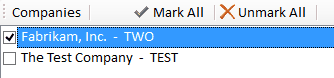
| 7. | For the Companies list, check the companies that will have the procedure created in them when the node is published. If registration keys have not been entered, the node will only be created in Fabrikam, so for this example we will only select “Fabrikam, Inc. – TWO” as the destination company. |
Add Table:
| 1. | Switch to the Tables screen by clicking the Tables button on the Toolbar after setup has been completed in order select the table that we will be integrating into. |
| 2. | Click the Add button to bring up the Add Tables window. If a default database was selected on the Setup screen, the Add Tables will already have filled in the Database field and will be listing the available tables. If the Database field does not have a database selected, choose “TWO” from the list. |
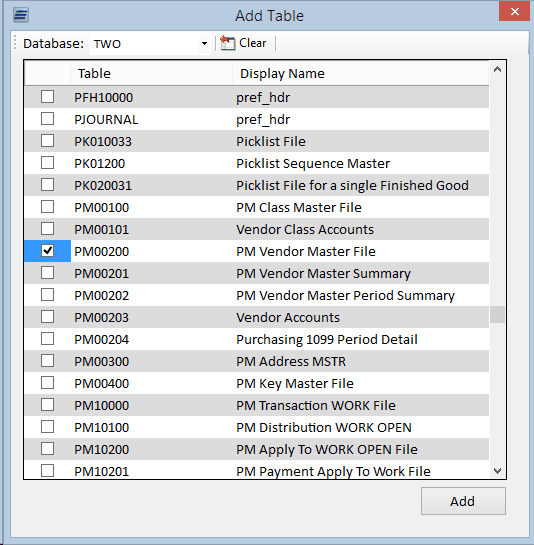
| 3. | Scroll down to the PM00200 table and mark it, then click the Add button to add that table to the current node. Note that you can quickly skip around in the list by typing in the first letter of the table that needs to be added. |
| 4. | The selected table should appear in the list on the left side of the Tables screen. Select the added table in order to see a detailed list of all the fields in the table. |
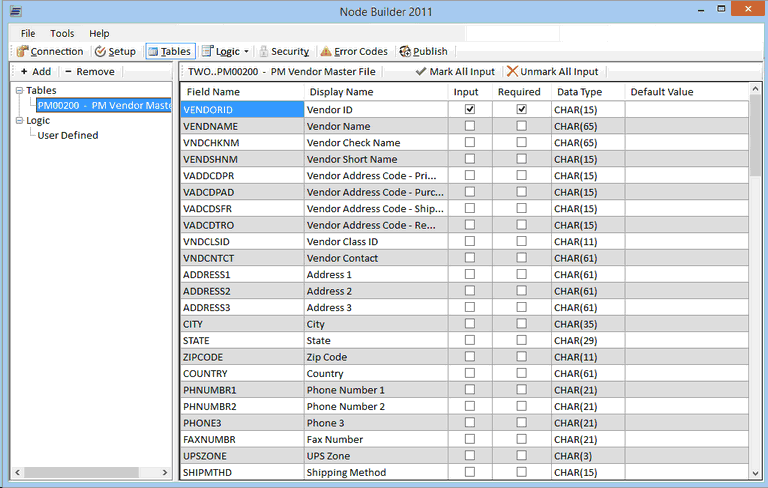
| 5. | The VENDORID field will already be marked as an input field and a required field. This is because it is a key field in the table, so any insert or update done to the table must provide values for any key fields on the table. |

| 6. | Scroll through the list of fields until the TEN99TYPE and TEN99BOXNUMBER fields are visible. Mark the Input checkboxes next to those fields to indicate that the user should be able to map to those fields in SmartConnect. |

| 7. | The Display Names can also be changed on all fields if desired. The display names are what are displayed in SmartConnect when mapping to those fields. |
PUBLISH
| 1. | Once the 1099 fields have been marked as input fields, the node can be created by clicking the Publish button. Once again, if Node Builder is not registered then the nodes will only be created inside of Fabrikam. |
SMARTCONNECT
| 1. | Once the node has been published, it will be available for mapping inside of SmartConnect. Inside of GP go to Tools -> SmartConnect -> Map to open up the Map Setup window. |
| 2. | In the map setup window enter a map id and description, and then choose Payables as the node group and Vendors as the node type. The custom node created in the above exercise, Vendor 1099 Fields, should be listed with the other nodes. |
| 3. | If we open up that node to map to it, we will see the 3 fields that were marked as input fields. The Vendor ID will also be a required field since that was set in Node Builder and the two 1099 fields will use whatever display names were set. |