
In our second article, “Accessing Historical Dynamics NAV Data in NetSuite,” we covered vital steps on how to access historical Dynamics NAV data within the NetSuite interface.
In this installment, we will take a step back and explain the process of connecting to your old on-premise system (in this case, Dynamics NAV) and transferring data to the Azure Data Lake using the Popdock Data Lake Upload Tool. We will also go over the details of incorporating lists, tables, and more.
Connecting to Dynamics NAV data
When it comes to Popdock, it’s important to keep the following points in mind:
- It runs on your own premises: With Popdock, you can transfer data from Dynamics NAV to a data lake without the need to open your SQL Server or poke holes in your firewall. This tool operates within your own premises, eliminating the requirement for gateways or specific utilities to open up your network. As a result, you can rest assured that there are no security concerns associated with poking holes in your firewall.
- Comprehensive access to NAV tables (coming soon): In the near future, we will introduce the capability to extract all NAV tables. This is significant because it allows you to incorportate any tables created by third-party products. Whether you have implemented customizations or are utilizing ISV (Independent Software Vendor) products, Popdock will retrieve data from all relevant tables. Regardless of the data’s source, Popdock ensures a comprehensive extraction of information.
- Integration of NAV lists: In many cases users work with data in the form of lists. Popdock allows you to extract all the relevant and meaningful information you need and present it within the interface of your desired system, such as NetSuite. For example, if you need to view sales order lines, it becomes more valuable when combined with additional information from customers, items, and other related data. Instead of searching for information across multiple locations, you can consolidate all the necessary information into a single list. By transferring all the tables, Popdock serves as an insurance policy, enabling you to access any piece of information directly within Popdock or NetSuite if needed.
Moving your Dynamics NAV data to an Azure Data Lake
After connecting to the data on your network, the next step is to move the data to the Azure Data Lake with the Popdock Data Lake Upload Tool.
The Popdock Data Upload Tool runs inside your environment, ensuring fast data upload while allowing you to monitor and address any errors that may occur during the process. Instead of on a SQL Server, the tool can be installed on a workstation within your network as long as it has the necessary access to establish connections and perform the data transfer effectively.
The tool enables fast data transfer, but the uploading speed can be influenced by various factors. Database size plays a role, with smaller databases uploading in minutes and larger ones taking hours or even approaching a day for terabyte-sized datasets. The processing speed of the machine executing SQL statements also affects the overall upload time.
The Popdock Data Lake Upload Tool
To better illustrate how useful this tool is, let’s walk through a step-by-step demonstration.
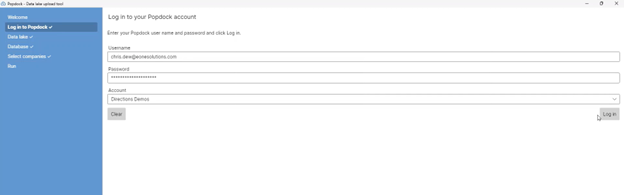
Begin by logging into your Popdock account.
Next, select an Azure Data Lake that you have set up inside Popdock.
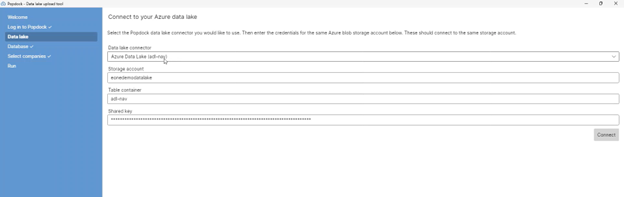
In this case, let’s choose the data lake called “adl-nav.” Once you have you’re your selection, click on “Connect.”
Now, we will connect your on-premise environment to the SQL Server.
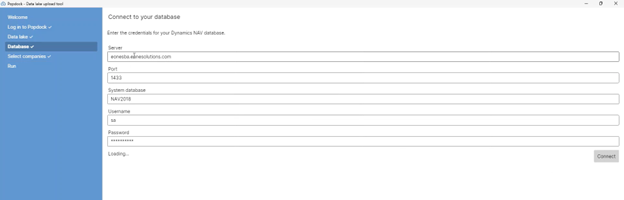
Please note that your setup may vary, and the server name or address for your on-premise server might differ from ours. It could simply be referred to as “SQL Server 1,” or something similar. The standard port for SQL Server is usually 1433. Ensure that you use the correct server address and port number based on your specific configuration.
In the case of the Dynamics NAV database, we have tested this process on different versions, and for this example, I will be demonstrating with NAV2018. This version contains all the necessary companies and tables. To establish a connection, you will need to provide a SQL user and password. It doesn’t necessary have to be SQL, but it should have the necessary access to the database and its tables.
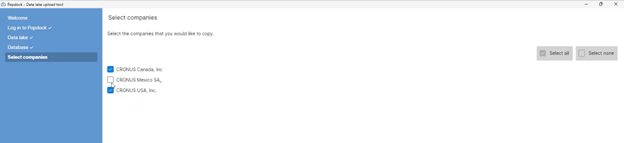
After clicking on “Connect,” you will be directed to the connected interface, where you will see the following options.
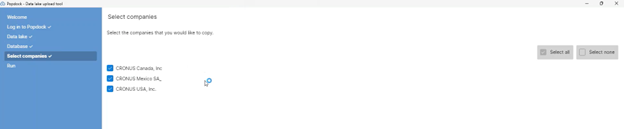
When you select all the tables, you will find that all the companies you have chosen will have their information extracted. However, if there is a specific company that you do not wish to include, you have the option to exclude it. If it’s a test database or a test company that you no longer use, don’t include it in the process.
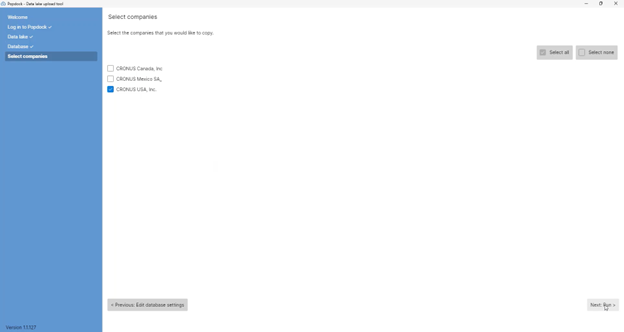
After selecting the desired companies, click on “Next: Run.” In this example, we’ll just archive a single company.
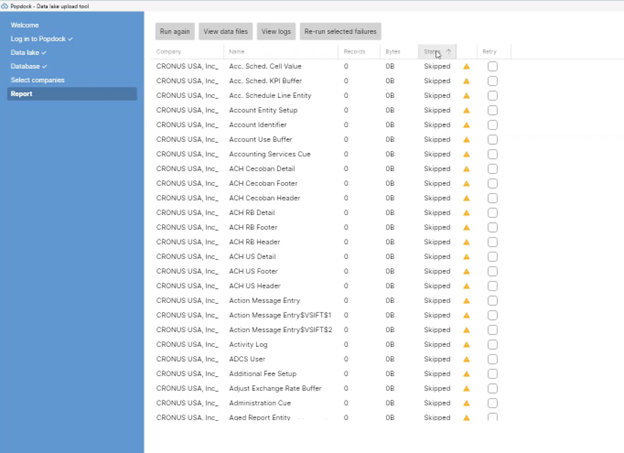
During the extracting process, real-time progress reporting will be provided. In our case, there are around 1,400 tables in this U.S. company. You will receive updates on the number of tables completed, remaining, skipped, and any that may have failed. This allows you to track the progress efficiently.
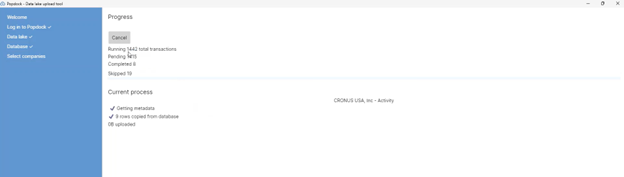
Why are some tables being skipped during the extraction process? The reason is that these tables do not contain any data. The tool selectively moves only the tables that contain data.
If you encounter any failed tables during the process, you will see the number of failures.
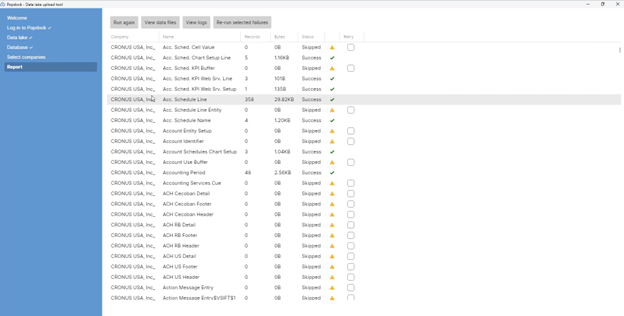
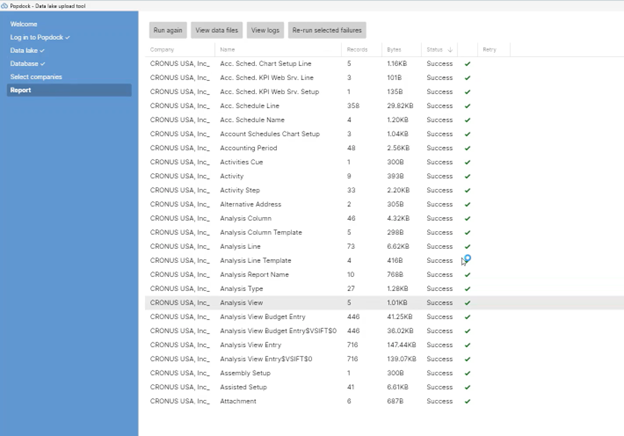
Once the process has been completed, you will have the option to sort the files by their upload status. In our case, all the files were either successfully uploaded or skipped due to not containing any data.
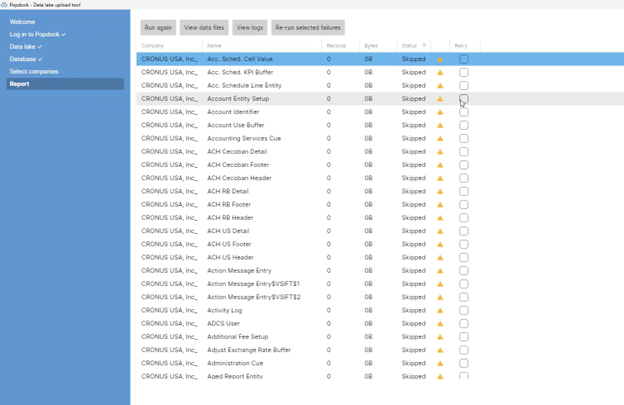
Although we don’t have an actual example of a file upload failure in this extraction, let’s consider a hypothetical scenario.
A file upload failure can occur due to various reasons, such as a bad calculation in a field or other similar issues. If a failure were to happen, you have the option to fix the problematic file and re-upload it. To do this, select the file that failed and click on “Run again.”
This allows you to rerun any table, giving you the opportunity to fix any issues and upload it as many times as needed.

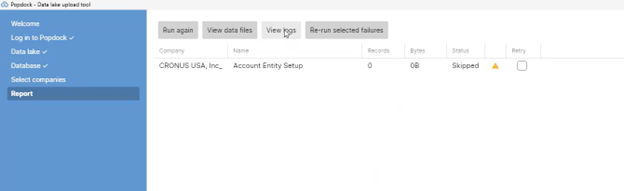
Popdock also offers the capability to access and review logs, so you can investigate the reasons behind the success or failure of each attempt.
Next up: More on the Popdock Data Lake Upload Tool
In our final article in this series, we’ll show you more demonstrations on using the Popdock Data Lake Upload Tool.
Interested in harnessing the power of Popdock? Contact us today
We hope this article series on accessing historical Dynamics GP data in NetSuite is helpful to you!
Are you ready to learn more about how Popdock can help your NetSuite experience? Check out our article on discovering a new level of NetSuite integration with Popdock, or contact one of our Popdock experts today at sales@eonesolutions.com or 888-319-3663 ext. 1. They are always eager to provide help and answers!