
In this article series, we will review how you can access historical Dynamics NAV data in Dynamics 365 Business Central. Click here to read the first article where we discuss terms, costs of an Azure Data Lake, and your overall migration strategy. This article will review how to access your historical NAV data in D365 Business Central.
Accessing and Viewing your Dynamics NAV History Inside D365 Business Central
We want to make sure you have the capability to see all of your data, without ever leaving Business Central. Popdock enables you to see your Dynamics NAV, combine lists, and filter lists.
Let’s go over this in more detail.
Just History
There are some situations where you might want to see just the history that came from NAV. In this case, we will be viewing NAV data inside of Business Central.
Combined List
There also may be some cases where you want to see a combination of historical Dynamics NAV data plus your new Business Central data. If this involves sales orders, you might want to see all the historical sales orders. If it has to do with payments from vendors, you may want to combine both Business Central data and archival Dynamics NAV data, all in one list. Popdock enables you to do this with list combining.
Filter lists by Customer, Vendor, Account, and more
Finally, there will be some cases when it makes sense to give you a list that’s much smaller. This list can be embedded on the customer page, the vendor page, the account page, or wherever else. It’s pre-filtered, so it’s only pulling the information for that particular customer, vendor, item, or account.
In our demonstration, we’ll cover all of these areas.
Demonstration:
Popdock in D365 Business Central
Before going into Popdock, we’re going to take you right inside the Business Central interface.
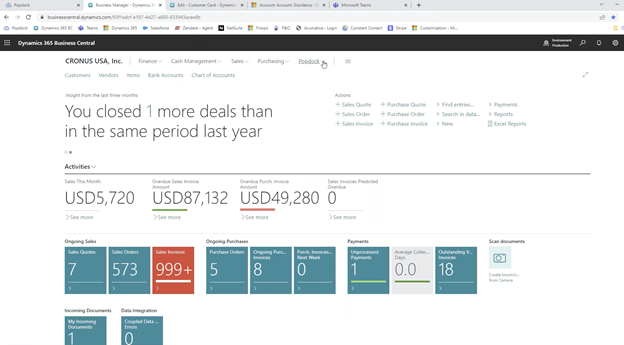
As you can see, we have Popdock embedded inside Business Central.
To start things off, we’re going to give you a little tour of the interface.
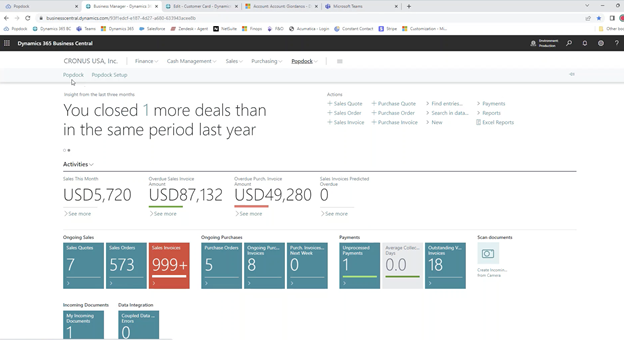
When we click on Popdock, it’s going to bring us to Popdock which has been embedded and feels native to the Business Central interface.
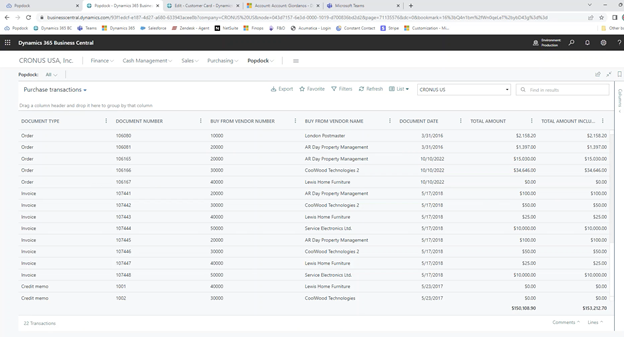
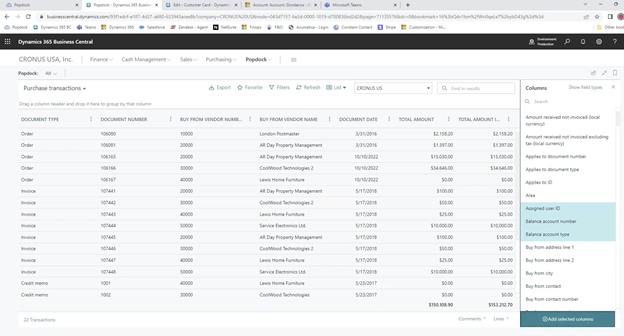
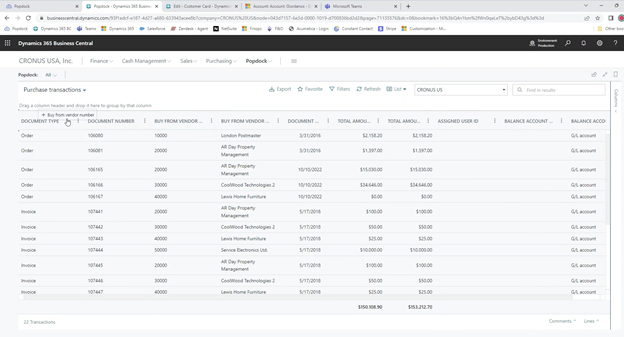
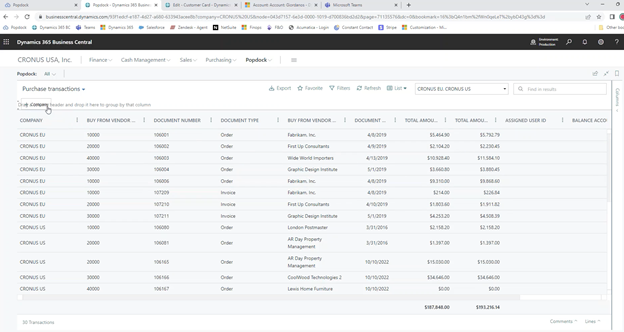
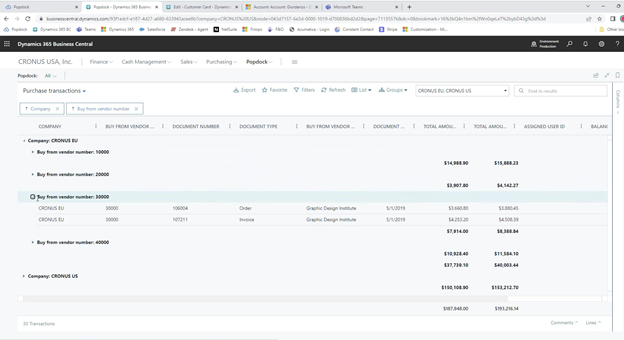
This is pulling live purchase transactions from Business Central. To give you a glimpse of how the interface works, one example is how it allows us to add new columns.
For example, if we want to add these three columns, we will be able to quickly pull in that information.
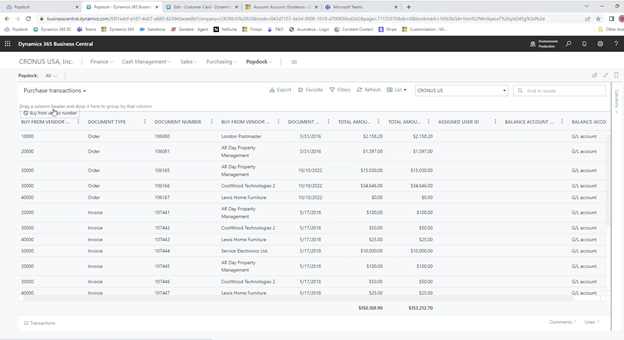
If we want to move them around, such as the vendor, we can do that. We can simply drag and drop each column into place.
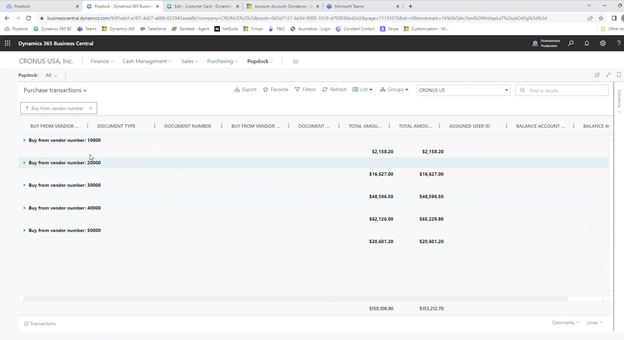
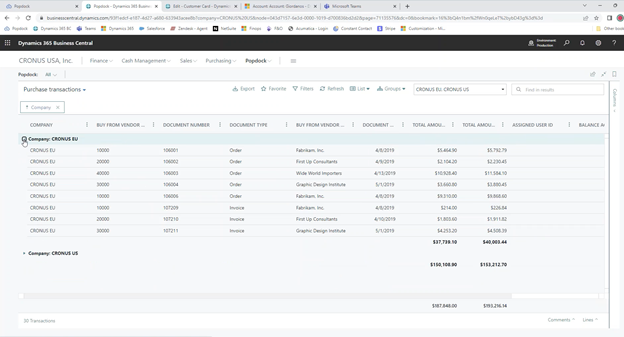
If we want to group by vendor, we can drag the vendor column up above to group it by that column. Now we’re getting subtotals by vendor.
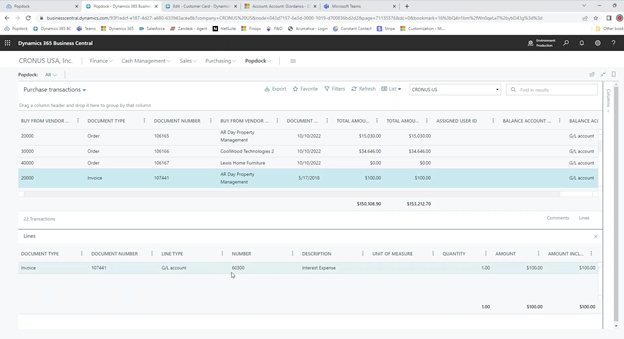
We can access even more information and see which documents came in for that particular vendor inside here as well.
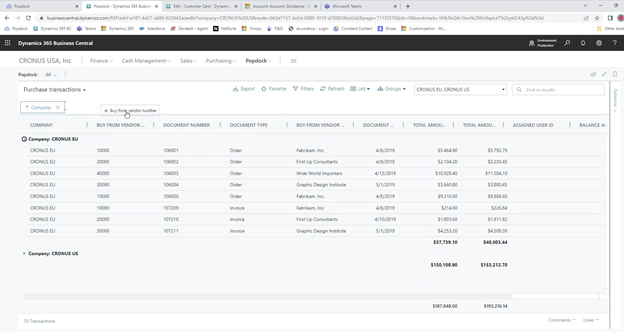
We can go further and view even more details by clicking on the dropdown arrow.
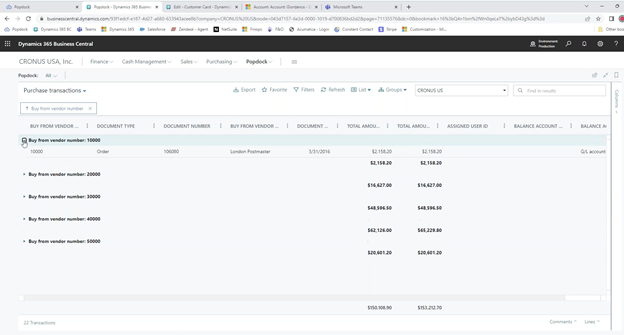
In this particular example, we can see there are three line items for that purchase order.
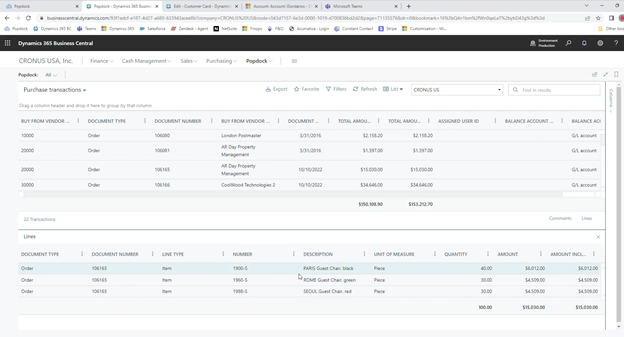
On the second purchase order we click on, there is only one line item.
Whether this data is live or archived, you have the capability of interacting with this data in a powerful way.
We can even do this across companies.
Multi-Company View
We can also check a second Business Central company.
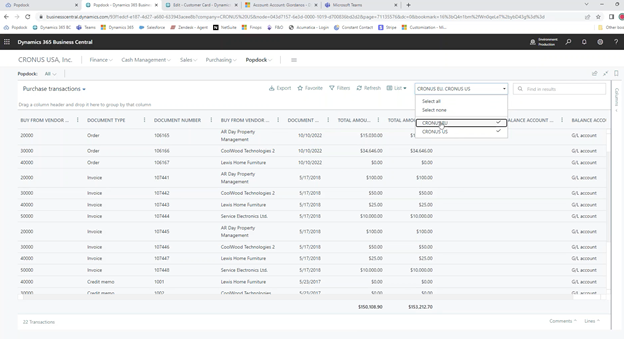
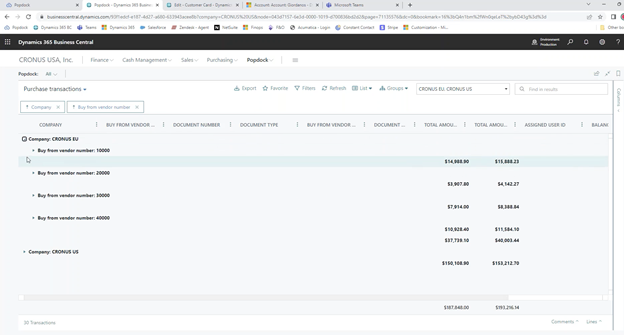
We now have the capability of it giving us one more column that tells where the data is coming from.
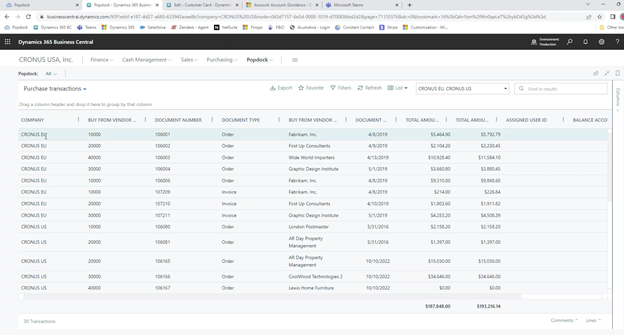
If we drag the company column up, we will then be able to see the transactions that are coming from CRONUS EU versus CRONUS US.

If we wanted to add in the vendor, we can drag the vendor column up as well. This will show us all the information by company and by vendor. Now we can see everything inside by clicking on the dropdown arrows.
Those are a few of the incredible ways you can interact with your data.
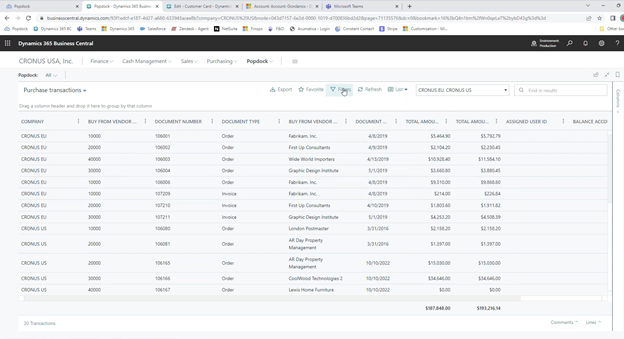
Filtering data
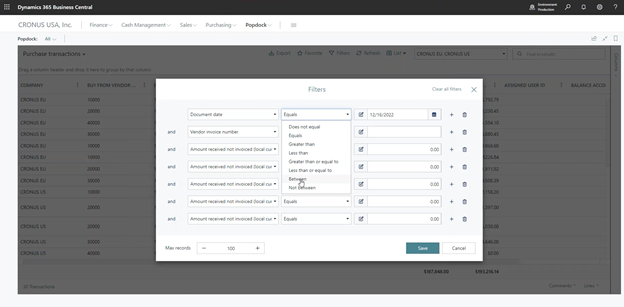
Another note we want to add is that you can filter this data as much as you like. There are no limitations on this.
In this example, you can see we are able to keep adding as many filters as we like.
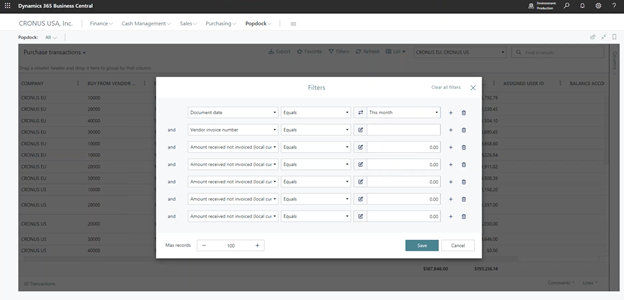
Click on “Filters.”
Click on “Click here to add a filter.”
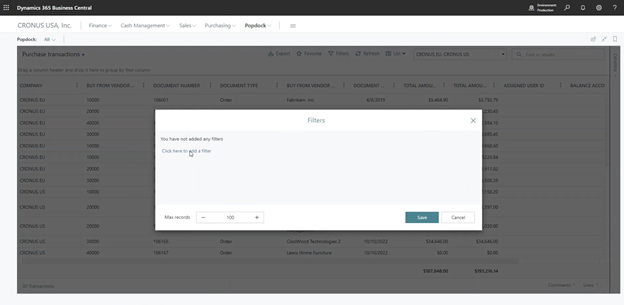
Then just click on the + to add as many filters as you need.
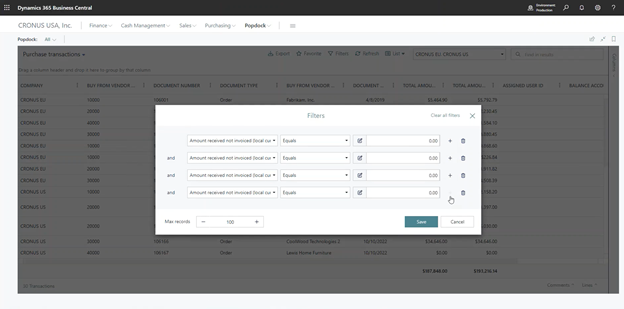
This gives us the ability to hone it down to only the fields we need. These don’t even have to be on our list. They just have to be part of the Business Central data.
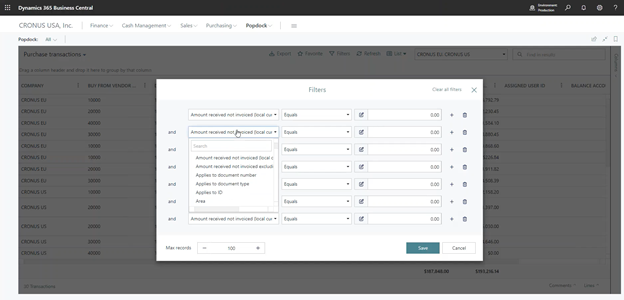
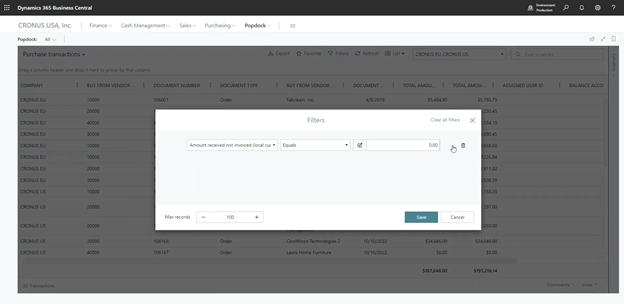
We can see all the different options that are offered and we can restrict it down to whatever filters we need and save this combination of filters as a favorite.
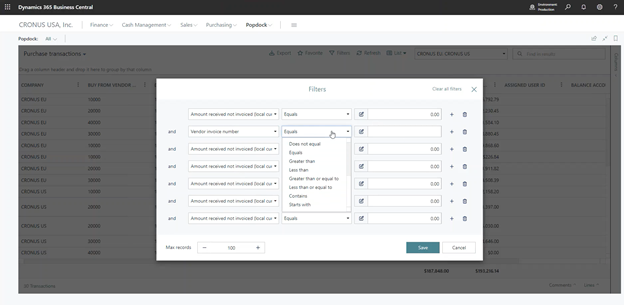
Frequently, those in accounting use a “between” filter when they’re working with dates. It’s a lot of work to keep changing views to things like “I want it for December 1 through December 31” and then “I want it for January 1 through January 31.” People are always using a “between” range and having to constantly change those favorites.
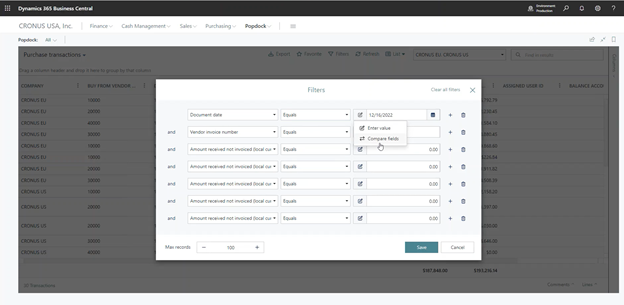
In the past, we have studied how people use filters and what would be the most helpful for them. We then made these comparisons simple to use in Popdock.
We can set up the same type of filter in a fraction of the time by choosing to have it give us everything from this month or another month.
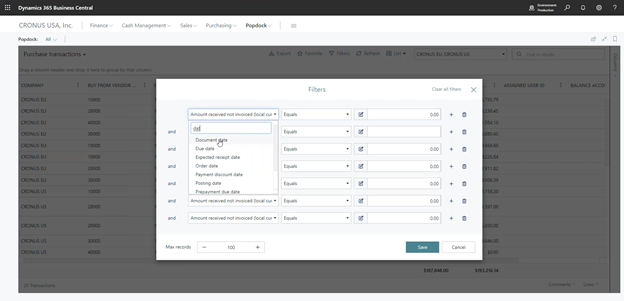
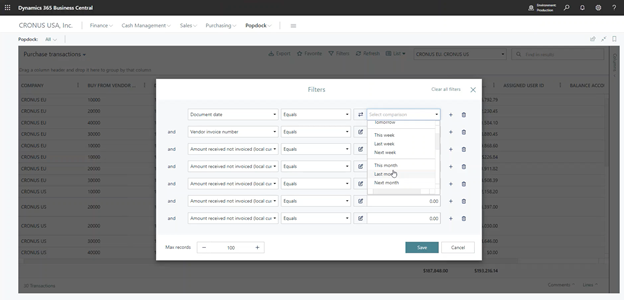
If we tell it to give us everything from the current month we are in, we can easily see all those values. Select “Compare fields,” then under “Select comparison” choose whatever time range you need to view, whether it’s “Last week,” “This month,” or anything else. If we need to see everything from the last month, it’s as easy as clicking on the “Last month” filter.
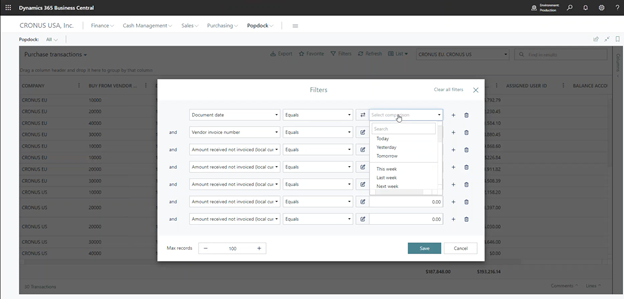
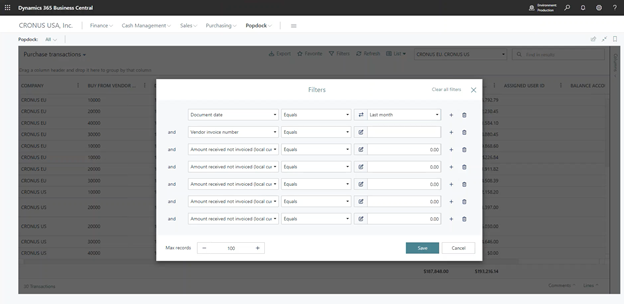
When you save these filters as favorites, you can quickly go back to them without having to constantly change the dates.
You can pick this quarter, last quarter, this year, last year, this week—whatever timeframe you like—and you have those capabilities built in.
Saving favorites with historical data
Now that we have walked through that tutorial for Popdock capabilities, we need to jump to one of our other main objectives: How to do everything we just did for historical data.
Instead of navigating through a bunch of the current Business Central data, we’re going to focus on historical NAV data.
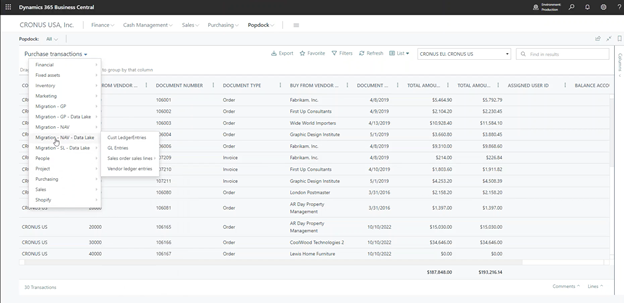
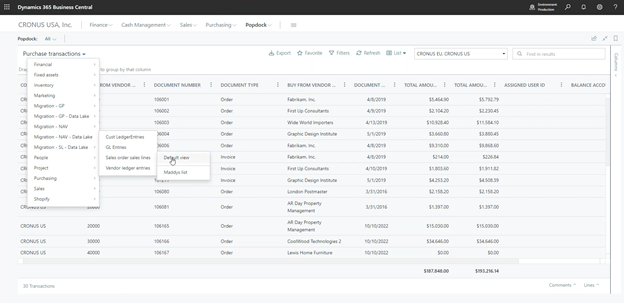
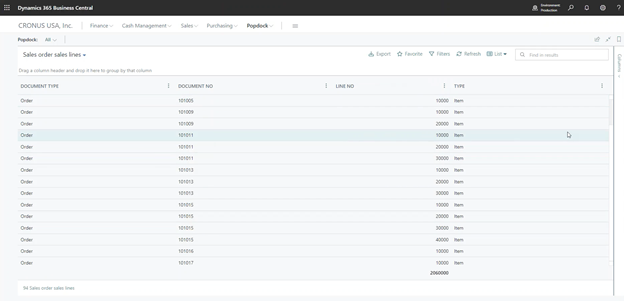
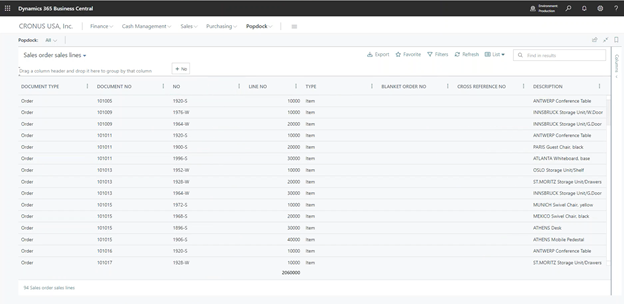
In this case, we can go ahead and pull some of our information in so we could see the sales order lines. For this example, we will just hit the default view.
You can see it’s pulling information and is now doing it from the archive which is pulling from the data lake.
We turned off our SQL server, and although it’s no longer active anymore, we still have the capability of accessing that NAV system because it is archived in the Data Lake. It enables us to still access the things we could before.
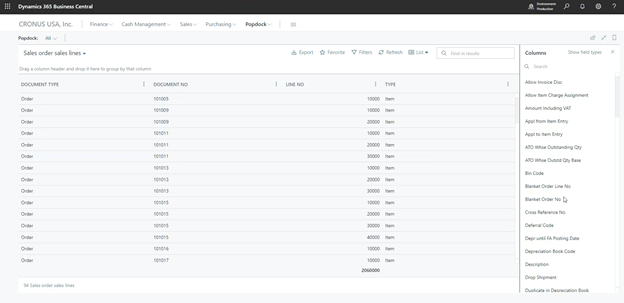
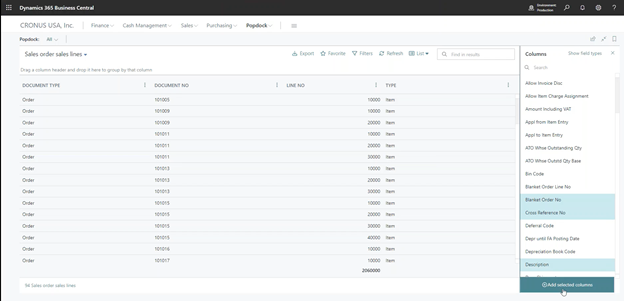
If we wanted to add these three columns, it still allows us to interact with the data that way.
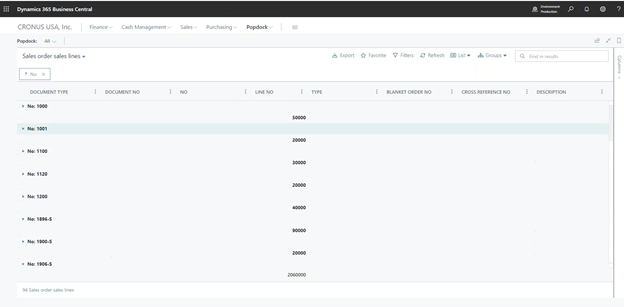
We can also still do grouping.
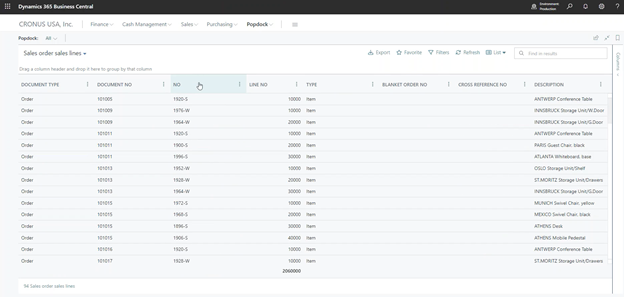
Once again, click on the column you would like to group. In this case, we’ll drag the item number column up and you can now see that we are getting some totals by line.
You can make whatever lists that you want available.
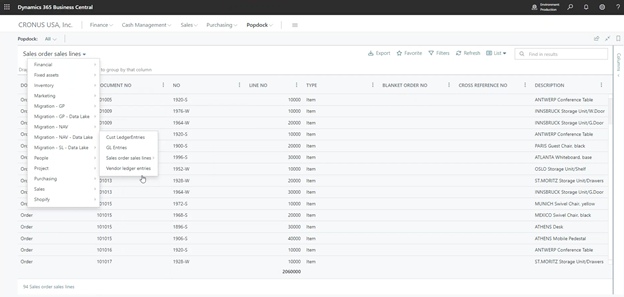
Maybe you’re focused primarily on the vendor side of things. Maybe you just want to have a couple of lists that have the ledger entries, payments, or whatever else. Just know that you have the capability to pull in 100 different lists that would make sense for your business, along with all of that history.
Additional Embedding Options
Jumping back into Business Central, we want to show you how you can also embed inside of a customer, vendor, item, or whatever it may be, and pull that contextual information.
Instead of pulling all the transactions from the lifetime of your business, we can give you the capability of embedding it right inside of, in this case, a customer.
We can pass in the ID to filter out the data and only show the records for this customer.
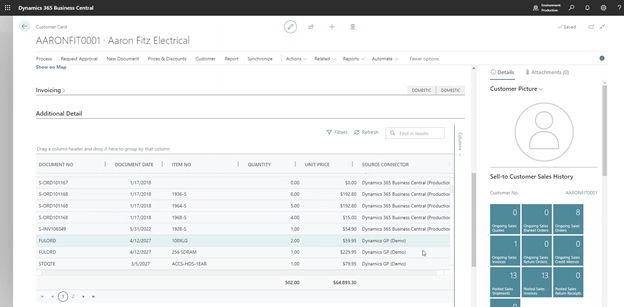
We might have millions of records in the overall list, but in this case, we only have 125. This example is pulling data from a couple of different places.
This process is pulling data from the live Business Central system. These are records that Aaron Fitz Electrical has put inside of there.
While we’re not using NAV data in this example, the concept is the same. It happens to come from GP data that was archived in the data lake.
This combination, also known as a merge list, is another capability of Popdock. It allows us to pull that data together so you can see both history and new information in one place without ever leaving Business Central.
In our next article, we are going to go over the scenario of connecting to Dynamics NAV to move data to the Azure Data Lake, along with other helpful information.
Do you have questions about the topics discussed in this article series or other questions about Popdock? Whether you need help with your migration strategy, you need the right tools, or you want help figuring out how to use tools to access historical data in the cloud, we are here to help. Contact one of our eOne Solutions experts at sales@eonesolutions.com or 888-319-3663.