
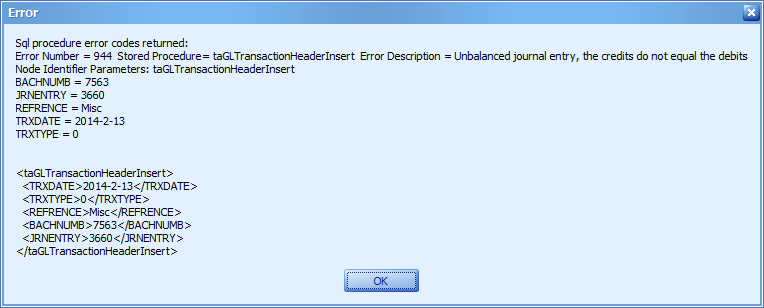
One of the most fun (insert sarcastic emoji) items to troubleshoot is eConnect error 944, Unbalanced journal entry, the credits do not equal the debits. The difficulty with this error is eConnect cannot not show which distribution(s) causes the transaction to be out of balance and with large Journals, searching through a source file or resulting eConnect XML can take hours to find.
This article will show how to reduce the number of destination columns to just the journal number and amounts so we can validate the expected values.
We will export the source data to an eConnect XML file, transform it to another XML file that can easily be read and validated with Notepad and/or Excel.
Other Considerations
There are some other items to review before assuming the source data is incorrect and going through these steps. Any of these items could potentially cause a journal to be out of balance or not appear as expected.
- Make sure any distributions restrictions are valid. Check that you are not restricting any records that would cause the transaction to be out of balance.
- Make sure there are no Unit Accounts are being used for comparison since they are not included in the Dynamics GP totals
- Make sure any calculated fields are correct. Verify any rounding or truncating is done correctly.
- Make sure the Key Fields for the map are creating the correct number of Journals. The Key Fields setting determines how the data is grouped.
Create General Journal XML File
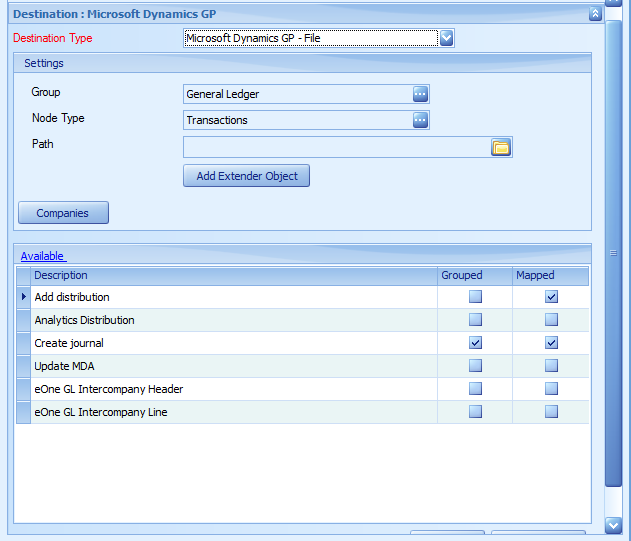
The first step is to change the Destination to Dynamics GP – File and enter a path to create the eConnect XML file.
When the map runs it will create an XML file for each journal that would be created based on the selected Key Field. We need the XML file that represents the out of balance journal entry.
Create a New Map
Create a new map that will use the resulting XML file from the first step. You can download the sample map (SmartConnect 20.18.0.9 and above), sample source file and XML transformation here. If you load the sample map, the paths will need to be changed to match your system and file names. I have highlighted the fields that would need to be updated in the screen shots below.
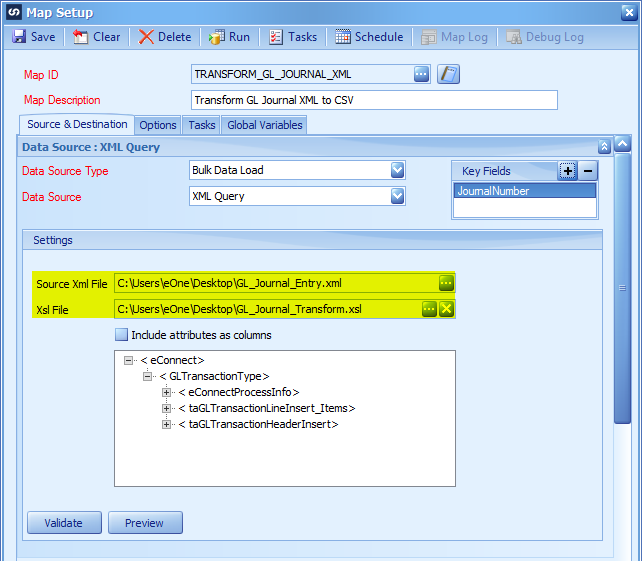
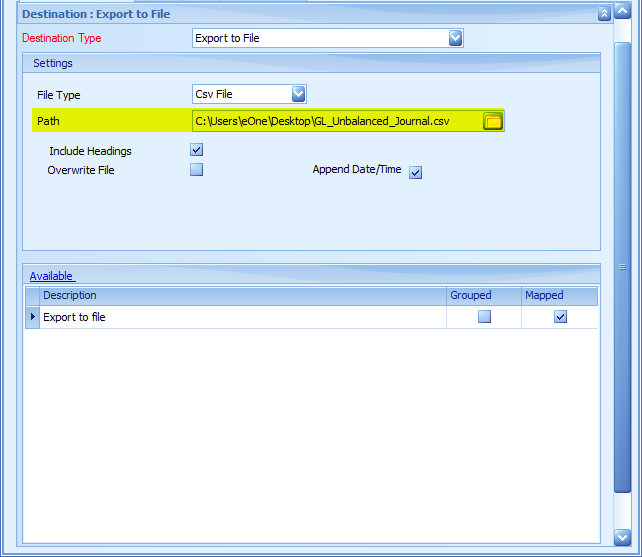
With this new utility map, our source will be an XML Query, pointing to the XML file generated in the prior step including an XSL transformation to get the data into the right format. The destination can be either a CSV file or an Excel file. The example uses a CSV file since Excel will format the data and potentially hide the results. The CSV can also be opened in Excel easily if needed.
XML Transformation
Here is the XML Transformation logic that can be copied to a file with the extension XSL. Open Notepad and copy the XML below.
<?xml version=”1.0″ encoding=”UTF-8″?>
<xsl:stylesheet version=”2.0″ xmlns_xsl=”http://www.w3.org/1999/XSL/Transform”>
<xsl:output indent=”yes” method=”xml”/>
<xsl:template match=”/”>
<GeneralJournal>
<xsl:for-each select=”eConnect/GLTransactionType/taGLTransactionLineInsert_Items/taGLTransactionLineInsert”>
<GeneralJournalLine>
<JournalNumber><xsl:value-of select=”JRNENTRY”/></JournalNumber>
<AccountNumber><xsl:value-of select=”ACTNUMST”/></AccountNumber>
<DebitAmount><xsl:value-of select=”DEBITAMT”/></DebitAmount>
<CreditAmount><xsl:value-of select=”CRDTAMNT”/></CreditAmount>
<SequenceNumber><xsl:value-of select=”SQNCLINE”/></SequenceNumber>
</GeneralJournalLine>
</xsl:for-each>
</GeneralJournal>
</xsl:template>
</xsl:stylesheet>
Run the Map and Validate the data
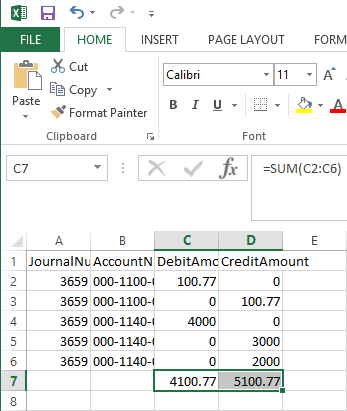
Run the map to create the CSV file. Open the file in Notepad or Notepad++ and verify the amounts are correct. The reason for not opening it in Excel first, is Excel may format the amounts to only show 2 decimals and now it becomes more difficult to track down the invalid distribution(s). Once it has been verified the decimal places are all as expected, open the file in Excel, go to the bottom of the Debit and Credit Columns and
Opening the file in Excel does allow for quickly adding sums to each amount column and seeing the difference.
Conclusion and Workaround
When running a GL Journal Transaction through SmartConnect and the error comes back as Error 944, we know that Microsoft eConnect is unable to balance the journal automatically. This method can assist with finding that one distribution in a potentially long list of distributions.
There is a workaround that can eliminate ever getting this error but it may not result in the desired journal entry if some of the distributions are not being integrated. The method would be to add an Offsetting Distribution node to your General Ledger Transaction Type and calculate the offsetting value. This is especially useful if there is a decimal place issue and we don’t want to have to manually change the file before integration.
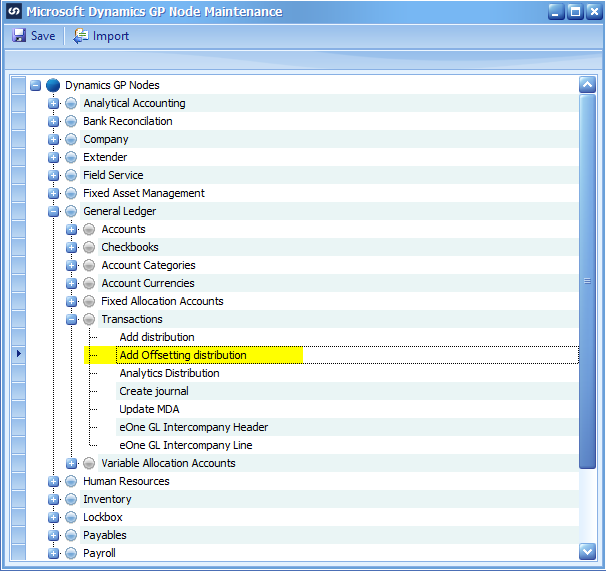
Microsoft Dynamics GP Node Maintenance
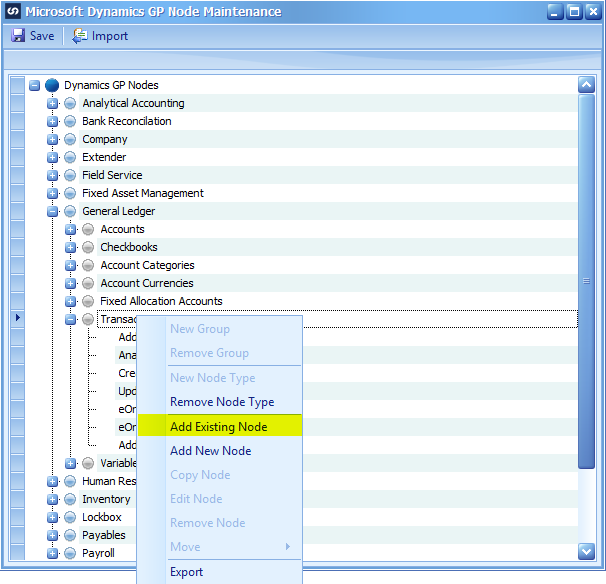
Open the Node Maintenance window from the SmartConnect Maintenance menu option and the GP Connector Pane.
Expand the nodes to Transactions.
Right Click and choose Add Existing Node.
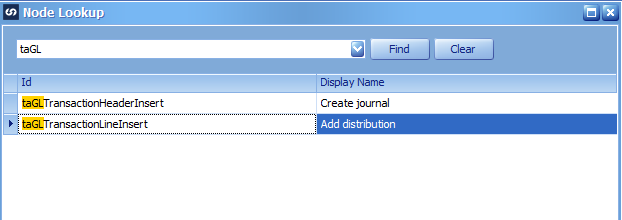
Select the taGLTransactionLineInsert Node.
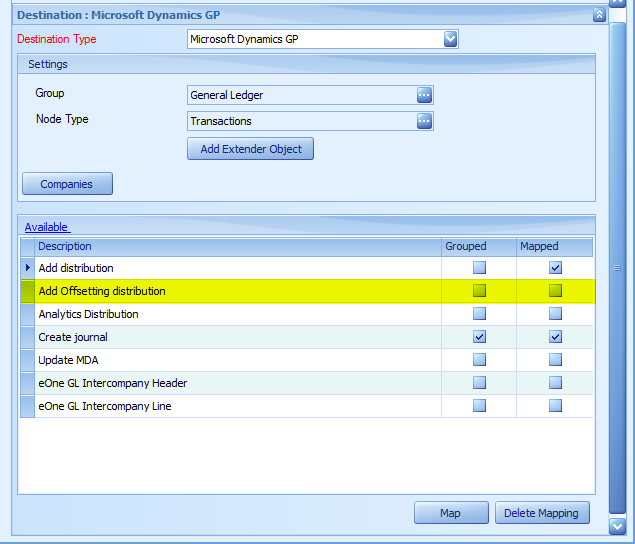
After it is added to the Transaction Type, right click and choose Edit Node. Rename the node to Add Offsetting distribution.
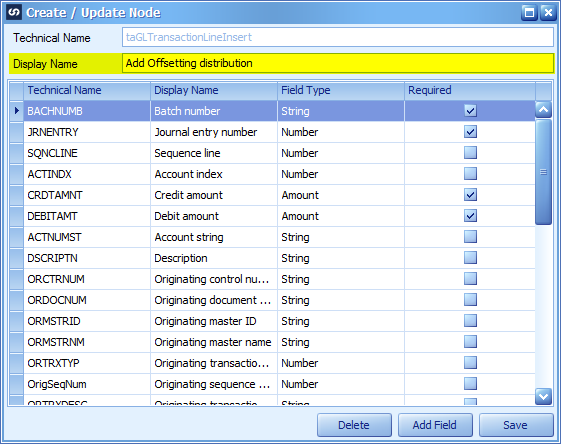
Save the edited Node.
Then Click Save on the Microsoft Dynamics GP Node Maintenance window.
Expand the Nodes again to view the General Ledger / Transactions node.
Drag the new Add Offsetting distribution node to right below the Add distribution node and before the Analytics Distribution node.
Then Save.
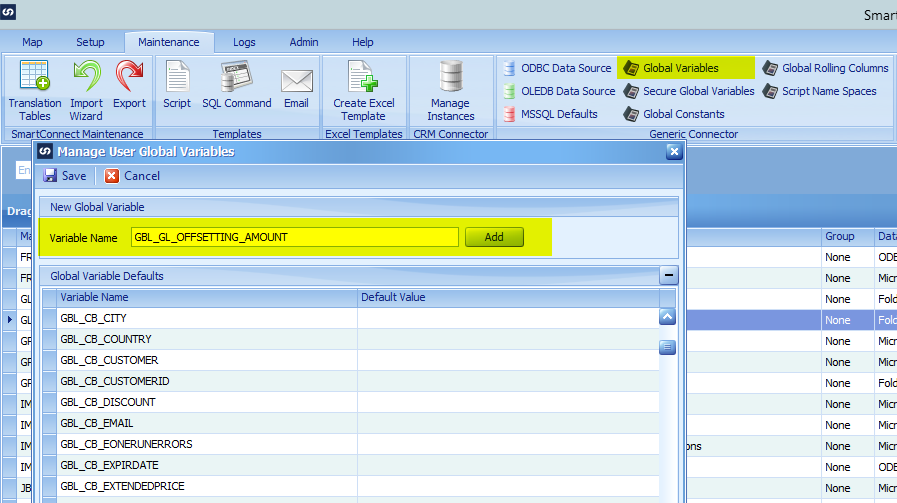
Global Variable
Create a Global Variable to be used for calculating the offsetting amount.
You can set the default value to 0.
Modify the existing GL Map
Open the map or better yet, duplicate the map and modify that one instead.
Expand to the destination and open the Add distribution node.
Click on the Restrictions button.
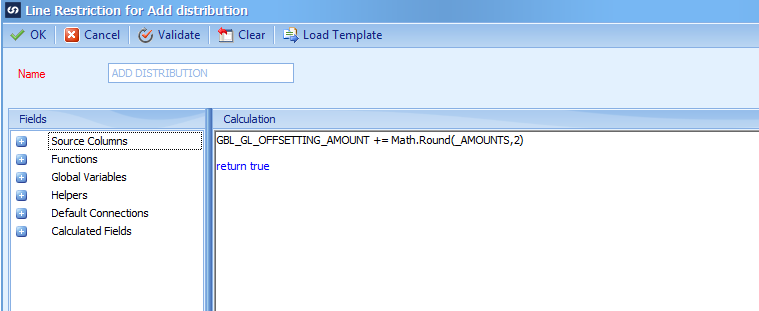
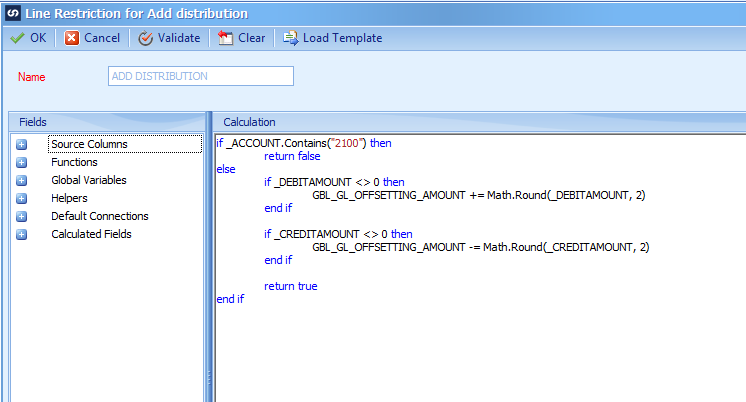
On the Restrictions Calculation, we will write some .NET code to sum the amounts to get our offsetting amount. There are few examples below.
One Amount Column with Positive and Negatives
This assumes positive amounts are debits and negative amounts are credits.
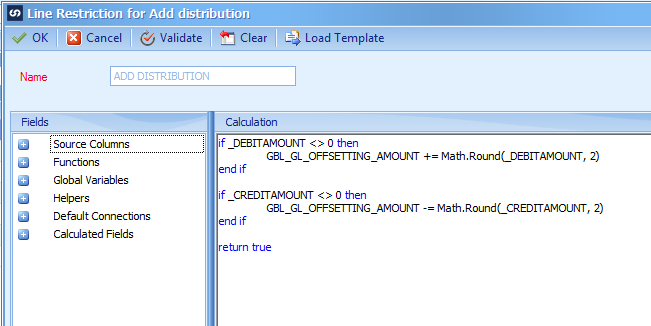
Two Amount Columns
This assumes there is a Debit Amount column and Credit Amount column. The Column names for your map may be named differently.
Using a restriction on the Node
When using an actual restriction on the Add distribution node, be sure to put the calculation code in the else portion of restriction so if the distribution is not being integrated, it is not included in the calculation.
Save the Restriction Calculation
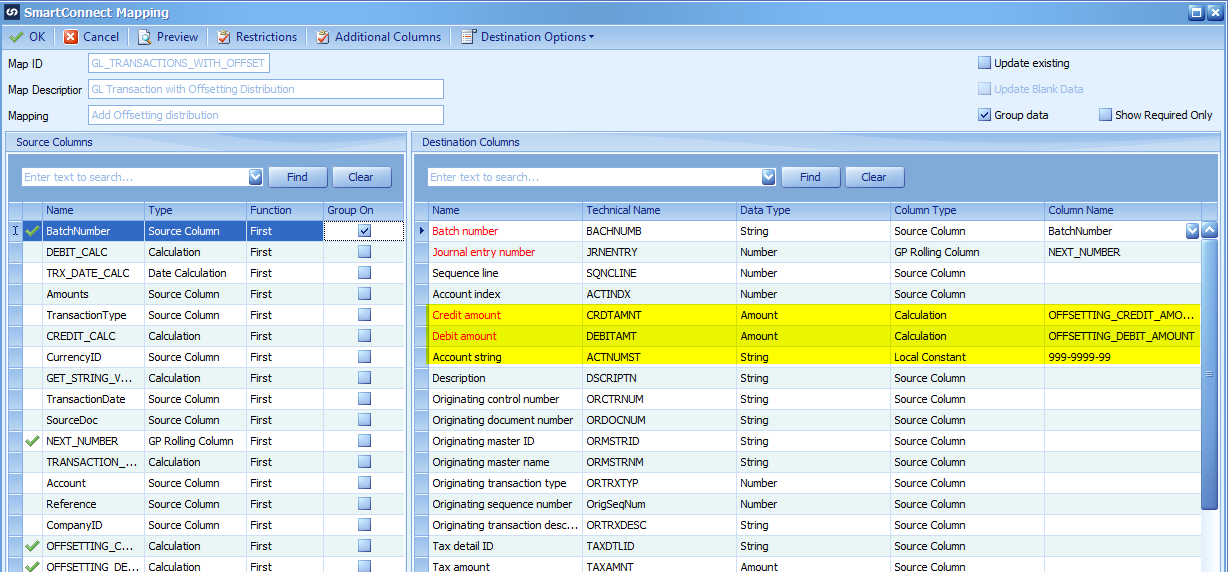
Map the Offsetting Distribution
Open the node called Add Offsetting distribution.
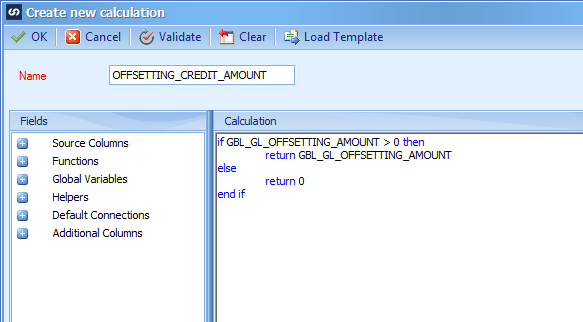
Credit Offsetting Amount
Create a new Calculated Field for the credit offsetting amount. If the value is positive, we have a debit balance and need to offset with a credit.
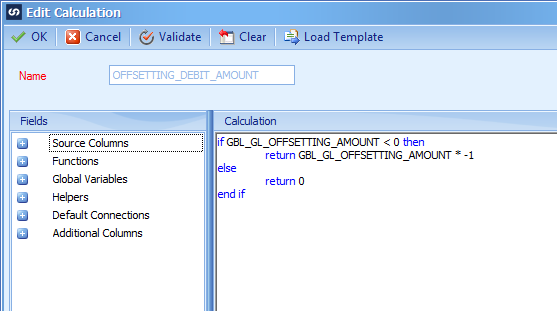
Debit Offsetting Amount
Create a new Calculated Field for the debit offsetting amount. If the value is negative, we have a credit balance and need to offset with a debit.
Map the Offsetting Calculation amounts and the Offsetting Account Number.
Be sure to Group the data by your Key Fields so we only get one Offsetting Distribution.
Save the mapping.
Run the map and the unbalanced error should no longer appear.
Happy Integrating!