
Normally, the data returned from a connector doesn’t need any special handling. However, in certain cases you may have to get creative with your Dynamics GP data to get it showing how you would like to see it. In this article, I will show you three scenarios with Dynamics GP data that will help you with taking data set to IDs and make it readable data, converting values, and checking fields to output a different value. Although these scenarios are using Dynamics GP data, they can still be applied to any connector’s data.
SCENARIO #1
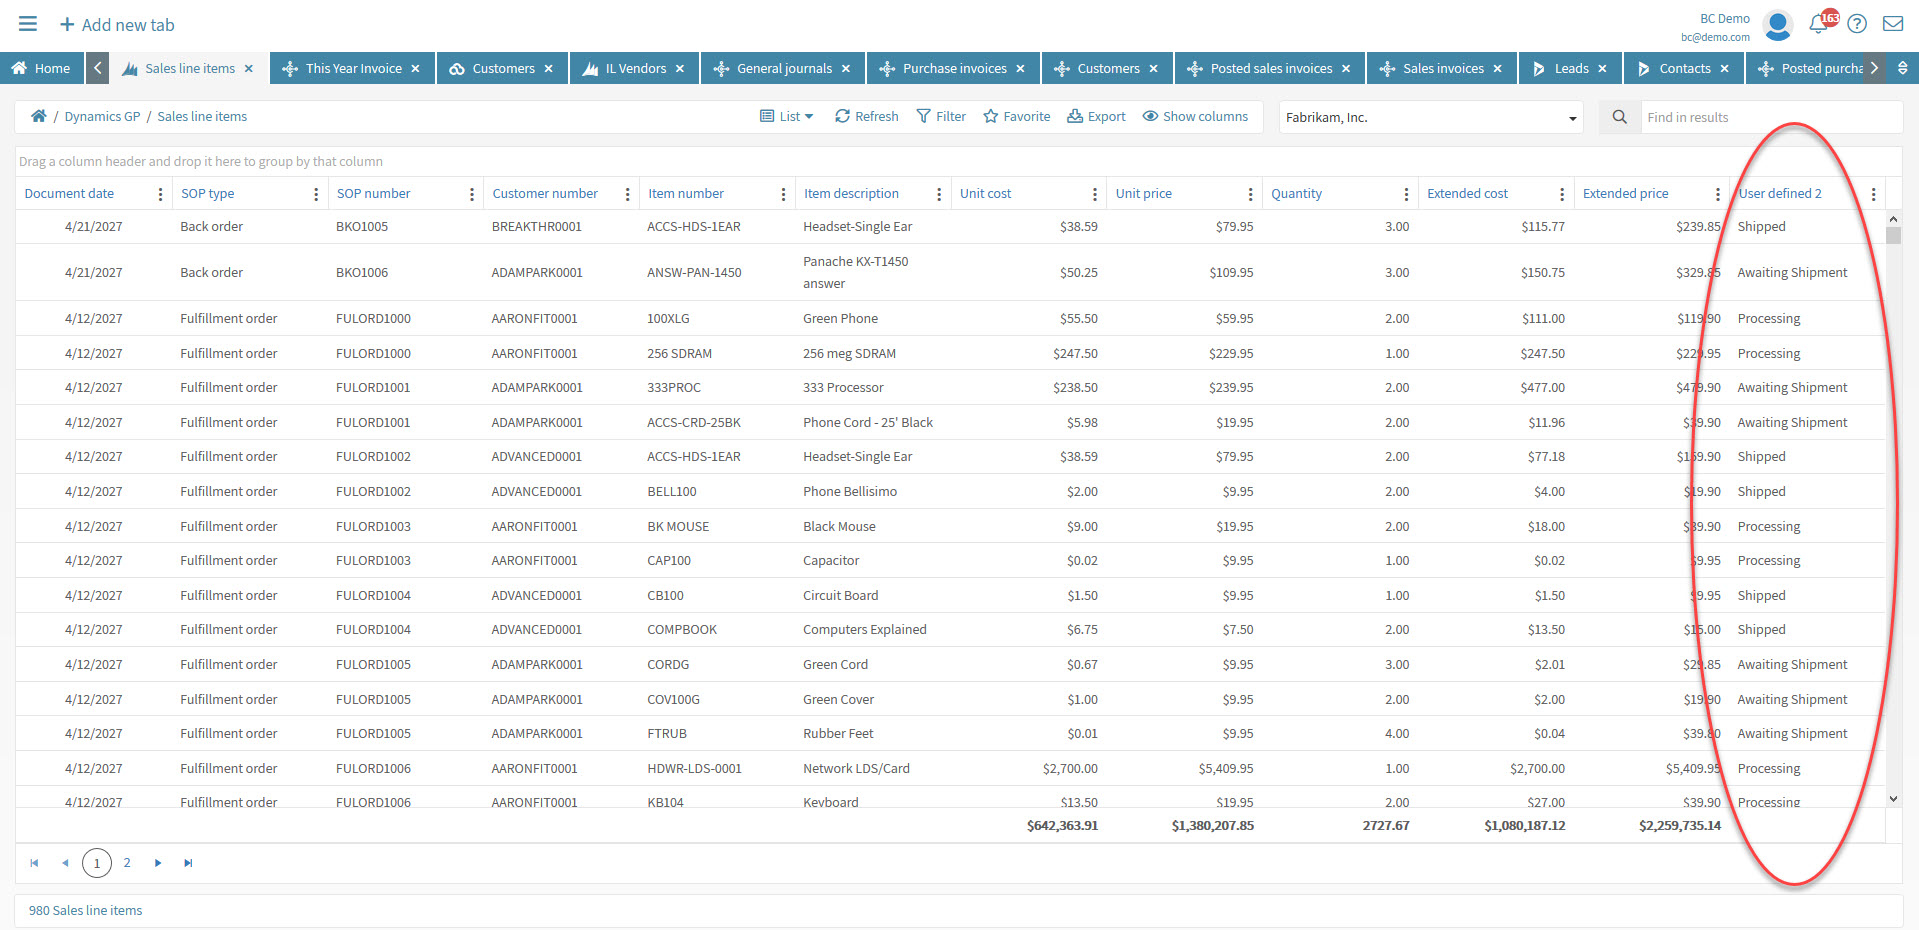
Your Dynamics GP list in Popdock returns an ID that represents a different value.
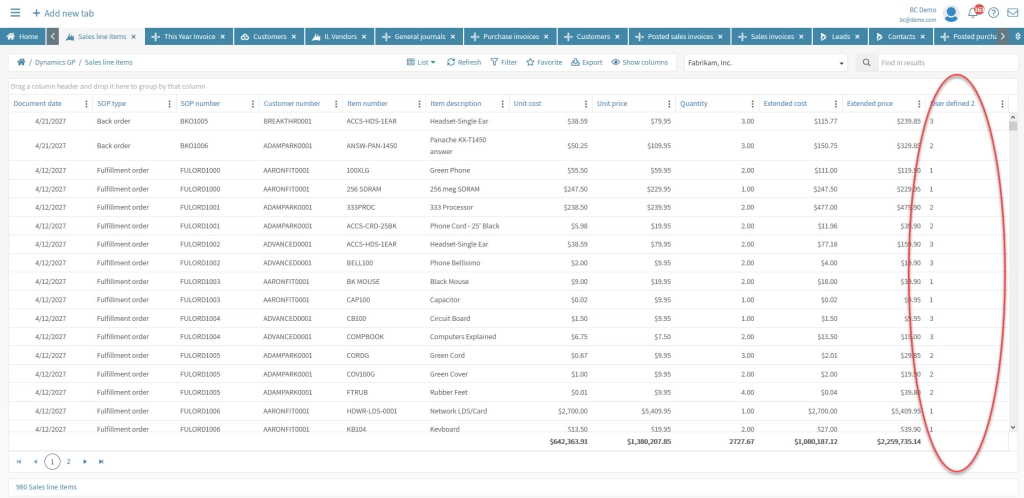
The image below shows the Sales line items list from GP and in this list I have showing the User Defined 2 field which I have populating with a 1, 2, or 3. Now, if I wanted to see the actual text value for these numbers instead, I can edit the connector and go to this field to adjust it to be a list of values.
To make our adjustments to this field, we need to edit the connector, then edit this specific list and locate the field. Then change the field type to a list.
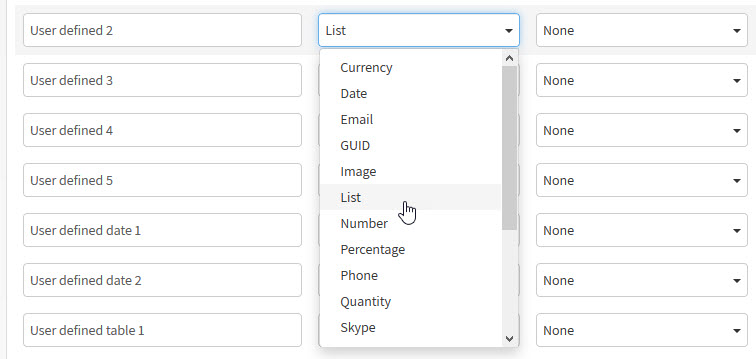
Now that the field is now a list type, this list icon will appear to the right at the end of the field options. 
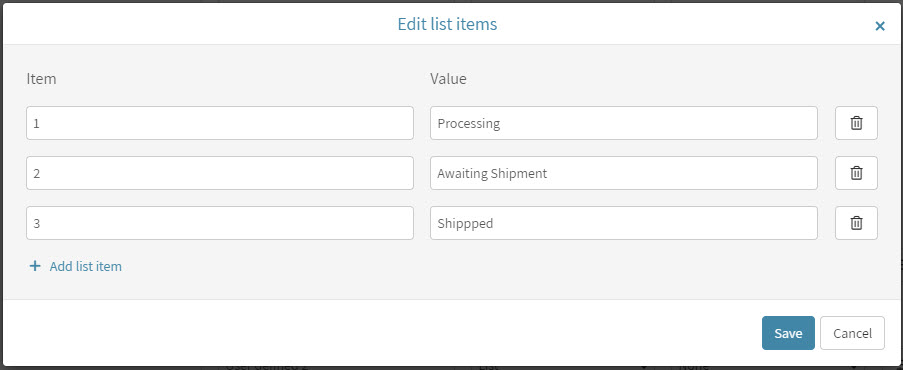
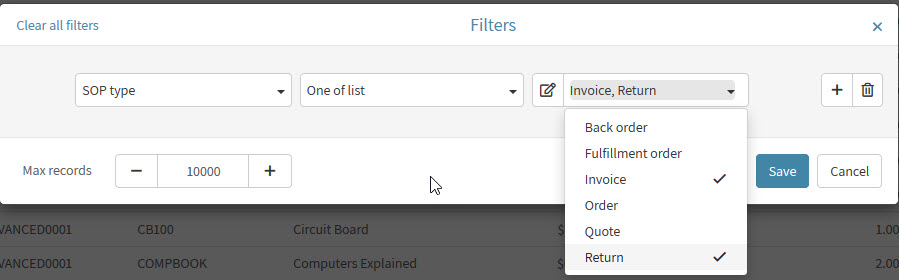
Click on the button to complete the list values. Here I am showing the window that appears that allows me to add values for the numbers and what they represent. For example, what if 1 represents “Processing”, 2 represents “Awaiting Shipment”, and 3 represents “Shipped”. This is how I would complete the form.
Now when you return to the list and refresh your data, these values will appear instead of the number value.
SCENARIO #2
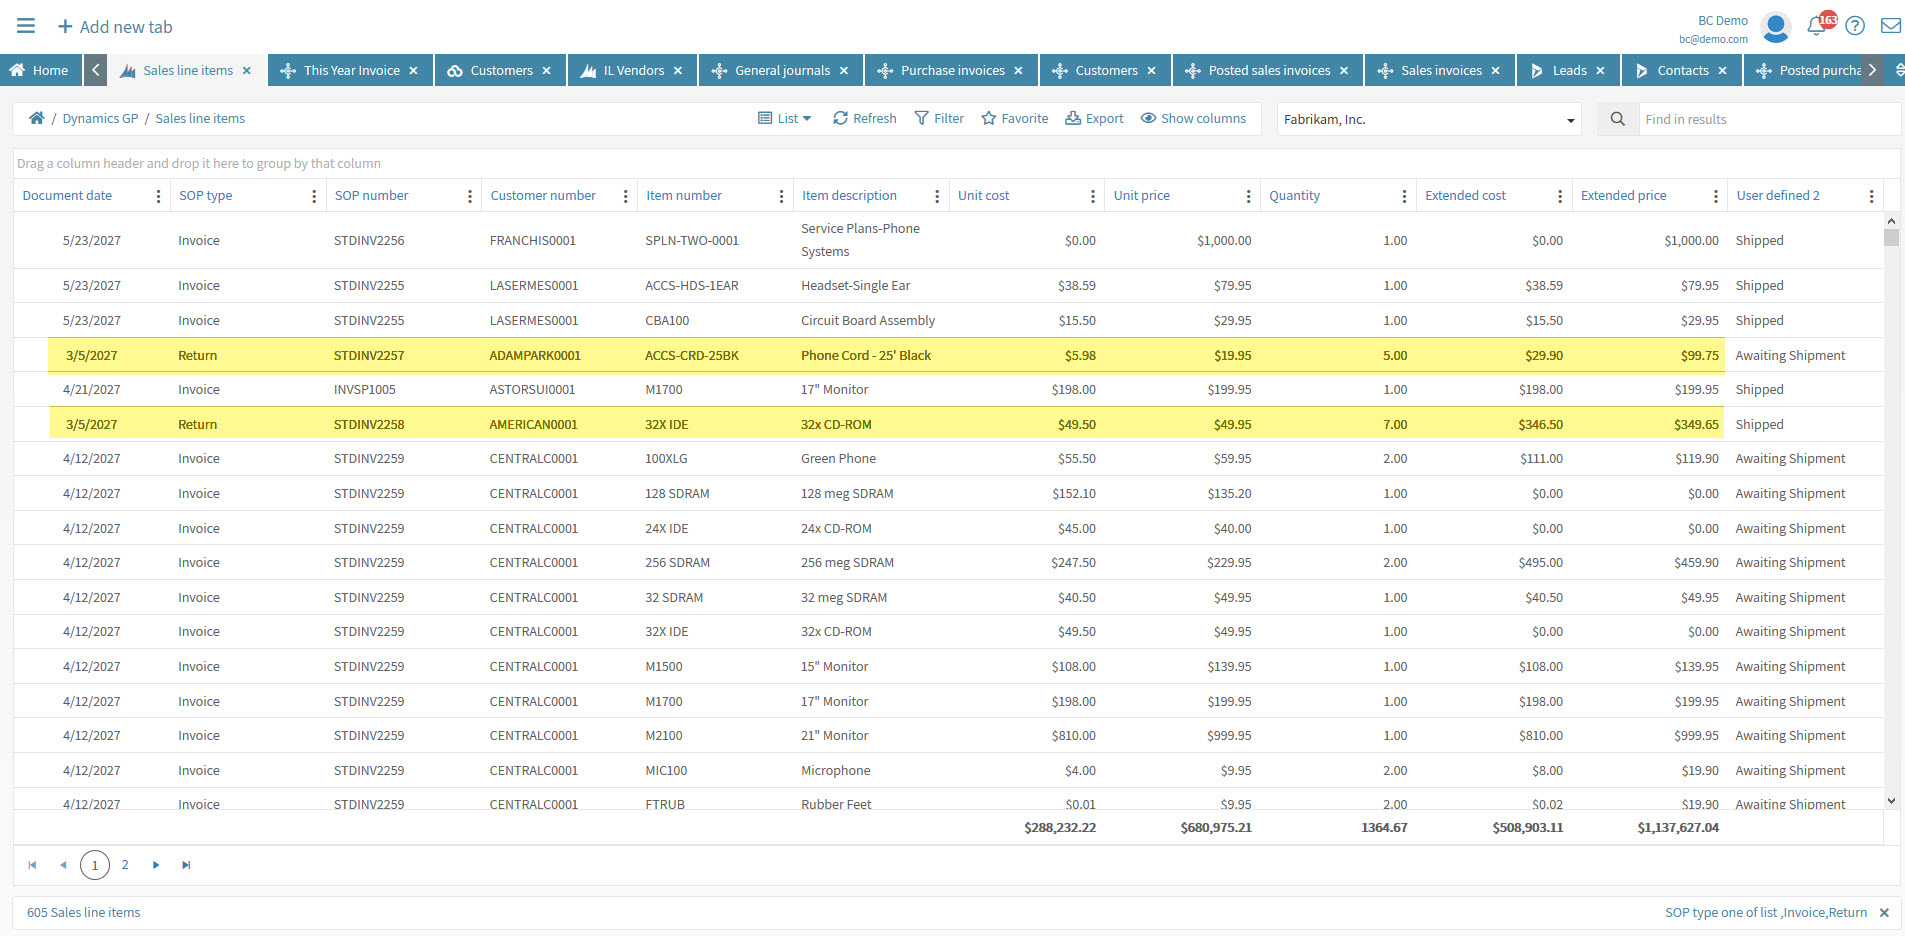
Accurate sales reporting by showing Returns as negative values.
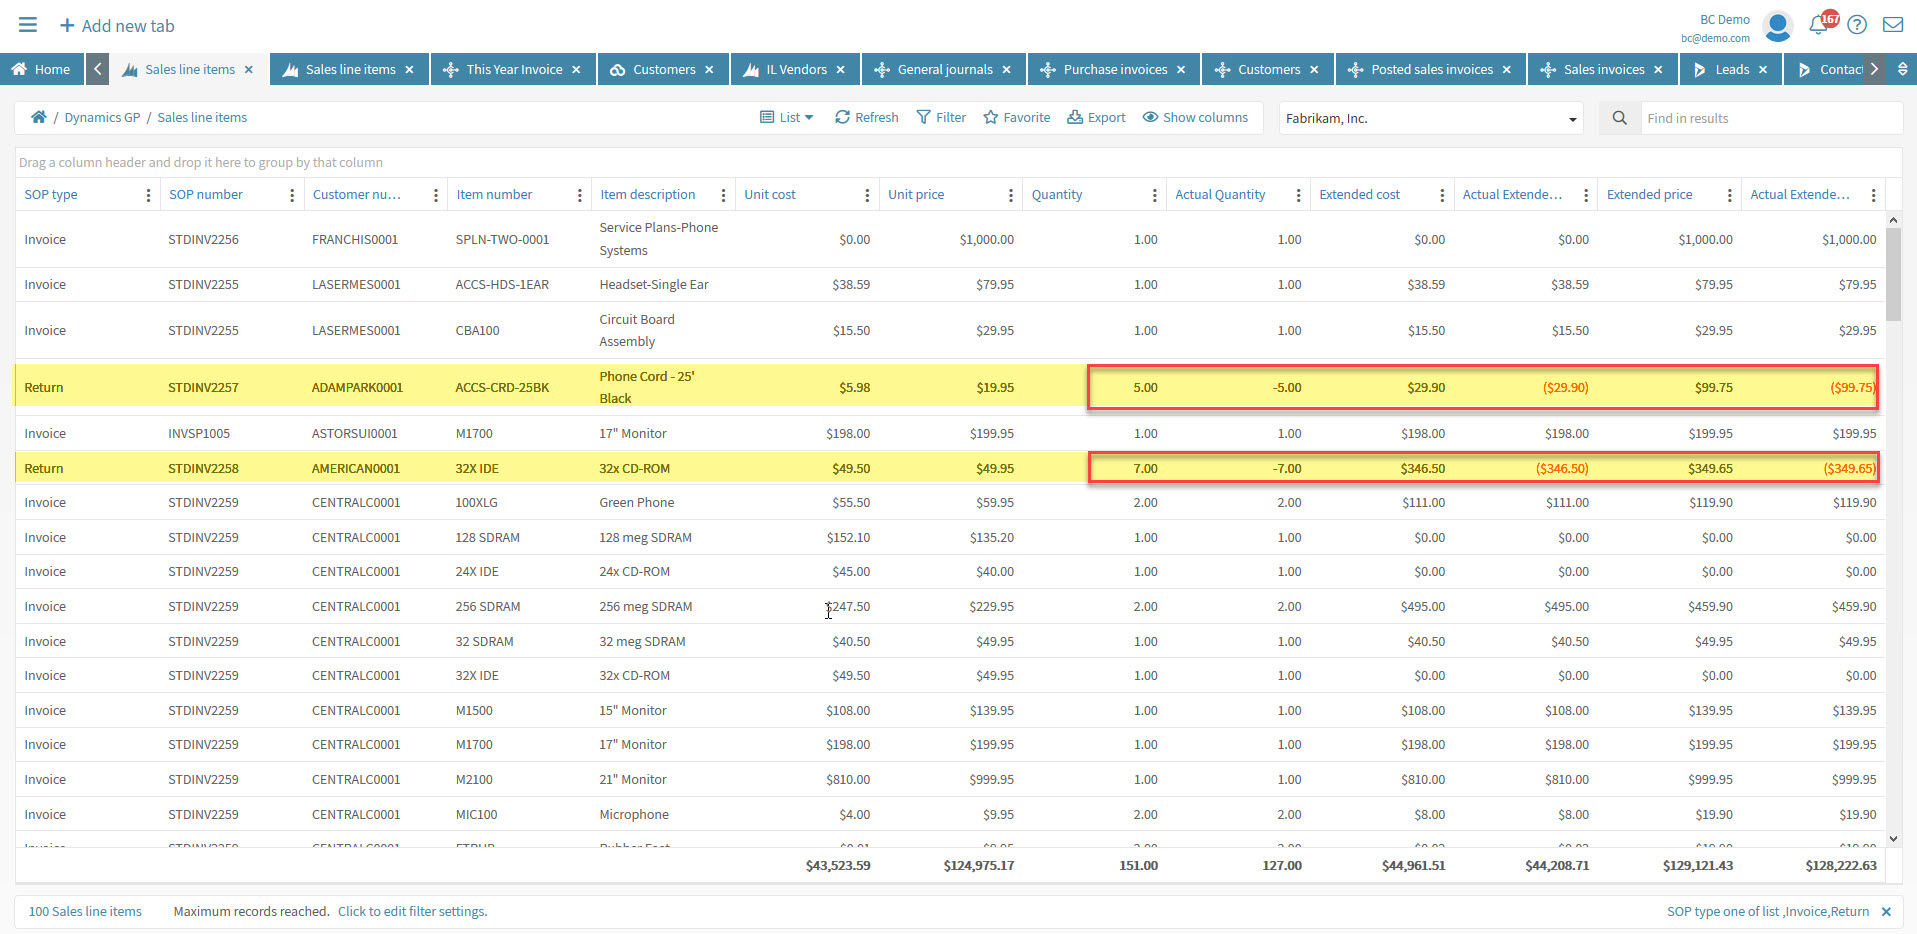
When viewing your Sales line items from Dynamics GP you will want to filter your SOP Type and view your Invoices and Returns to get accurate sales numbers. However, the Returns data show a positive value, so when Popdock sums the quantity and price columns it will be added into the total skewing your numbers.
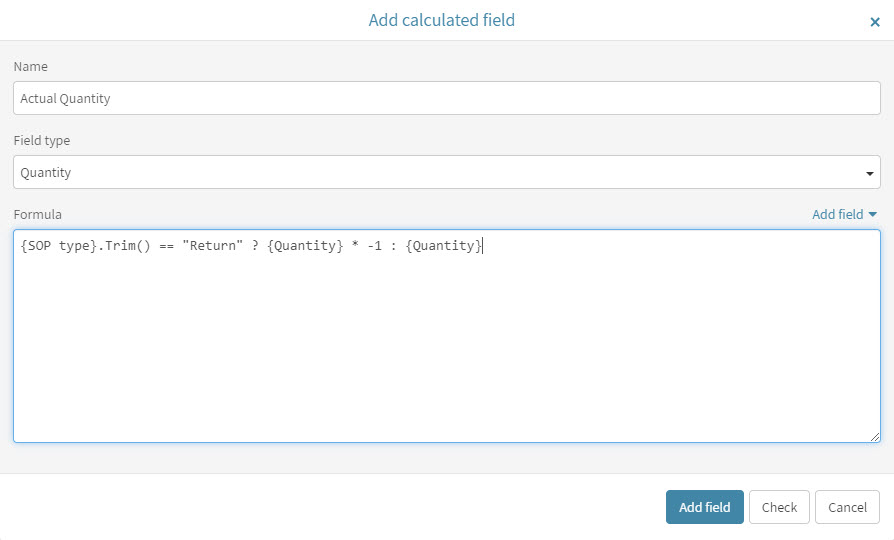
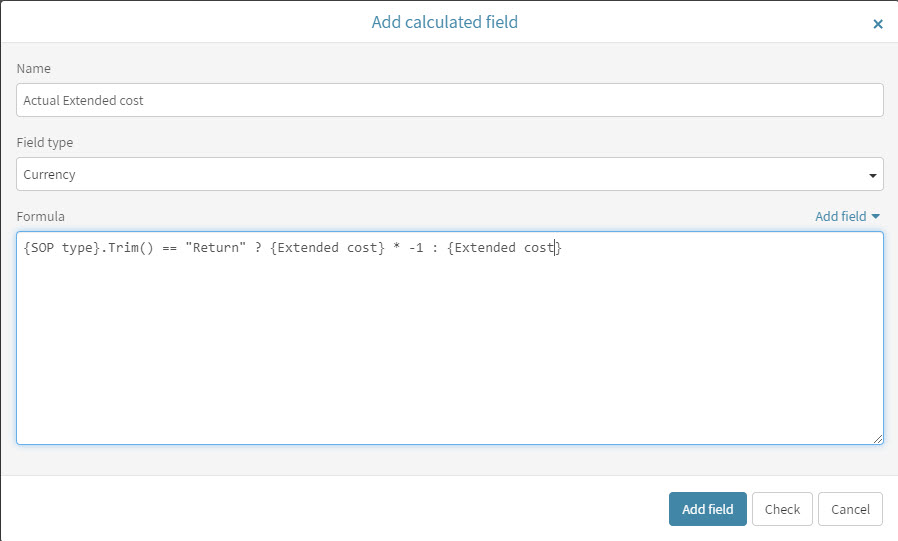
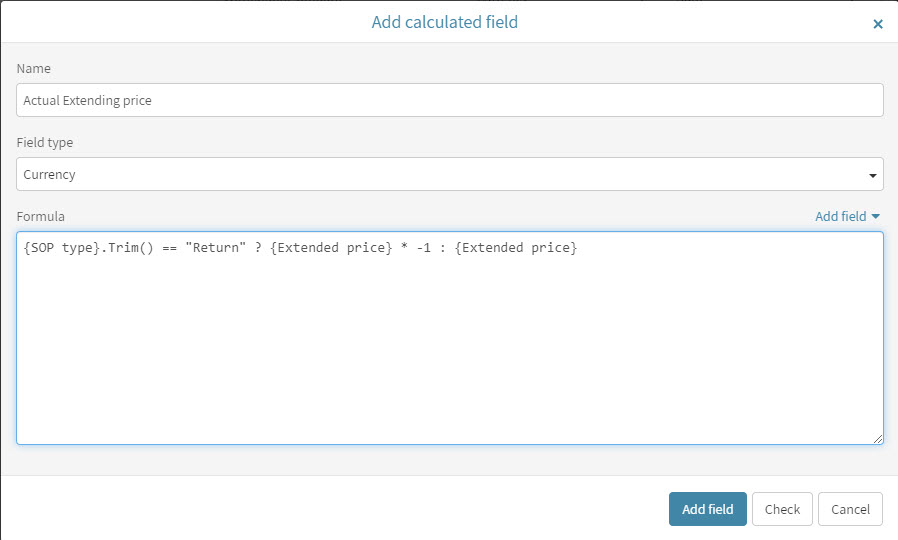
You can easily add a new calculated field that takes the value of Quantity, Extended cost, and Extended Price, and make it a negative value if the SOP Type is equal to “Return”. We will want to edit the connector and edit the Sales line item list to add a new calculated field for each of the fields we want to show as negative.

The first calculated field I will add is to convert the Quantity to a negative value. The calculated field formula is setup like an if-then-else statement and formatted like the following:
{SOP type}.Trim() == “Return” ? {Quantity} * -1 : {Quantity}
The SOP type will need to be trimmed of white space because the GP data is stored with a certain amount of characters and if the data doesn’t fill that amount, it fills it in with spaces. The “.Trim()” is a way of trimming the white space so that we get the exact value and the we can use it to compare to a value like “Return” and get a accurate match. The way this formula is written it reads basically as:
If SOP type equals(==) “Return” then(?) return the Quantity value times -1 else(:) return Quantity
Quantity was a quantity field type and now I will do the calculated fields for cost and price which are currency field types. You can copy the same formula as above and just replace the “{Quantity}” fields with the fields you are also converting to negative.
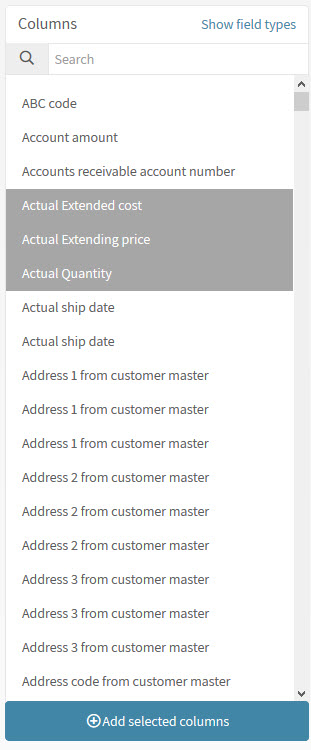
After saving your calculated fields and you return to your list, you can now go to show columns and see the new fields you have created and add them to your list.
You should see the correct values in the fields if your formula has worked.
SCENARIO #3
Using values of specific fields to determine the string value you want to show in a calculated field.
In some cases you would like to put Sales line items in certain categories based on a reported value. In this example I will categorize each item based on a User defined value to show a grouped report of the values Fulfillment, Dropship, or Warehouse.
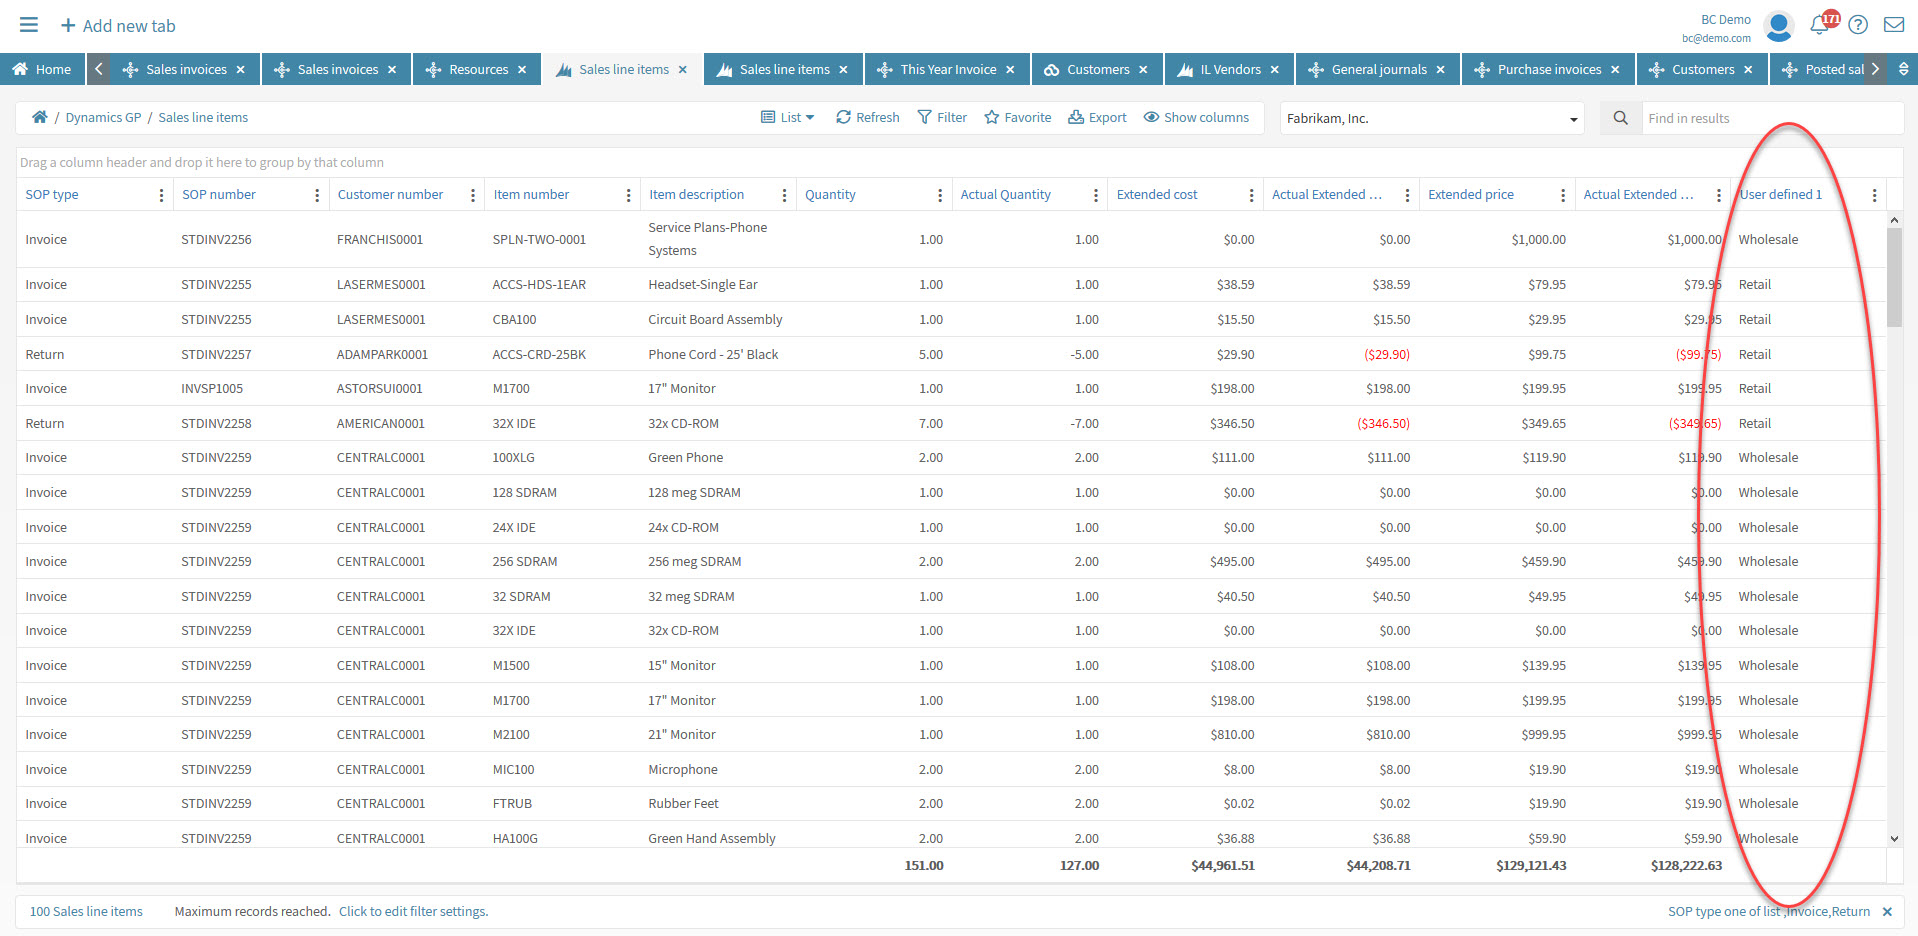
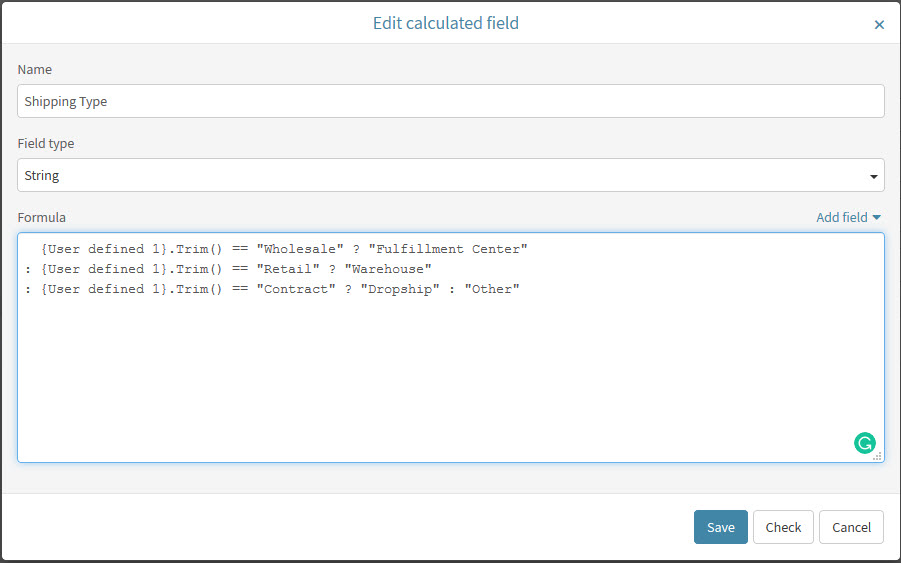
We will want to edit the connector and edit the Sales line item list to add a new calculated field that will output one of the three values based on the value of the User defined 1 field.
The formula for this will look like the following:
{User defined 1}.Trim() == “Wholesale” ? “Fulfillment Center” : {User defined 1}.Trim() == “Retail” ? “Warehouse” : {User defined 1}.Trim() == “Contract” ? “Dropship” : “Other”
The User defined 1 field will need to be trimmed of white space here as well. The way this formula is written it reads basically as:
If User defined 1 equals(==) “Wholesale” then(?) return the value “Fulfillment Center” else(:) if User defined 1 field equals(==) “Retail” then(?) return the value “Warehouse” else(:) if User defined 1 field equals(==) “Contract” then(?) return the value “Dropship” else(:) just return the value “Other”.
Now return to your list and add the new calculated field you just created and you should see the values filled in appropriately depending on the User defined 1 field.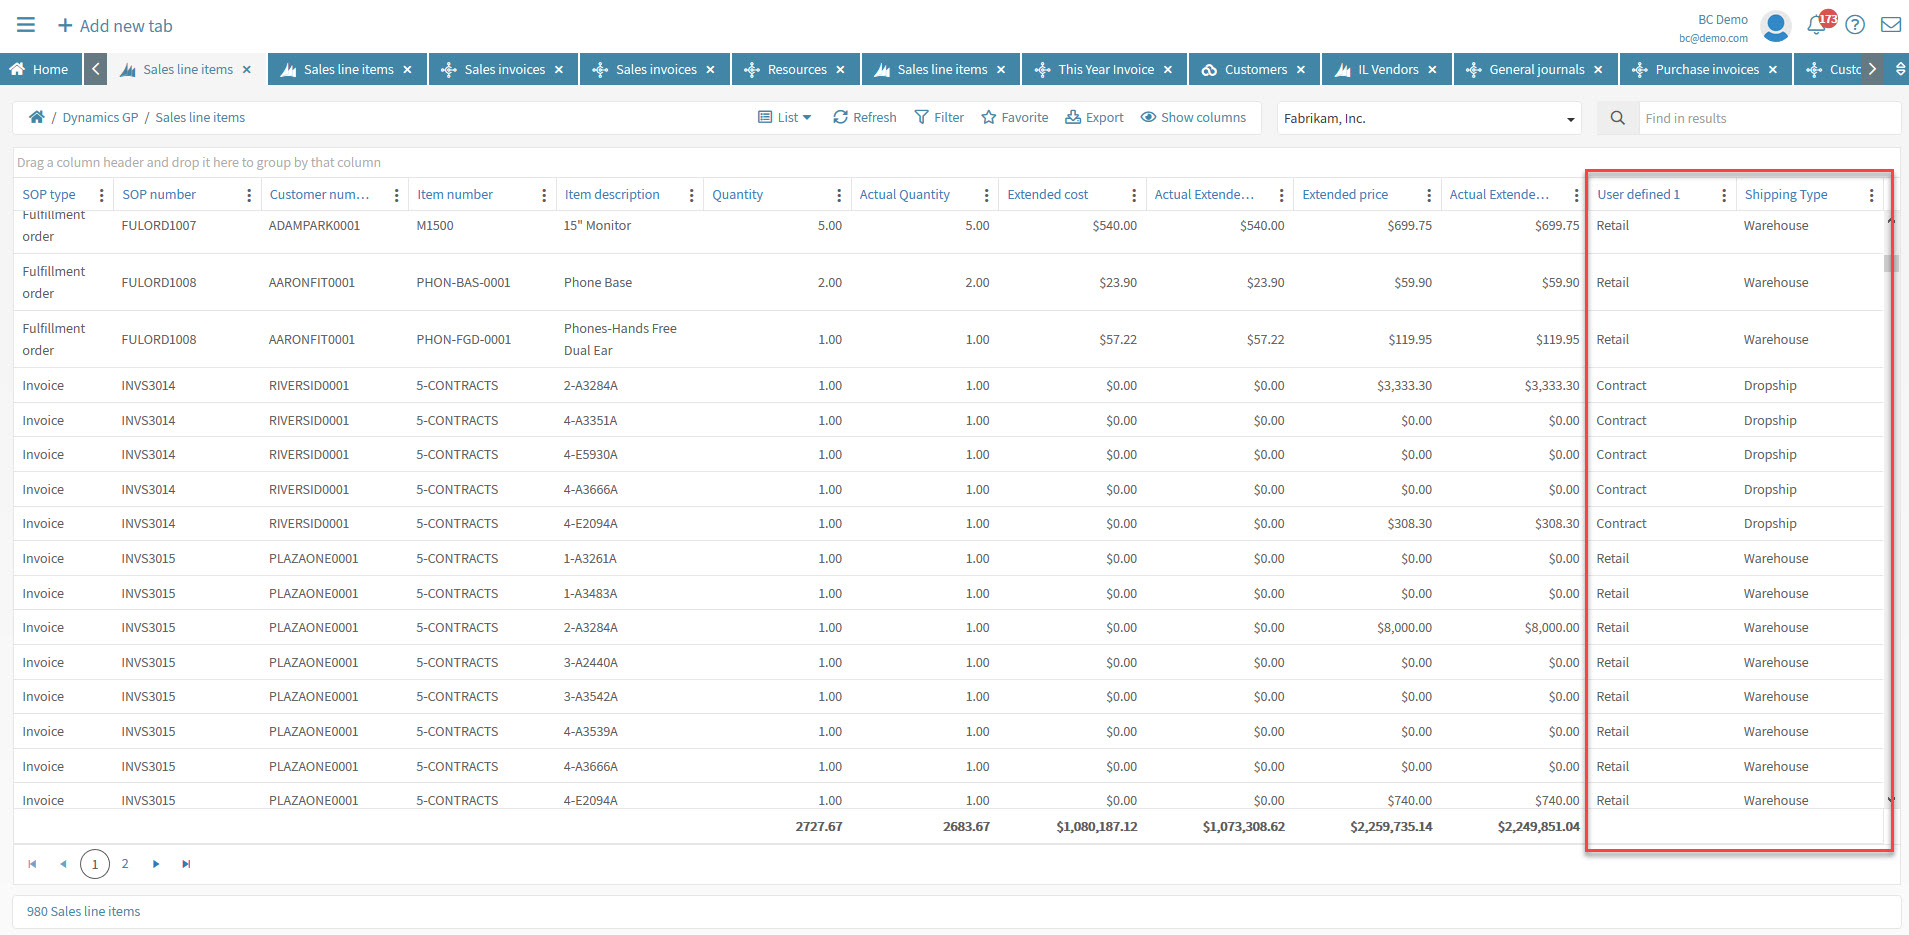
If you want to learn more about Popdock, or have any questions for us, feel free to email us at sales@eonesolutions.com