With the most recent Popdock face lift, we have concentrated quite a bit on improving how you view relationships between your data. Popdock already had relationships which allowed you to view related data below your main list related to any record you selected. For example, a Sales Invoice list could have a detail section below, that showed the Sales Invoice Line items based on the relationship of the two lists joined on the sales invoice number.
Popdock has evolved and expanded this into what we now call Details. Details expand the concept of relationships to allow you more flexibility in what related data you can quickly view, and more control in how that data is displayed. Details can not only show below a main list, but can also pop out from a sidebar from the right side of the list or drill down to a new page. You can add multiple sidebar Details like the details section below the main list. For example, a Sales Invoice list can show an option of choosing a sidebar Details for Sales Invoice Line items, Customer info, and Shipping Details. Each Detail sidebar would show individually based on a drop down of which one you select.
How to Add a Detail
1. From the Popdock dropdown menu, go to Connectors.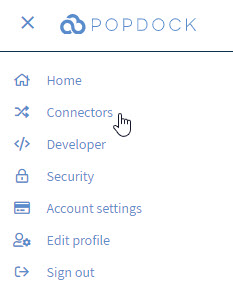
2. Find the connector that you want to add Details to a list on that connector. Then click the edit icon to edit the connector.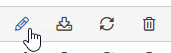
3. Click on Lists in the left navigation menu.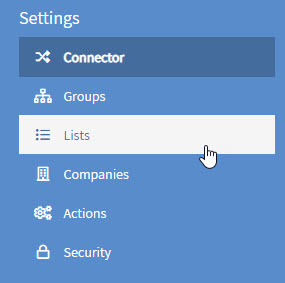
4. Next locate the list you would like to add Details to and click the edit icon next to the list.![]()
5. In the left navigation menu, click on Details.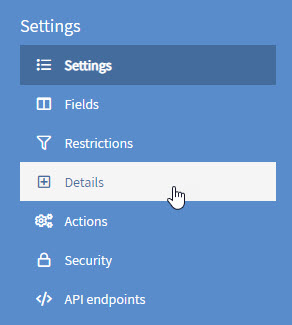
6. Click the link to add a detail, in this case this list has no details so we will add one for the Sales Invoice Lines. Give your Detail a name, then continue completing the form to create your Detail for the sales invoice lines. We are going to give it the List view type and have it display below the record. The Display method is where you can also choose to have the list appear in a sidebar or to have it drill down to a new page.
7. Next in the left navigation menu, click on Filters.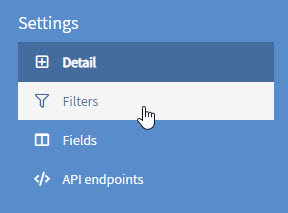
8. This is where we are going to set how the data on a Sales Invoice record is related to it’s Sales Invoice Lines.
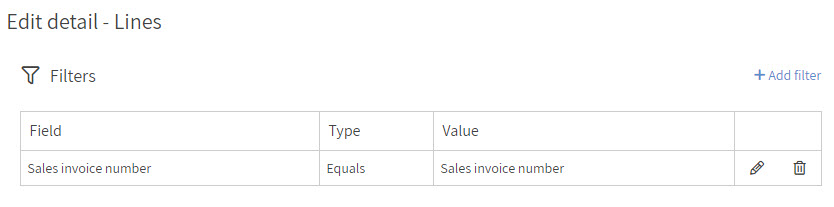
This is done by adding a filter that says the Sales Invoice’s field called Sales Invoice Number matches to the Sales Invoice Number field on the Sales Invoice Lines list. Once you have the form completed, click Save and you will see the filter added.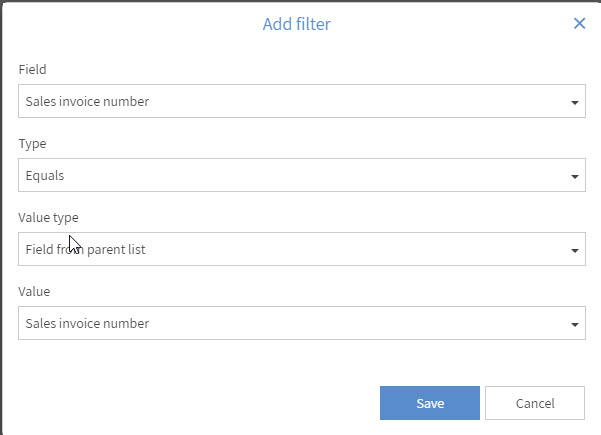
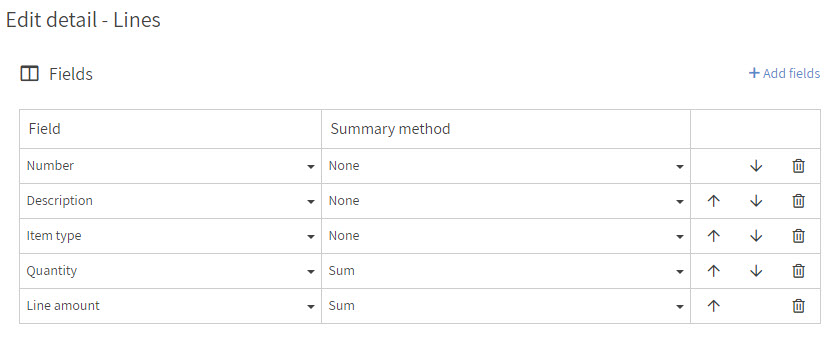
9. Next click on Fields in the left navigation menu. Here you will click the link to add the fields you would like to see in the Details. Then once you have the fields added you can sort them in the order you would like to see them.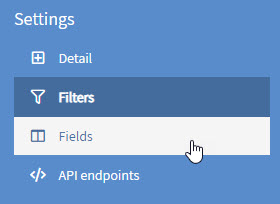
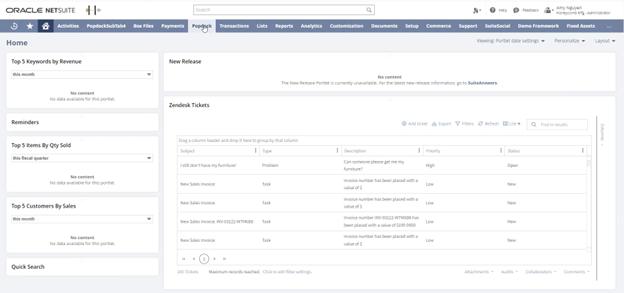
10. Now you have completed the Details setup and you can go back to home to add your list and see the Details you created. Here is the example I did for showing Lines for the Sales Invoices list.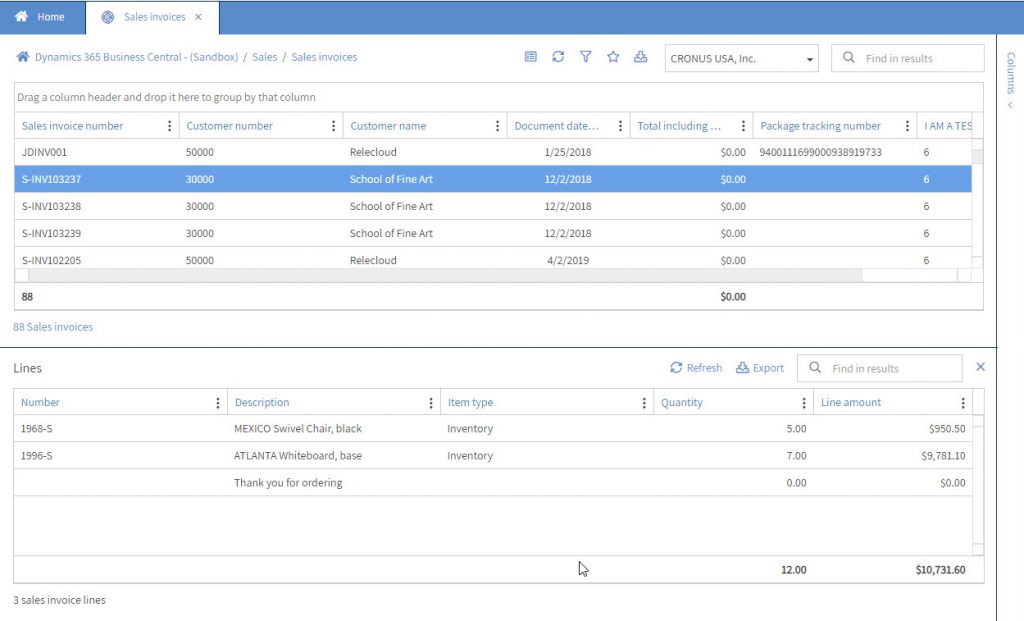
Here is the same example, but I have switched the display method to show as a sidebar: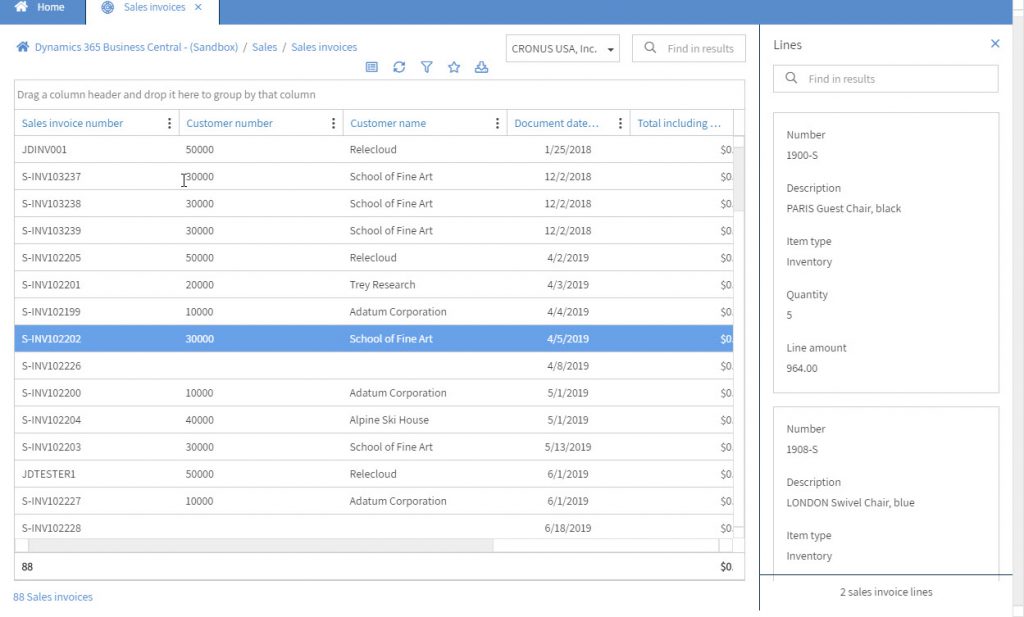
And, here is an example of the drill down to a new page. To access the Details for this type, you right click on the record and click the Lines action: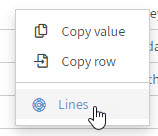

To return back to your main list, click the back arrow before the bread crumbs above the details drill down list”
If you have any questions regarding any of the features mentioned here or any questions in general regarding Popdock or Popdock details, please reach out to our Support Team at support@popdock.com.