In our previous blog (May The Visualforce Be With You – Part I), we took you through customizing your Salesforce Product’s page to add a Popdock Widget in a new section to display the quantity on hand coming from Dynamics 365 Business Central. In this article, we will now show you how to add a section on a Salesforce Order’s page that displays the order status, package tracking number, and shipping details of that package user a new widget.
When you have your business running in multiple systems having a customizable interface like Salesforce allows you to bring multiple systems together. Using a Popdock widget and adding it to a Visualforce page, Saleforce lets us drop the widget into a customizable section on a page as a new tab. This gives your team insight on if an order has shipped and where that shipping carrier is currently reporting it is at.
First you will need to have your connectors added to Popdock. Besides the Salesforce and Business Central used in part one of this blog article, we need to be sure to connect a shipping connector.
Adding a Shipping Connector
- Go to Connectors from the Popdock home page or drop down menu.

- On the left navigation menu, under Actions, click on “+ Add connector”.
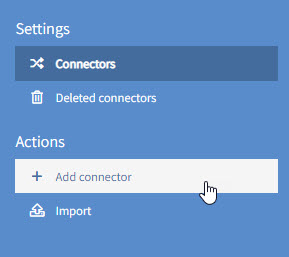
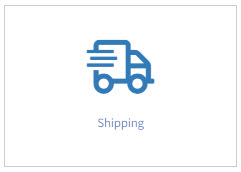
- Next, find and click on the connector labeled as “Shipping”.
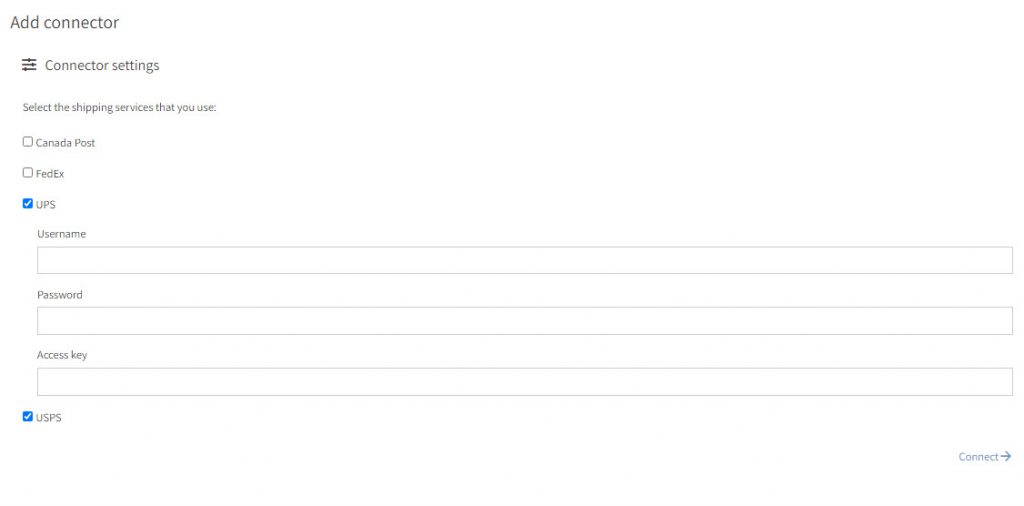
- 4. Check the shipping carriers you use, some may require your login for your account. When finished, click “Connect”.
Adding A Shipping Sidebar To A List
By adding a shipping sidebar to a list, this enables us to see the tracking info for a package if a specific field contains a tracking number. In this example we will use Business Central’s Sales Invoices to add a shipping details sidebar to the list so that the tracking details show when you select a posted invoice with a package tracking number.
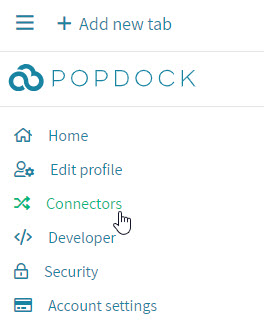
- Go to Connectors from the Popdock home page or drop down menu.
- Then click on the pencil icon next to the Connector you want to add the Shipping Sidebar to its list.
![]()
- On the left navigation menu, click Lists.
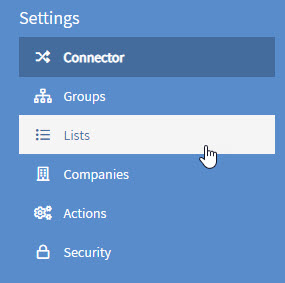
- Click the pencil icon next to the list to edit it.
![]()
4. In the left navigation menu, click Details.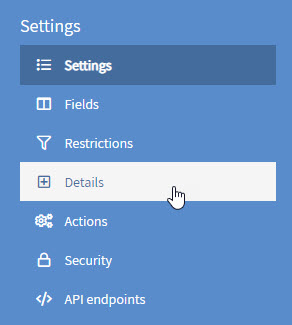
- Click the “+Add detail” link to add a new detail.
- Give the sidebar a name, then choose “Shipping details” for the Type. For the Tracking number field dropdown, you will want to choose the field from the list that contains a tracking number, for this example the field is “Package tracking number”. For the display method, we want to show it as a sidebar so choose “in the sidebar” from the dropdown.

Now that you have everything configure we will create the widget that we will then use in the Salesforce UI. Refer back to Part I of this blog the section called Creating A Widget With A Parameter For Visualforce Page to create your new widget using the Sales Order list that passes a sales order number to the widget and setup the Visualforce Page in Salesforce. Next I will go straight to showing you how to add a new tab on the Order’s page and add the Visualforce page to that tab.
Customizing your Salesforce Orders Page With A New Tab That Shows A Visualforce Page
- Navigate to your Orders page in Salesforce. Then click on one of your orders. This will open the specific order page that we will customize.

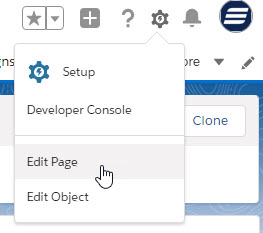
- Next click the gear icon at the top right and choose the option “Edit Page”. This will open the Lightning App Builder where you can edit the page.
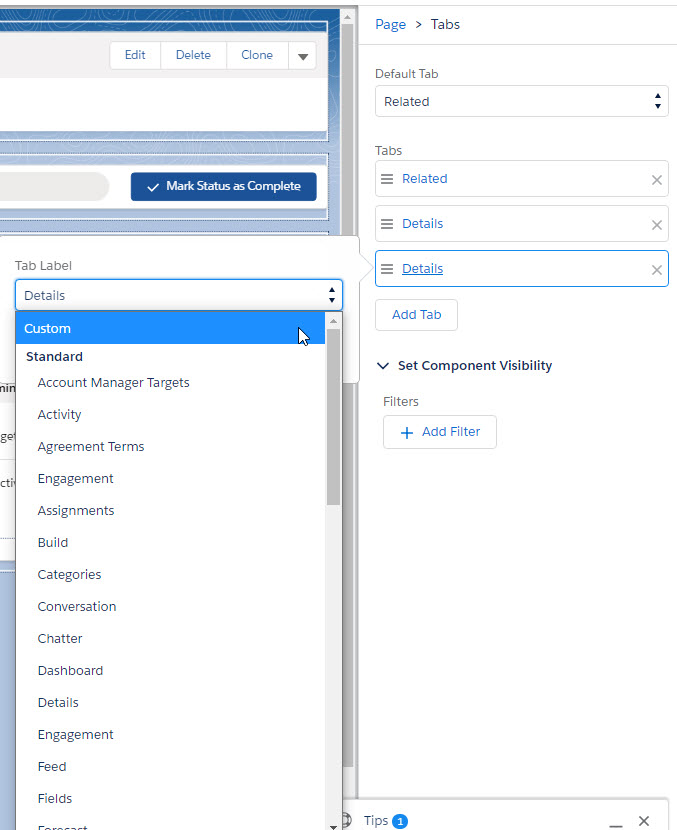
- Click on the section that contains the Related and Details tabs. You will now see the option to add tab on the right hand side.
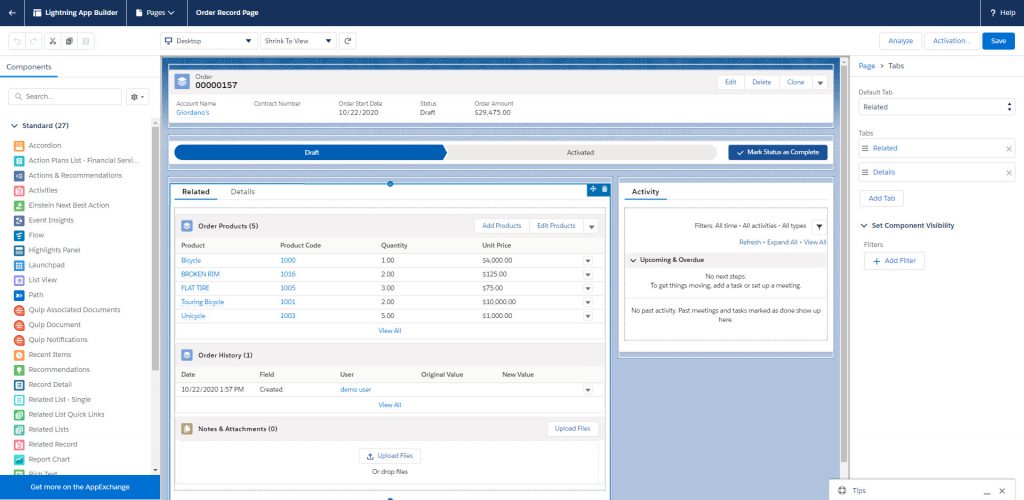
- Click the “Add Tab” button. You will see a new tab added that repeats “Details”. Click on the duplicate and it will bring up a box to choose the name of the tab, choose “Custom”.
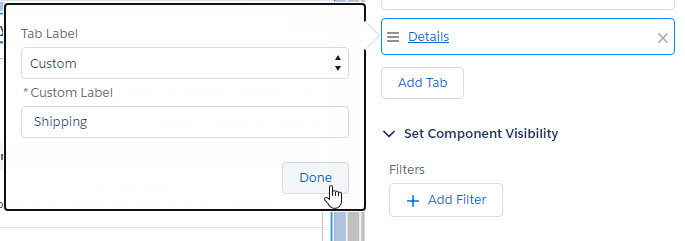
- A field to enter the Custom Label will appear, type in the name you would like to see for this new tab. Then click “Done”.
- Now click on the new Shipping tab that you have created and you will see a blank space to add your Visualforce component.
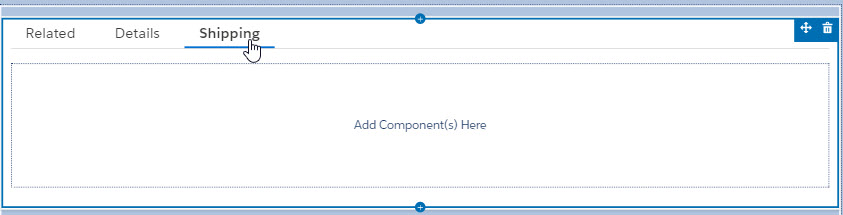
- Drag and drop the Visualforce page from the Components in the left navigation onto the empty “Add Component(s) Here” box.
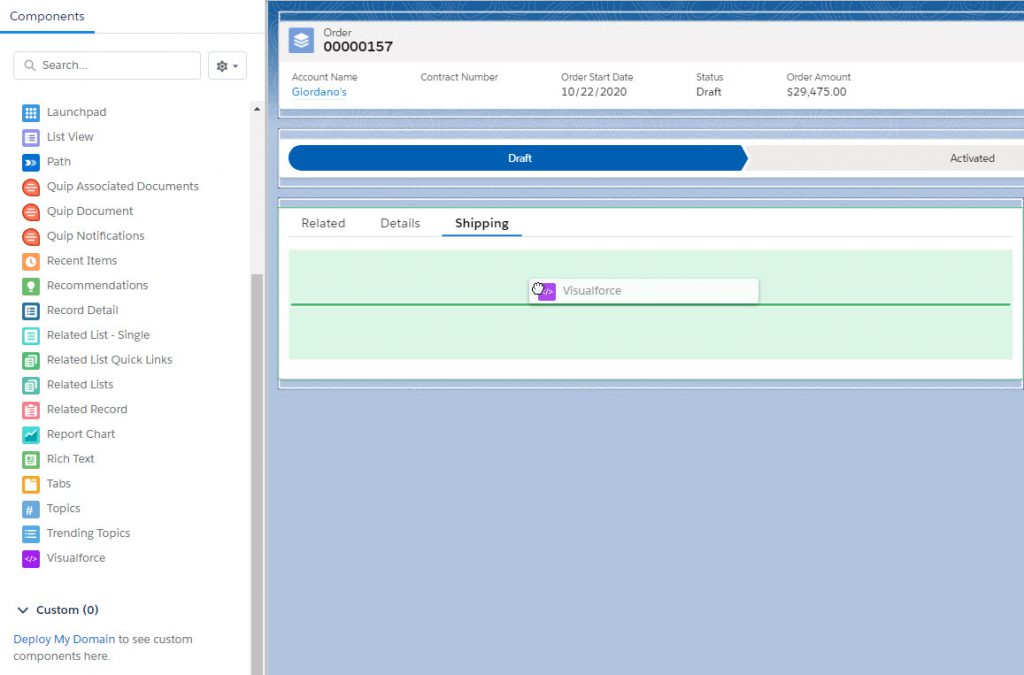
- It will default to a Visualforce page you have added, but just make sure to choose the new one you created with the shipping details. I also remove the “Show Label” option. When you have everything configured, click the “Save” button at the top right and your new shipping tab is ready to test.
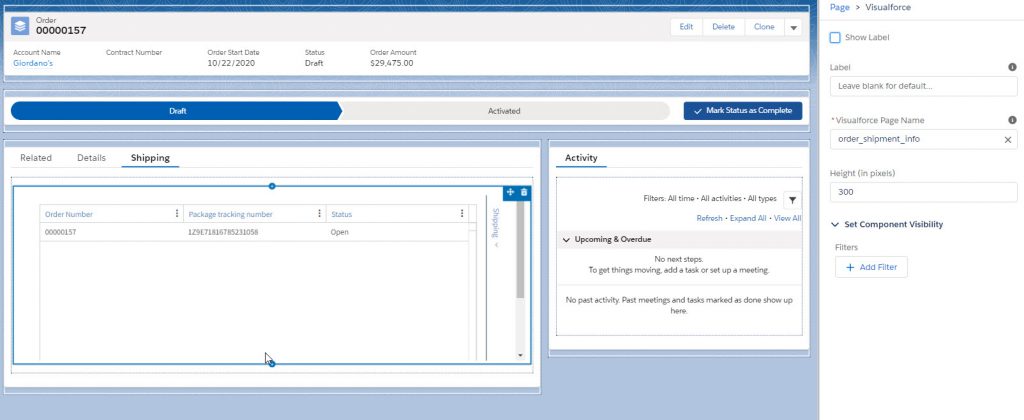
- Head back over to the Orders page and click on an order to give it a try, preferably an order with a tracking number. Click on the new Shipping Tab and expand the Shipping Details sidebar on your Popdock widget. Now click on the record with the tracking number. The results should look something like this:

If you have any questions regarding any of the features mentioned here or any questions in general regarding Popdock, please reach out to our Support Team at support@popdock.com.