This week’s Tech Tuesday is from Lorren Zemke, our Director of Professional Services. He discusses a new feature that has been added to the latest SmartConnect 2013 release which is available to download here.
With the latest release of SmartConnect 2013 Service Pack 1, there are now multiple ways to add Extender Nodes to a SmartConnect integration. You are now able to add a node using the standard method in SmartConnect through Node Maintenance and also during map creation. The other awesome feature that has been added is the ability to add the same node twice, so if I have more than one Extender Window attached to a Dynamics GP Document I can update the data for both objects in the same map.
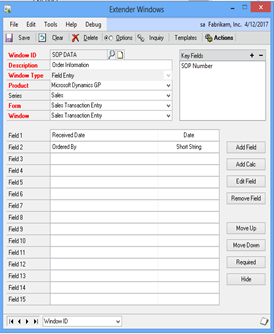
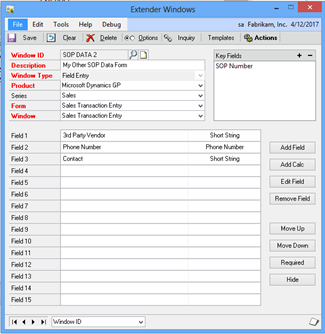
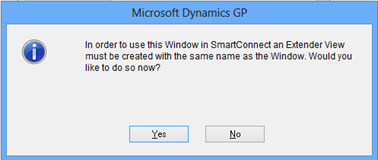
When I save each window, I answer ‘Yes’ to the question to create the Extender View as required by SmartConnect and include all of the fields as part of that view.
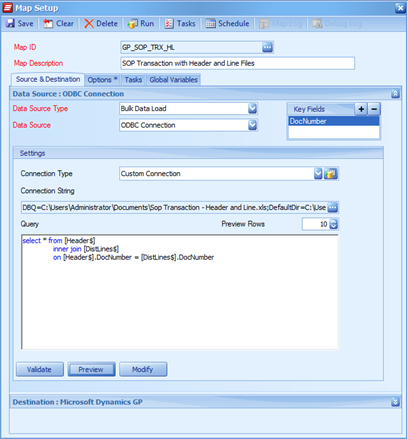
 I will now add the Extender Nodes to my map for integration to Sales Documents. I am using an Excel Workbook that has one sheet for the header portion and one sheet for the line portion. In SmartConnect, I use an ODBC Connection and join the Header and Lines in the Query.
The new method for adding the Extender node to SmartConnect is to use the Add Extender Object button as part of the SmartConnect Destination mapping.
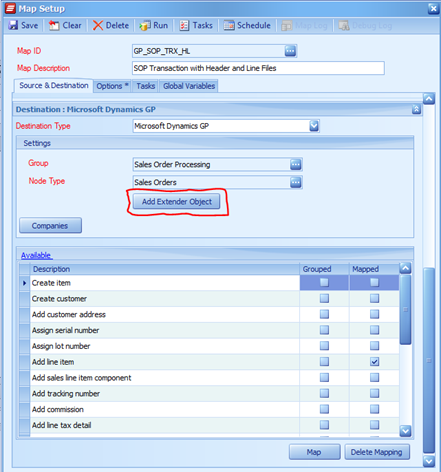 Click on the Add Extender Button to open the Add Extender Objects window.
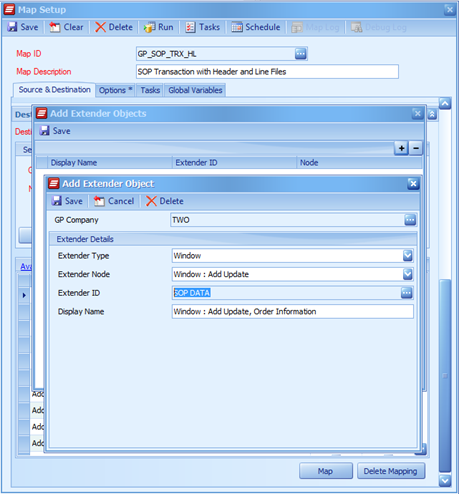
Select the appropriate Extender Type, Node Type and Extender ID. After clicking Save on the Add Extender Object window, I can add my other Extender window as an additional node using the same process as above but choosing the other Extender ID. The new nodes will appear at the end of the list within the Destination Type.
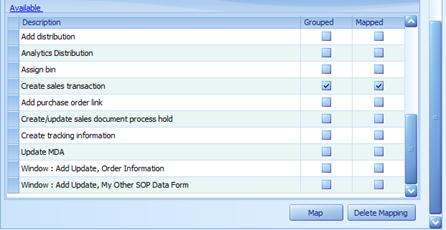 Now the process of mapping the Extender Nodes is the same as mapping any other SmartConnect node.
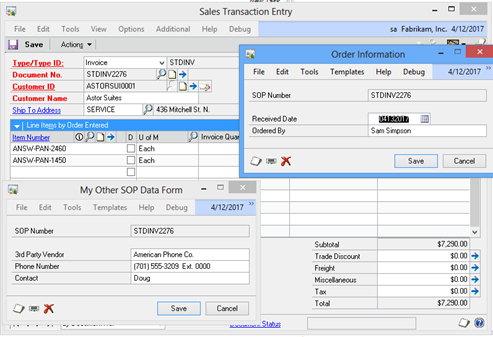
Once the Extender windows are mapped, I can import my documents and review the data has been successfully imported.
Until next time, happy integrating.
Lorren Zemke
Interested in learning about what other awesome features have been added to SmartConnect? Feel free to reach out to us at sales@eonesolutions.com for more information!