In a prior article I discussed how to create General Ledger Transactions while including Analytical Accounts but with the assumption that if the Distribution Sequence number is being mapped, based on the scenario, it would be a part of the source data. It turns out that is rarely the case. This article will show how to calculate the Distribution Sequence number within the map.
Global Variables
For calculating the correct sequence numbers, we need to create two global variables. You can get to this window by click on the Maintenance menu and then global variables.
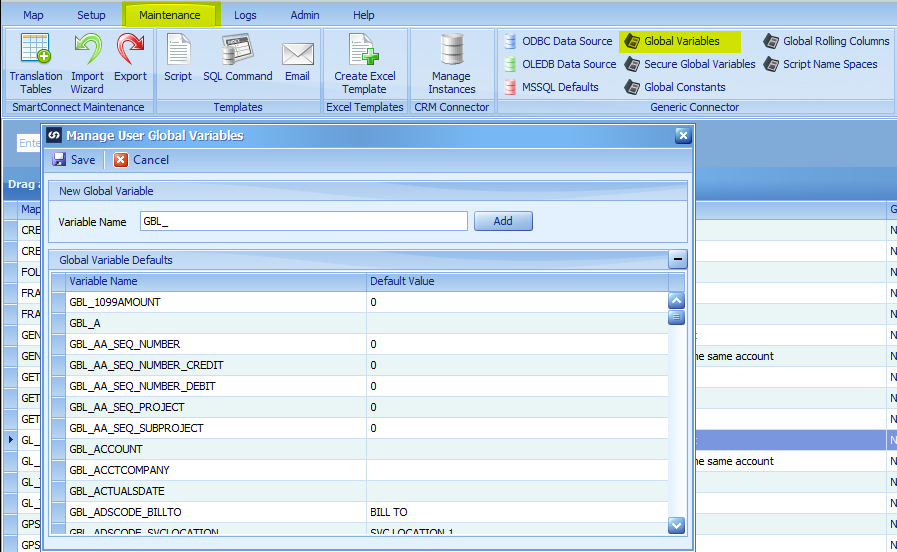
Add the following variables
GBL_AA_SEQ_NUMBER
GBL_GLDISTLINESEQ
The files for this article; source, maps and schema’s can be DOWNLOADED HERE.
Scenario 1 – One Analytical Distribution per Distribution and no duplicate accounts.
This is by far the easiest scenario to integrate as it’s a straight mapping to the fields in the Journal Entry Header, Distributions and Analytical Distributions. In this scenario, there is only one AA line per GL line so the distribution sequences will automatically match and we don’t need to adjust the previously created General Journal mapping. You can reference the original article for this map.
Scenario 2 – One Analytical Distribution per Distribution and duplicate accounts.
The next easiest scenario to integrate is when we have the same account number on multiple distributions and each distribution has only one Analytical Distribution. For this scenario, we need to add the distribution sequence to our mapping. Depending on your data source, the value can come from the source or calculated using a global variable.
Data Source
We will use the same data source as scenario 1. The distribution sequence number will be calculated in the mapping restrictions and will not be in the source file.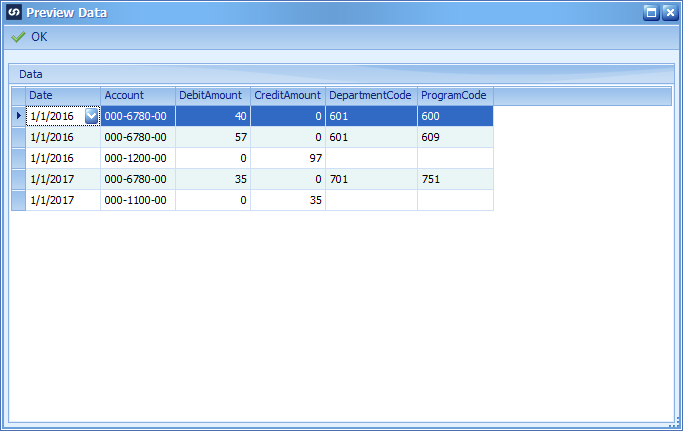
Script Tasks
Create some the following Script Tasks to handle setting the default value for each global variable and to reset the value after each document has executed.
Map Pre Task – Tasks that run before the map – New Task – Run Script
Right Click on the Tasks that run before the map and choose New Task -> Run Script. This script runs before the map starts each time so we are guaranteed the values start out correctly each time it runs.
Default the global variables to 0 using the logic in the screen shot.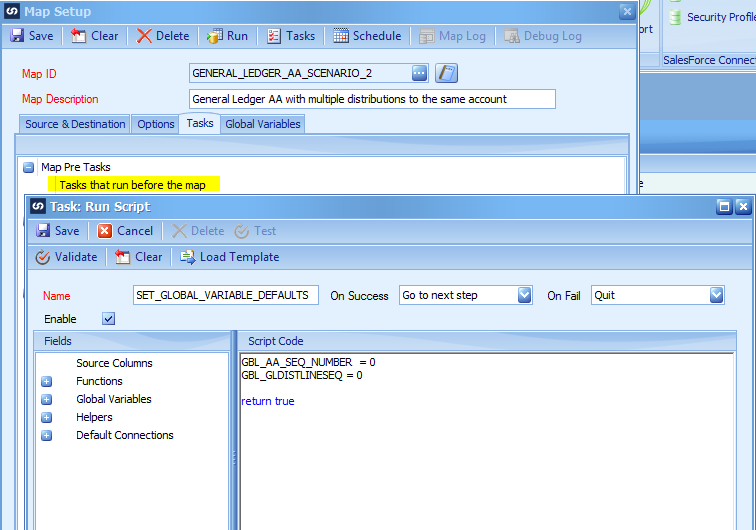
Document Tasks – Tasks that run before the document – New Task – Run Script
Right Click on the Tasks that run before the document and choose New Task -> Run Script. This script runs after the data has been processed for the Journal Entry but before it is sent to Dynamics GP. This means we can be guaranteed the global variables are reset before the next journal entry data is processed.

Mapping
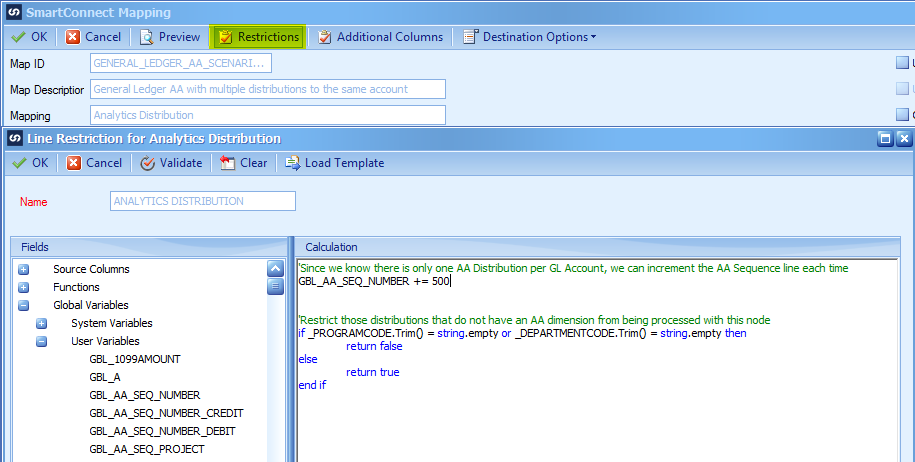
We need to make one addition to our Add Distribution node by incrementing the Distribution Sequence in our node Restriction script, since we know that is executed for each record in our data source.
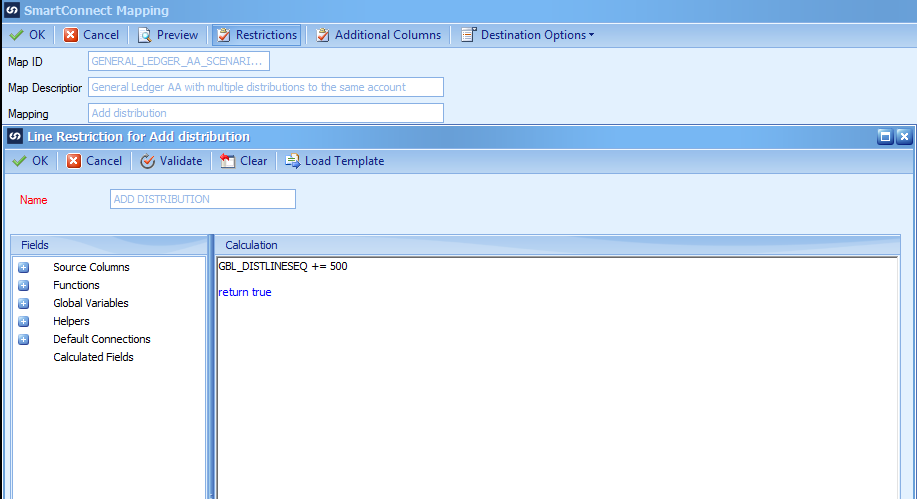
Open the Add distribution node and click on the Restrictions button. Enter the logic to increment the Global variable of GBL_DISTLINESEQ by 500 each time the distribution record is processed.
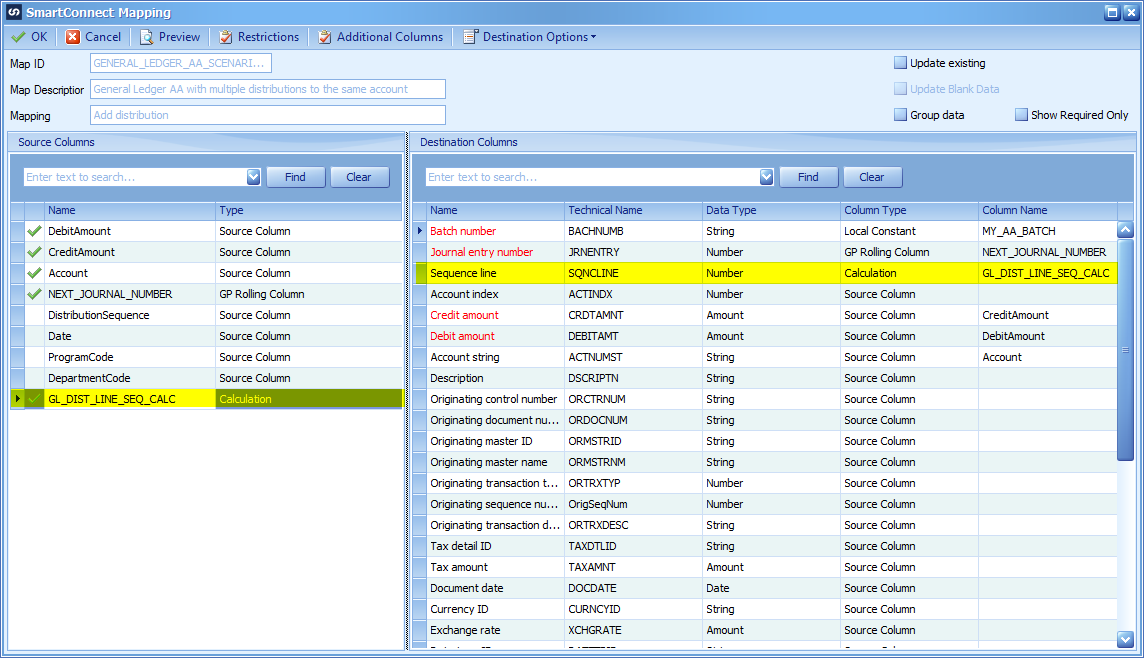
Create a calculated field to return the value of the Global GL Line Sequence value.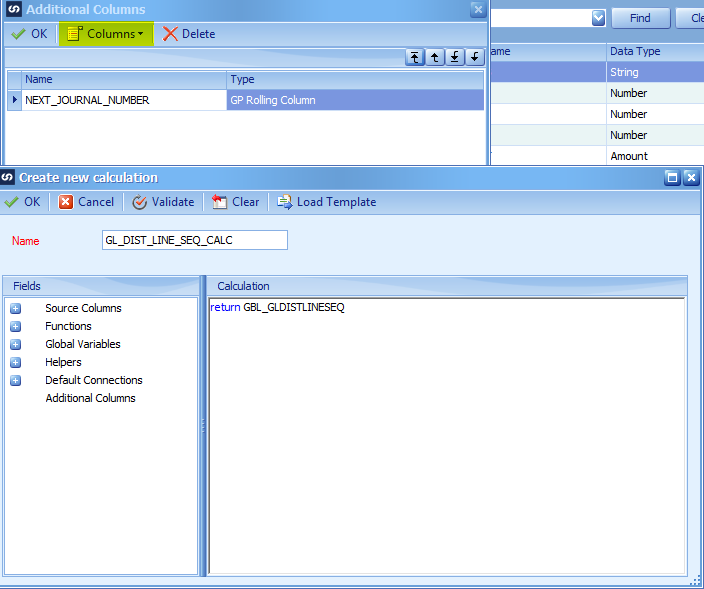
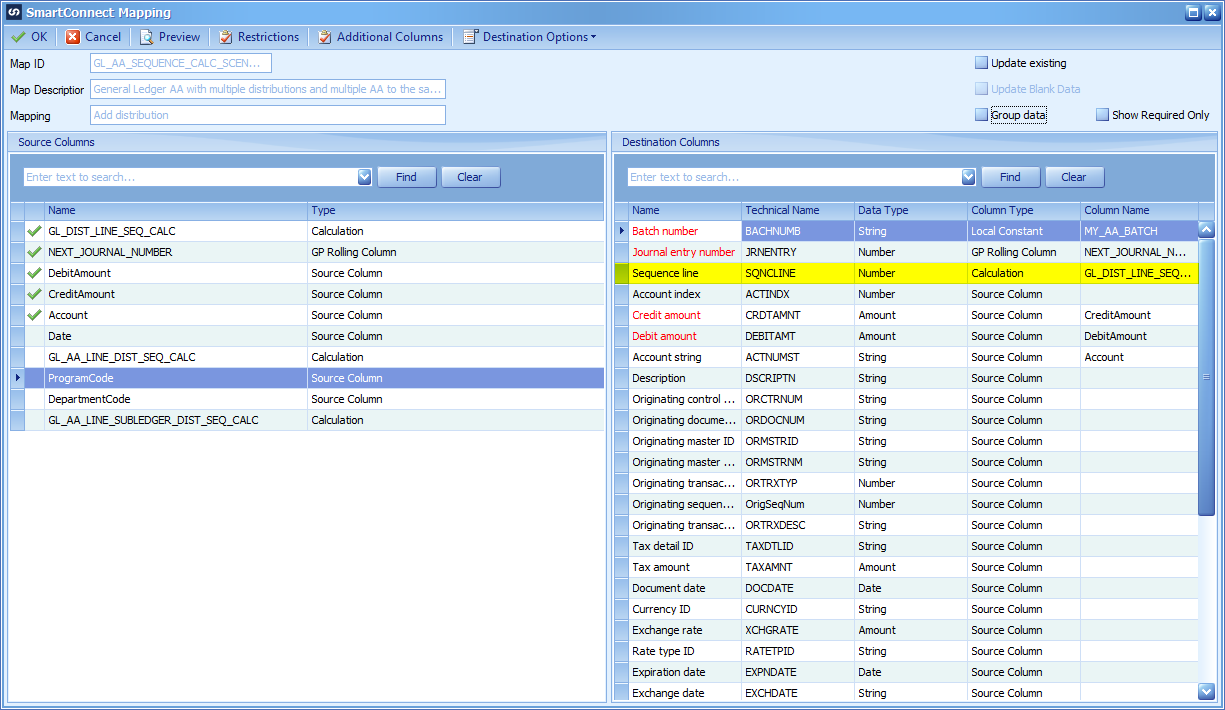
Map the Calculated field to the Sequence line on the destination.
Our Analytical Distribution mapping includes the addition of calculating the distribution sequence in the restriction script as well. Increment the Distribution Sequence for every line since there is possibly only one AA distribution per GL distribution.
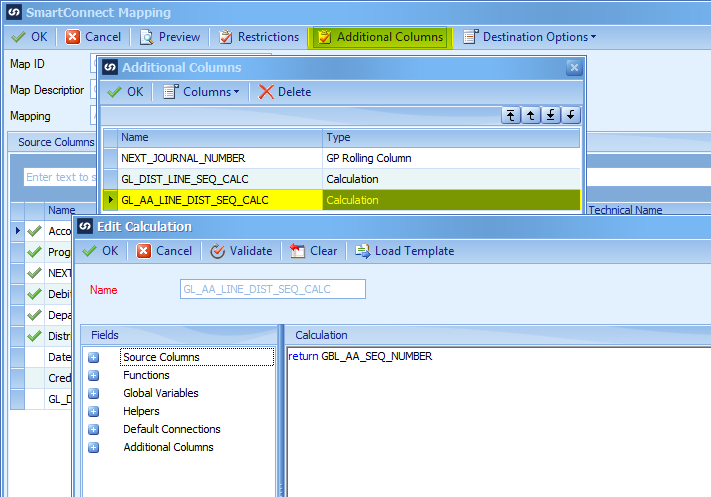
As was done with the General Ledger Distribution, we need a calculated field to return the sequence number.
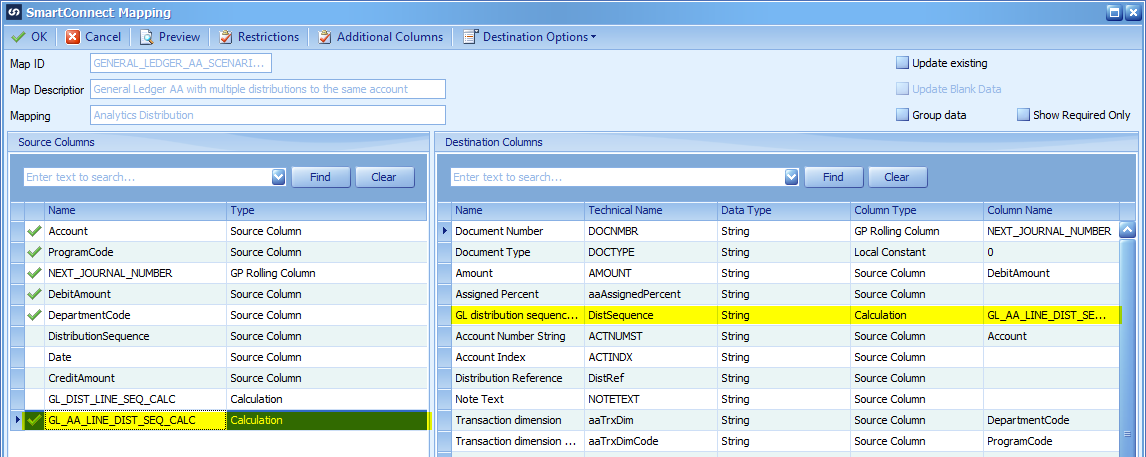
Map this new calculated field to the GL Distribution Sequence.
When the map executes, it will properly create our Journal with AA distributions
Scenario 3 – Multiple Analytical Distribution per Distribution and duplicate accounts.
The next easiest scenario to integrate is when we have the same account number on multiple distributions and there can be multiple Analytical Distributions for each payables distribution. With this scenario, we need to add the distribution sequence to our mapping and an analytical sequence. Depending on your data source, the value can come from a source column or calculated column using global variables as described in scenario 2.
Data Source
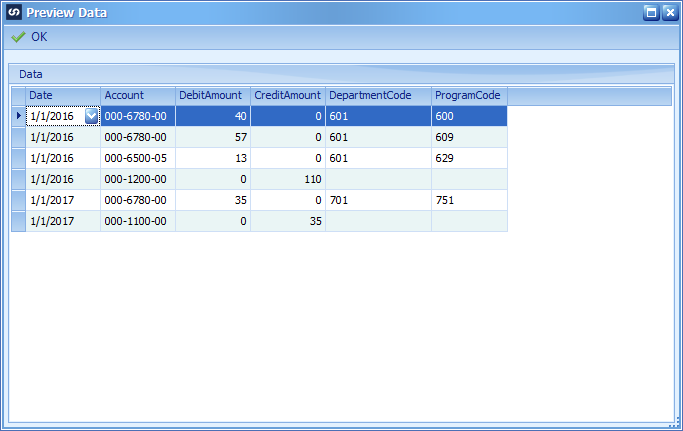
Here is our data source without the additional General Ledger Distribution sequence and without the Analytical Distribution sequence number. I also separated the amounts into debit and credit columns to reduce the number of calculations needed for summing amounts on the distribution node.
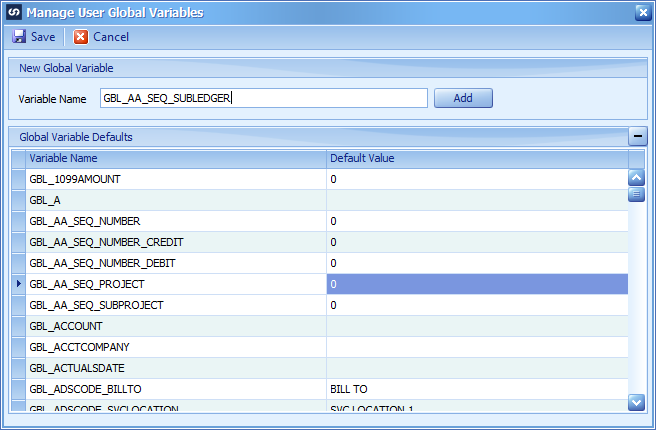
Global Variables
In this scenario, we will need an additional Global Variable to track the sequence for the multiple AA distributions for that one GL Distribution. We’ll call this one GBL_AA_SEQ_SUBLEDGER.
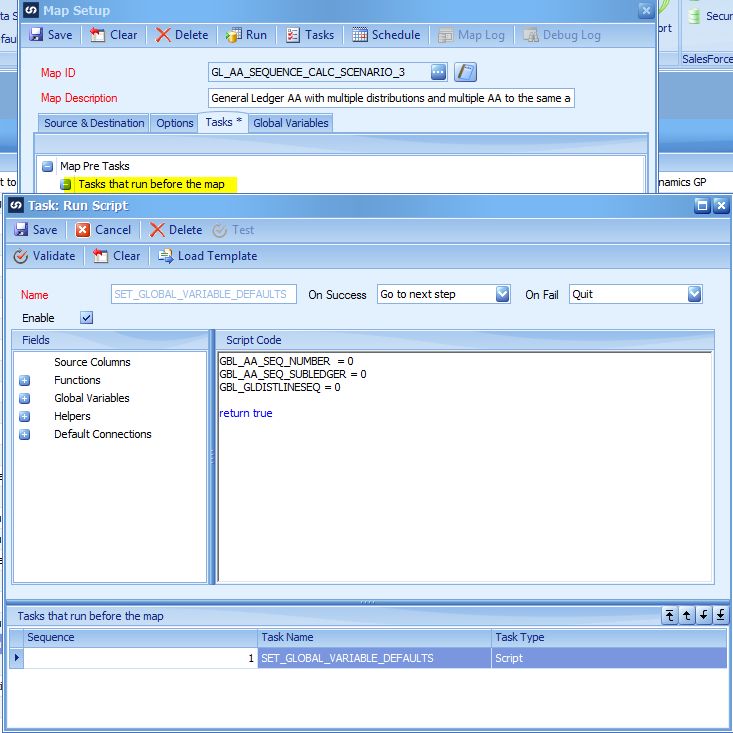
Map Pre Task – Tasks that run before the map – New Task – Run Script
Right Click on the Tasks that run before the map and choose New Task -> Run Script. This script runs before the map starts each time so we are guaranteed the values start out correctly each time it runs.
Default the global variables to 0 using the logic in the screen shot.
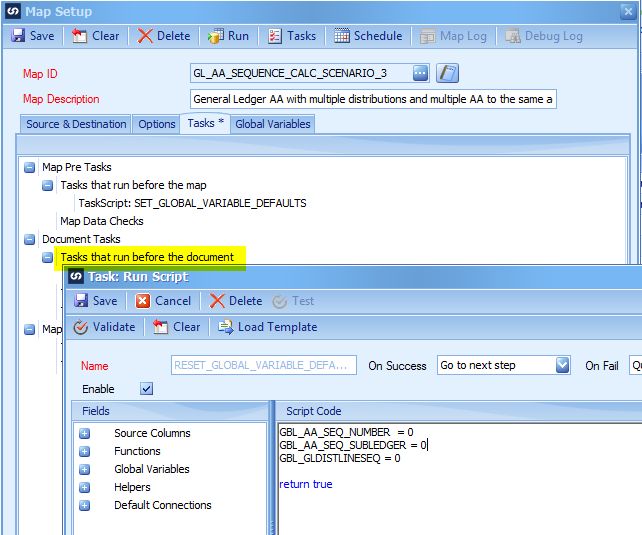
Document Tasks – Tasks that run before the document – New Task – Run Script
Right Click on the Tasks that run before the document and choose New Task -> Run Script. This script runs after the data has been processed for the Journal Entry but before it is sent to Dynamics GP. This means we can be guaranteed the global variables are reset before the next journal entry data is processed.
Mapping
In the Add Distribution, we group on the date and the account number to create one distribution for our account. If the same account appears multiple times and needs to be on separate GL lines, then we need to find another field to include in the grouping that would make them different. We won’t get into that level of detail, however. We will also sum the debit and credit amounts to ensure the correct distribution amount aggregate value.
Open the Add distribution node and click on the Restrictions button. Enter the logic to increment the Global variable of GBL_DISTLINESEQ by 500 each time the distribution record is processed.
Create a calculated field to return the value of the Global GL Line Sequence value.
Map the Calculated field to the Sequence line on the destination.
Since there is a Dimension Code for each distribution we will not group our distribution node which means we will get a distribution line for each line in the source file.
In the Analytics Distribution, we need to add several modifications to make sure we increment the sequence numbers correctly.
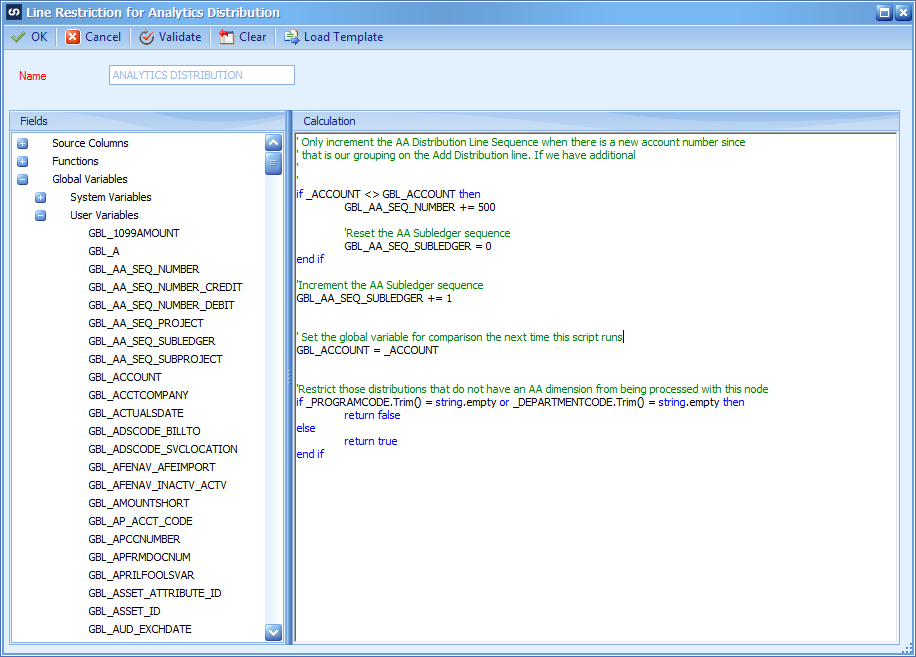
Modify the restriction script to increment the AA GL distribution sequence only when the account number is changed. Again, we are checking for a different account number here because that is how we grouped the initial GL Distributions. Whenever the Account Number changes, we also should reset the AA Subledger sequence to start over with the new distribution.
The second part of the script is to increment the AA Subledger sequence for the current distribution.
Please note, we have introduced another Global Variable called GBL_ACCOUNT that will be used to determine if we should increment the sequence numbers.
As before, there is the GL_AA_LINE_DIST_SEQ_CALC script for the GL Distribution Sequence.
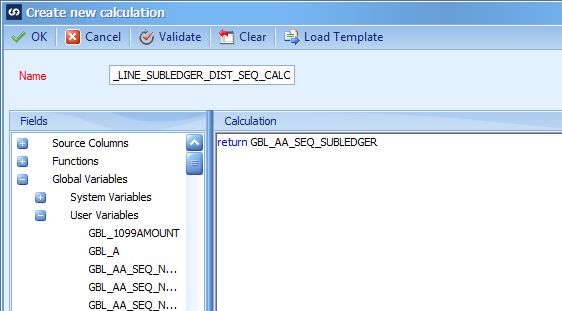
Another calculated script is needed to return the AA Subledger Sequence. (GL_AA_LINE_SUBLEDGER_DIST_SEQ_CALC)
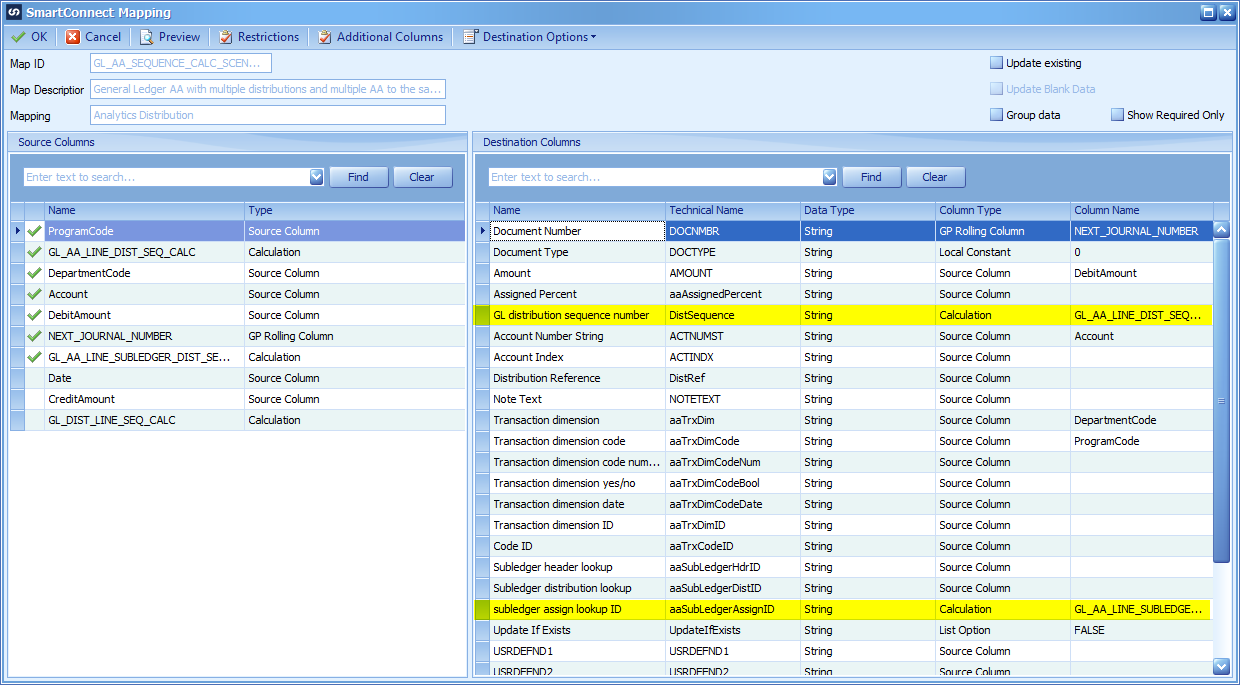
Map the two calculated fields to the distribution sequence and subledger sequence:
Mapping Restriction
This will be the same restriction as used in scenario 1.
That’s it. All three scenarios should successfully import if you have the right data available and the Analytical codes are set up correctly and we have calculated the correct sequence numbers.
Troubleshooting
We will admit that troubleshooting issues regarding integrating AA transactions can be difficult. If something is not mapped correctly on the analytics distribution node, the most common error you will receive is “An Item with the same key has already been added”. Unfortunately, this error is being returned to SmartConnect from the Microsoft eCnnect runtime and means eConnect has generated the same error multiple times. It usually means the Microsoft eConnect taProcessAnalytics Stored Procedure cannot validate the Analytics Distribution to the matching Payables Distribution. The way we troubleshoot this issue is to use SQL Profiler to capture the text of the calls being made to the eConnect procedures and executing those procedures within SQL Server Management Studio and execute them within SQL Management Studio. https://docs.microsoft.com/en-us/sql/tools/sql-server-profiler/sql-server-profiler
Another possible method to validate the mapping is to change the map destination to Dynamics GP – File and review the XML that is generated to verify the calculations and mappings are correct.
Here is a list of items to verify when looking at the generated XML.
- Make sure the Document Number and Document Type are correct for the Analytics Distribution Node
- Make sure the Analytics Distribution Node is after the Add distribution node and before the Create transaction node
- Make sure the Distribution Sequence is correct for the Distribution node and the Analytics Distribution node.
Additional Considerations
A common question is whether we can provide the Analytical Distribution Alias and have eConnect pull the right values for the Analytical data. Unfortunately, this is not handled within eConnect so we can only provide the actual Analytical data with the integration.
Another scenario is where the Dimension Codes are all contained on the same line on the source document. If the data is in this format, it will require pivoting the rows so each Dimension Code is on its own line. If the Dimension Codes are not on their own line, we cannot process the file with SmartConnect.
Have further questions? Shoot me an email at lorren.zemke@eonesolutions.com.