There are a few common issues I’ve seen with document distributions when creating them using SmartConnect. This blog talks about Receivables Transactions, but it would apply to pretty much any kind of Dynamics GP destination and mapping.
The first one is:
I’m creating a Receivables Transaction Invoice document and providing the distributions. The document is created successfully however the distributions are created unbalanced or duplicated. What is wrong in SmartConnect?
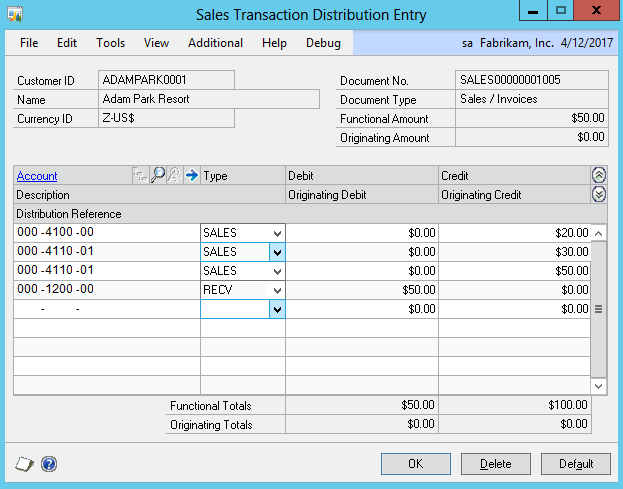
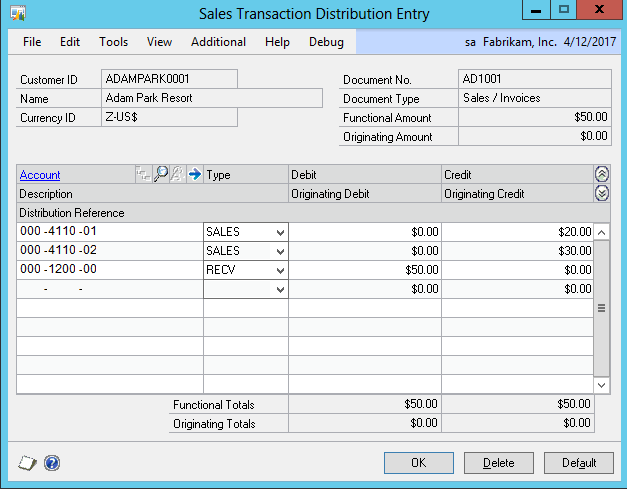
Unbalanced distribution after integration
In the figure above, we can see there are 3 SALES distributions and one RECV – the distributions are out of balance and so the document would not post. Looking more carefully at the distributions, the first two ($20 and $30) are the distributions that I integrated in my source data.
This observation is correct – the first two distributions are the ones that came from the source data. The last two have been created by eConnect automatically as we failed to tell eConnect (via SmartConnect) to not create them.
In the SmartConnect map on the ‘Create transaction’ node, make sure the column “autocreate distributions” is set to 0.
By default, eConnect will assume that it should create the distributions and not mapping the column would let eConnect default this parameter and create the distributions. So by mapping our distributions and leaving this field empty – we get double the intended distributions.
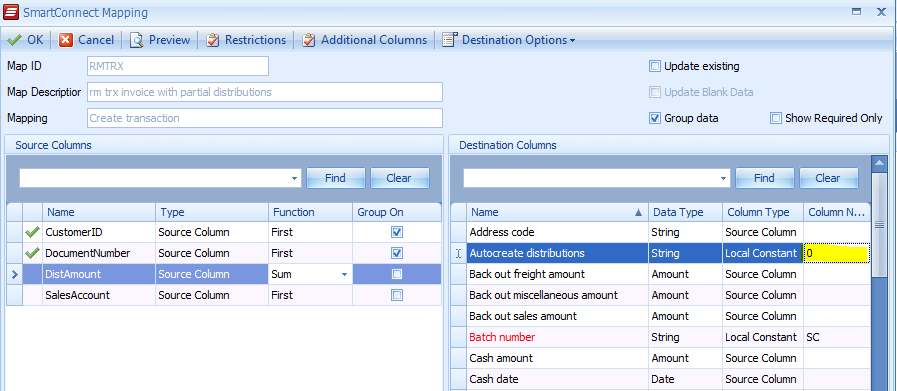
Set Auto-create distributions to 0 (zero)
That leads to problem two:
I disabled the eConnect auto-create of distributions. Now I find that SmartConnect didn’t create the distributions properly and now the document has unbalanced distributions.
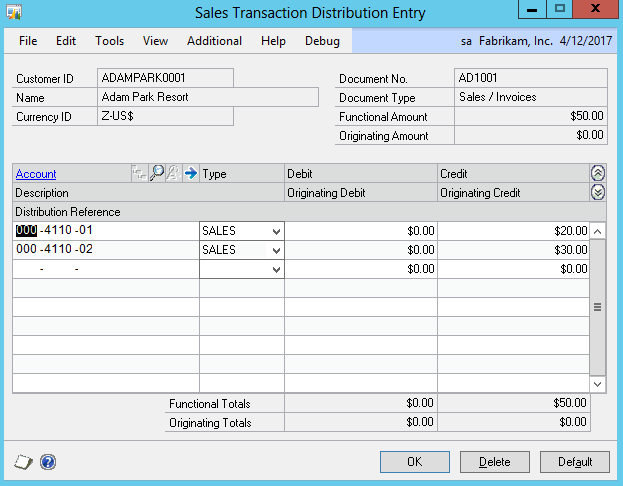
Integration with auto-create distributions disabled
This is a misinterpretation of how eConnect creates the distributions.
eConnect will either create all distributions or none of the distributions. There isn’t a way for it to be set to “create the distributions that are not provided”.
In this case, a common issue we see is that the user source data does not contain all of the distributions necessary to create a balanced transaction. Typically only the SALES (or PURCH on the PM side) distributions are provided and not the offset accounts.
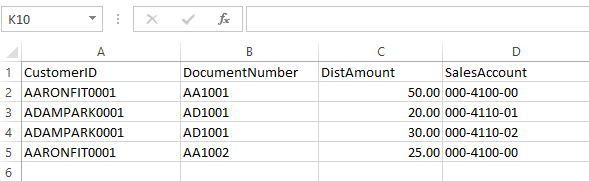
Representative data only containing the SALES distribution amounts
For the example above, the document AD1001 has been successfully created and the two SALES distributions for $20 and $30 are created successfully – but we are missing the offset RECV distribution for $50.
This is a problem because while we can use grouping in SmartConnect to take two (or more) lines and group them into one line, there isn’t really a way to create new lines. Nor can we map multiple data sources (somehow) into an already mapped node such as this ‘add distribution’ node.
Fortunately we don’t have to – we can do it with SmartConnect 2014 and above (sorry, it does not work in previous versions).
In order to create more distributions, we need to be able to map more distribution lines. In order to do that, we need another entity to map to that will create distributions. Once we have that, we can then summarize our existing data to that mapped line to create the offset distribution.
In the Microsoft Dynamics GP Node Maintenance window, find the Receivables node and expand it to find the Receivables Transactions node.
Right Click on the “Receivables Transactions” node and choose Add Existing Node
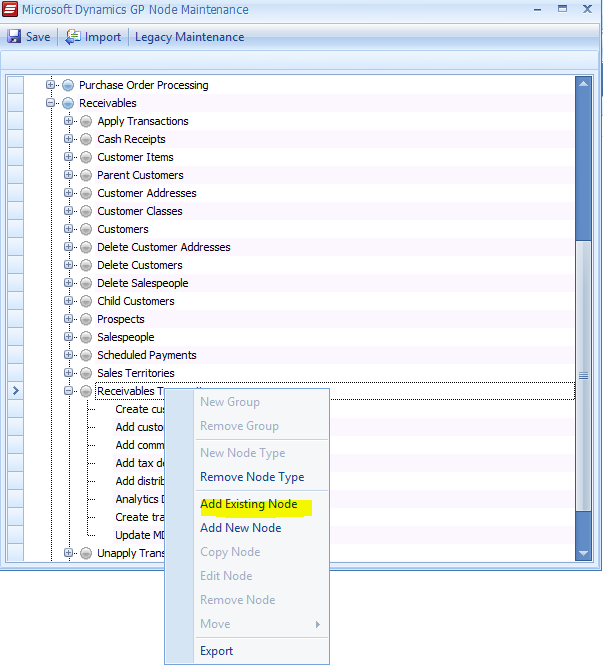
Add Existing Node
Select the taRMDistribution (for this example):
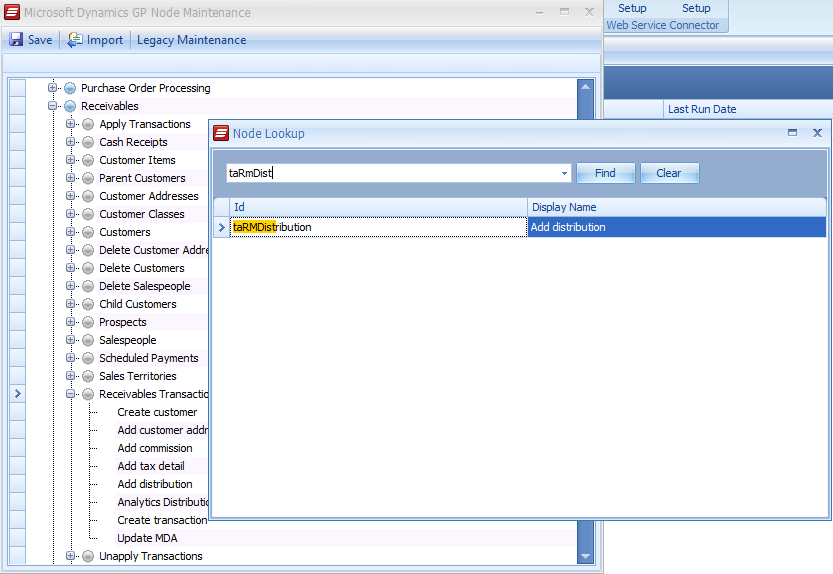
Adding taRMDistribution
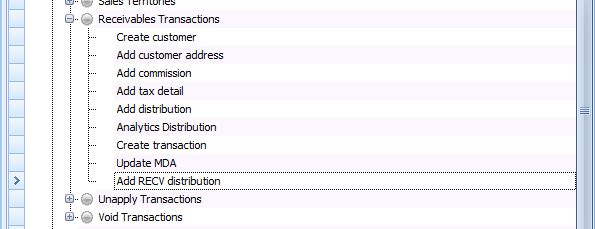
Once that processes, SmartConnect will add the new node with the default name to the list of nodes.
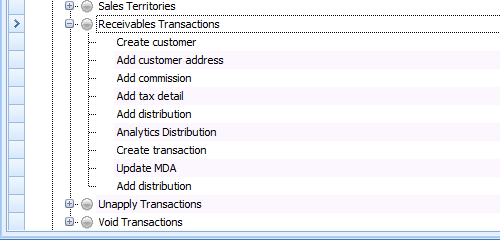
New ‘Add distribution’ node added
Right click on the new ‘Add distribution’ node and choose ‘Edit Node’
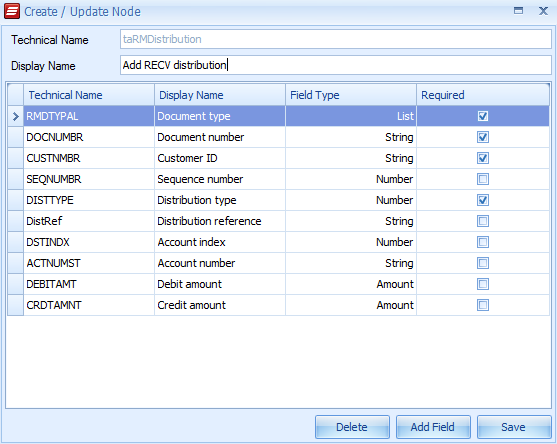
Change the name from the default “Add distribution”
Once the Display Name has been changed, we don’t need or want to change anything else. Just press Save.
Distribution Renamed
We can see that the UI now shows the new node with the new name.
In this case, I named it ‘Add RECV distribution’ since that was what I plan on using it for. But that is just the name – I can use the node the exact same way as the built-in ‘Add distribution’ node that already exists.
The last thing we need to do is move the node position. Currently the new node is last in the sequence and we should really put it around the same spot as the existing node.
To do this, select the new ‘Add RECV distribution’ node, choose “Move” and then “Up”.
Keep doing this until it is above or below the existing ‘Add distribution’ node.
My final result is:
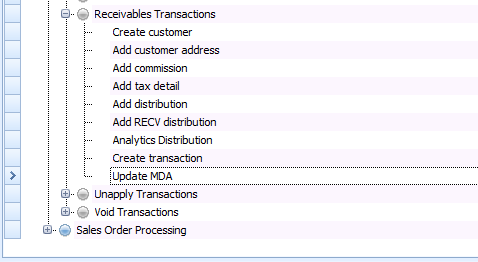
Final change
Lastly, press the Save button on the Node Maintenance window to save our hard work.
Opening our existing map, we see that it now shows the new ‘Add RECV distribution’ node.
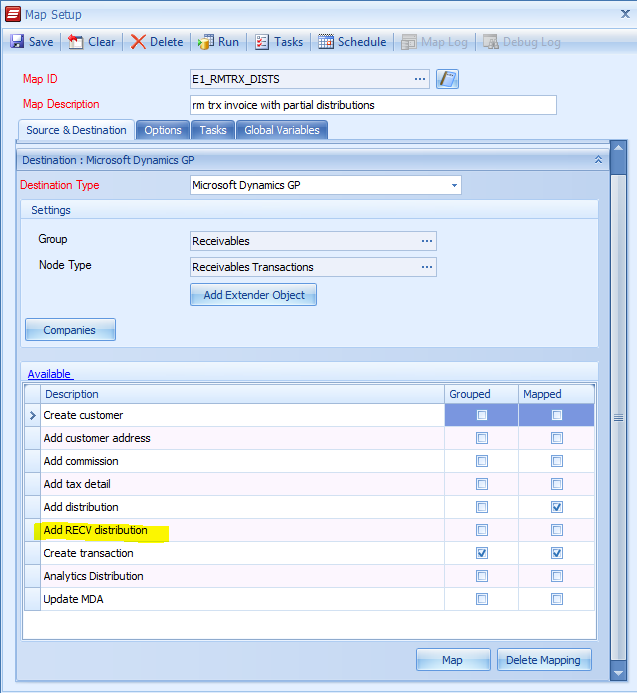
Map with new node
In this case, from our data we see the intent is that the document would be grouped by the Customer & the Document Number. We would deduce then that while there isn’t a column for “Document Amount”, it must be the SUM() of the DistAmount column.
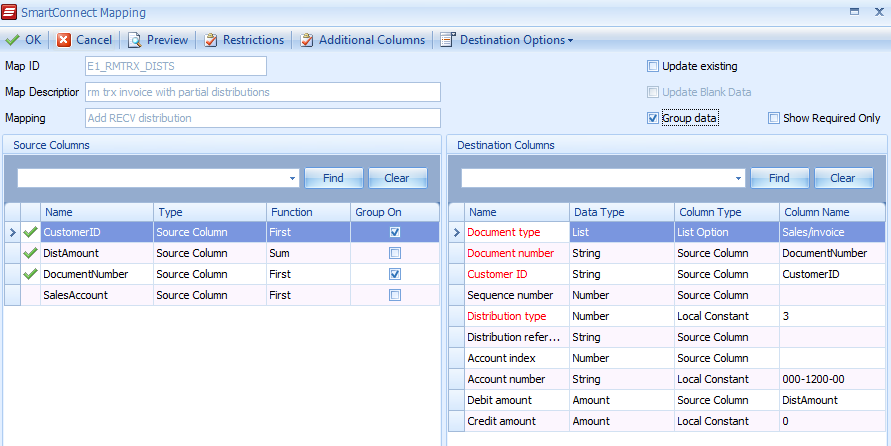
Source data mapping
Normally we wouldn’t group the distribution data – but in this case we do because we need to SUM the distribution amounts in order to get our offset distribution.
Here, we are hard coding the offset RECV account to the Fabrikam default account of 000-1200-00.
The Distribution type is hard coded to 3 (RECV) for this distribution to be created.
The DistAmount column is set to SUM and mapped to the DebitAmount column. The rest are self-explanatory.
Looking at the resulting document created in Dynamics GP, the distributions are now balanced and what we would expect to see.
Correct document distributions after integration
EDIT 2/16/2021: While this method works nicely here, I wrote this later blog article that discusses a different way to do this. While this one works, in more complex cases the newer article works better.
Until next time,
Patrick
eOne
Interested in learning more about SmartConnect? Email us at sales@eonesolutions.com for more info!