
I talk with a lot of people that use SmartConnect to import and apply cash receipts. The first issue you normally run into is that the cash receipts node and the apply transactions node are entirely different destinations in eConnect. So typically you have to create one map to import the cash receipts, and a second map to apply the transactions. However, this becomes painful to implement since one of the required fields in the Apply Transactions node is the “Apply from Document Number”. Typically you won’t have this information available since you just imported the Cash Receipts, and you let the document number default from Microsoft Dynamics GP.
The easiest solution is to add the apply transactions node to the existing cash receipts map. Then you can import the transactions and apply them by just running 1 map. The added benefit of this is that you can use the same rolling column for the Cash Receipts mapping and the Apply Transactions mapping so that you no longer have to worry about making sure the correct receipt gets applied to the correct document.
First go into SmartConnect Node Maintenance. 
Find the Group and Node Type you want to add the new Node to. In my case I want to add the Cash Receipt Apply node to the Cash Receipts Node. So browse in the structure and look for Receivables Cash Receipts and expand the node. Right click on Cash Receipts and select “Add Existing Node”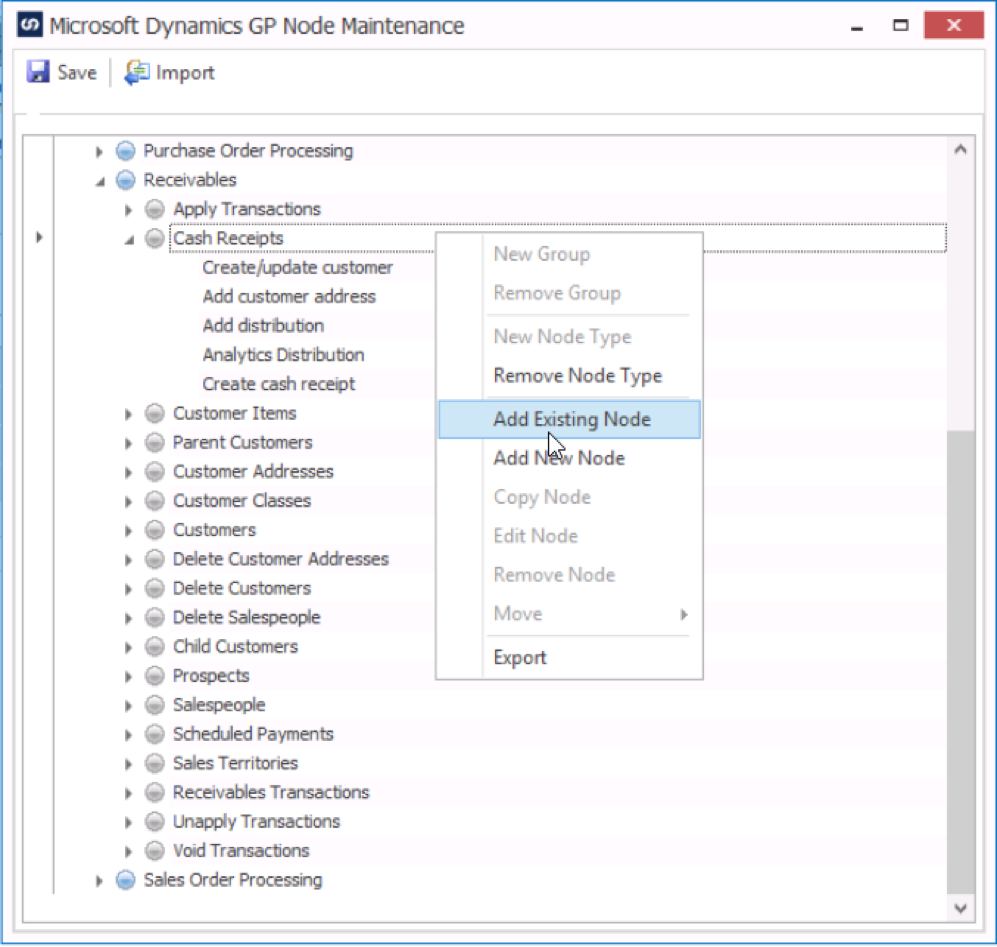
Type “apply” in the lookup window to find all the nodes that deal with applying transactions. In my case it found the “Apply Transaction” node and the “Unapply transaction” node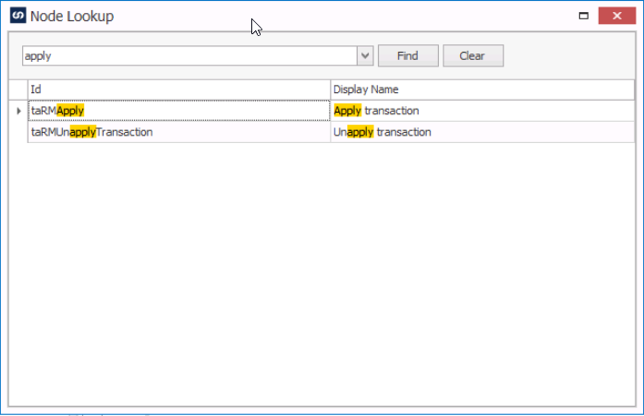
In our case we want to add the “Apply Transaction” mapping, so we double click on the Apply transaction node.
The new node has been added to the bottom of the destination.
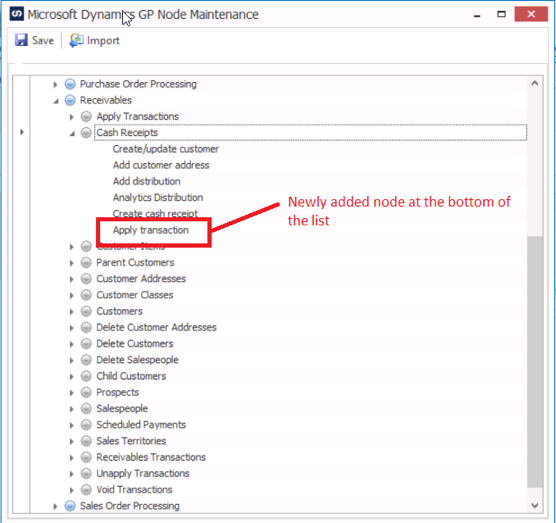
NOTE: You need to leave the Apply Transaction mapping at the end of the list. If it inserted higher up, you need to right click on it and move up or down until it’s the last item in the list. This is because you need the cash receipt to get created first before you can apply it. If the node gets put in at the top of the list, it’s going to try and apply it before it gets created.
After adding the apply transaction mapping, you can add the additional apply information in the original cash receipts map allowing you to import and apply cash receipts using just one map.