
Integration Groups and Sorting in SmartConnect.com are just a few new features that have been added recently, and this article will explain how to set up and use some of these new options.
Why would you use Integration Groups? Integration groups are great for organizing larger implementations. You can create as many as you want and assign your maps to different groups, which you can then filter and sort on. Additionally, you can sort on any displayed column, which can let someone quickly see the most recently run integrations or see which maps failed on their last runs.
To create an Integration Group, navigate to Maintenance > Integration Groups on the navigation pane to the left.

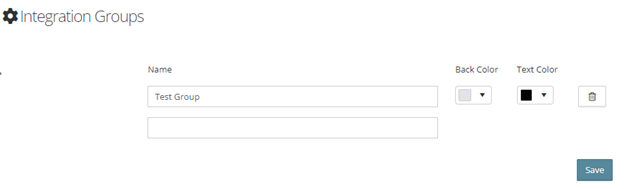
This will open the Integration Groups window where we can create new Integration Groups to use.
First, enter a Name for your Integration Group. A Back Color and Text Color with automatically be selected. These options can be changed to use whatever colors you would like. The colors can be used to help with the organization of integrations when using the grid view and will be explained more later in the article.
Then click the Save button to save your changes.
Now that an Integration Group has been created, we can use the group on an integration to help with the organization of integrations.
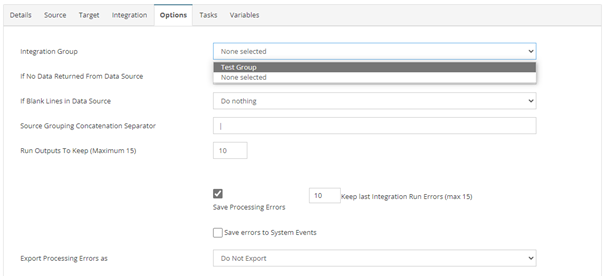
Open an Integration Process and go to the Options tab. Select the Integration Group that you would like to use for this specific integration and make sure to save the integration.
Now that an Integration Group has been added to an Integration Process, we will be able to sort our integrations by Integration Group. This process is a little different depending on if you are currently on the grid view vs the list view.
Grid View
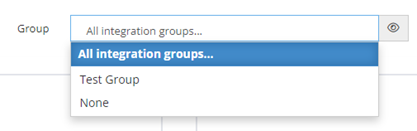
Go to Processes > Integration Processes on the navigation pane. At the top of the window will be a Group sorting option.
Options include:
- All integration groups: Displays every integration that has been created.
- Any Integration Group created, for example, “Test Group”: Displays any integrations that have been added to that specific Integration Group.
- None: Displays any integrations that have not been added to an Integration Group.
For example, if I select “Test Group” here, it will display any integrations that have “Test Group” selected as the Integration Group on the Options tab. As you can see, only one integration is shown in the grid since there is only one integration using that Integration Group.
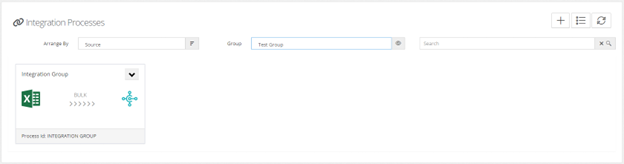
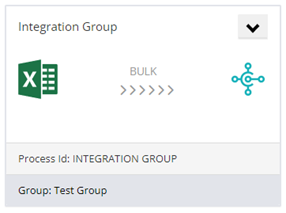
If you select the icon next to group:

This will display another section for each integration, showing which Group the integration is a part of. It will also be colored in whatever colors you selected for the Text and Back colors when setting it up. This can be helpful by color coordinating your integrations by Integration Groups. You can select different colors for each Integration Group.
NOTE: Each time you go back to Processes > Integrations Processes, the sorting will be remembered. So if you want to see all integrations again, you can either select the All integration groups option or click the Restore Defaults button in the upper right-hand corner.

List View
Go to Processes > Integration Processes on the navigation pane. The Group column will NOT automatically be a column header, so we will have to add that header to the list. Select the stacked three-dot symbol next to any of the column headers, go to Columns, and then check the Group column.
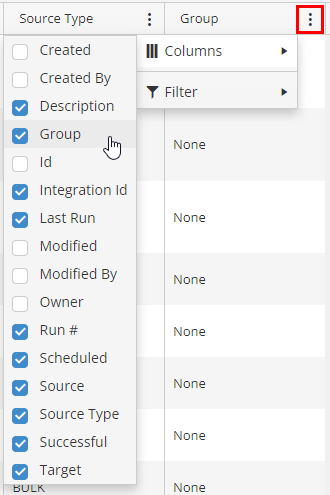
This will add the Group column to the list and we can now sort by the Integration Group. Drag and Drop the Group column into the sort area and now your list will be sorted by Integration Group.

To clear the sort, click the x next to the Group sort or click the Restore Grid Settings button the same as the Grid view.
Hopefully, this will help with the setup of your Integration Groups. They can be very helpful when working with a lot of integrations and can make searching and sorting your integrations easier.
If you have any questions, please send me an email at devon.binstock@eonesolutions.com