In today’s Tech Tuesday article, I am going to show you the email task feature within SmartConnect. The email task can be used on a map task that allows emails to be sent containing the details of map processing. This allows a user to get the status on a map, without having to log into SmartConnect to check.
The first thing you need to do is setup the E-mail Settings connector. To setup the Email Connector, open SmartConnect. Click on the Setup tab, then click the Setup icon. Next click on the E-mail Settings tab. You will need to enter the SMTP Server info, Port, Username and password fields.
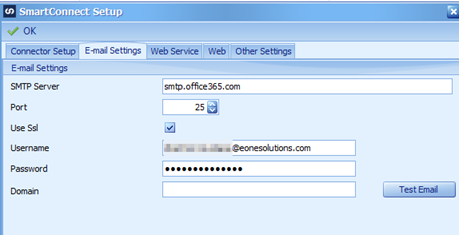
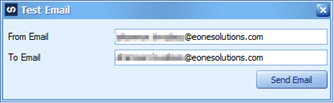
Once you have setup the fields, you can click on the Test Email button. If you fill in a From and To email, you can test that an email was sent by clicking the Send Email button. Once the email has successfully arrived, you can click Ok to close the SmartConnect Setup window.
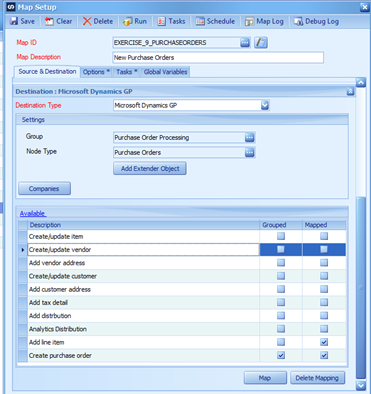
Once the E-mail Settings is complete you are now able to setup a task that sends you an email detailing the status of the map run. To do this, you will either need to open an existing map, or create a new map. Once you have your map setup, you can either click on the Tasks tab or Tasks icon towards the top of the Map Setup window.
Under the Maintain Tasks window you can choose the Task you want to setup. A common Task is the Map Post Task. This is a task that runs if the map fails. This will allow you to receive an email that includes certain error details about your map, if your map fails.
Select the Task you want to perform, then click on the Add New Task drop down menu. In my example I am selecting the Send Email task from the drop down menu.

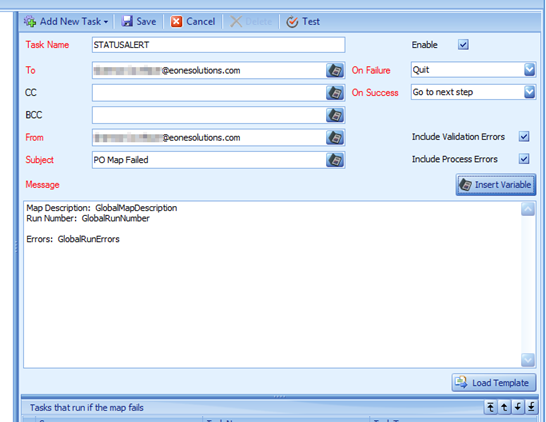
On the Send Email window enter your To, From email along with your Subject. The Message body is used to describe what failure details you want in your email message. If you click on the Insert Variable button, you can select the variable detail that you would like to receive in your emails. You also see the option to select a Load Template. You can select the Load Template if the details of the email may be loaded from a predefined email template.
Since the example is for a post task map, you will notice that you are able to use the Include Validation Errors and Include Process Errors check boxes. Selecting the Include Validations Errors checkbox will cause any errors raised during the map data checks stage to be attached to the email as a csv file. This will list failed rows in the file, saving the user from having to reopen the map to figure out what went wrong.
Selecting the Include Process Errors checkbox will cause any errors raised during processing to be attached to the email as a csv file. This contains the failed records. With the failed records a user could run a new map, to re-upload just those failed records.
Once you have entered the valid information, you can click the Save button. You can then click Ok on the Maintain Tasks window.
If your map is using any global variables for the email task, you will need to add a pre-map script task to initialize the variables being used. For better performance, SmartConnect only initializes variables that are used in a script on the map. A sample script would look like this.
‘——– BEGIN SCRIPT —————–
Dim My_String as string
My_String=GlobalAdministratorAddress
My_String=GlobalBCCAddress
My_String=GlobalCCAddress
My_String=GlobalFileName
My_String=GlobalFilePath
My_String=GlobalFromAddress
My_String=GlobalMessage
My_String=GlobalToAddress
My_String=GlobalErrorCount
My_String=GlobalLastError
My_String=GlobalMapDescription
My_String=GlobalMapID
My_String=GlobalProcessCount
My_String=GlobalRollingColumn
My_String=GlobalRunDate
My_String=GlobalRunEnded
My_String=GlobalRunErrors
My_String=GlobalRunNumber
My_String=GlobalRunStarted
My_String=GlobalSuccessCount
My_String=GlobalUserID
return true
‘——– END SCRIPT —————–
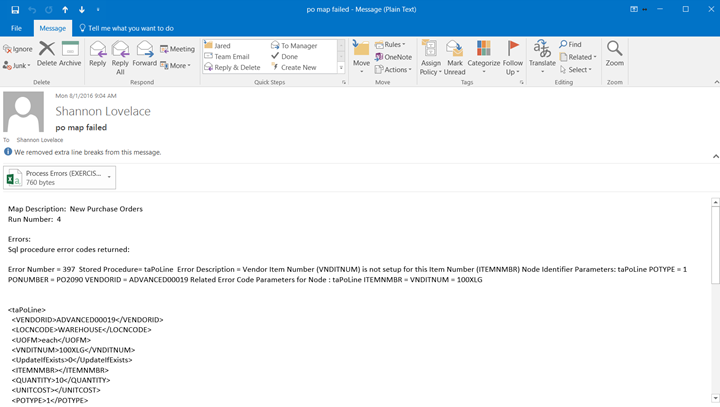
Below is an example of the email you will receive regarding the failure details. This email allows you to get notification on your map progress, without having to access SmartConnect for those results.