This week we are going to take a look at using SmartConnect to integrate to Spark Pay using the REST connector. SmartConnect can be used to get data from Spark Pay and create or update data in Spark Pay. This will not go through completely setting up the connector from scratch as there will be an import provided. The import will allow you to get customers, items, and orders as well as create customers and items.
To start I would recommend looking through the Spark Pay API to understand the authentication and resources available. You can find the API at https://support.sparkpay.com/hc/en-us/sections/200545434-REST-API.
Once you have familiarized yourself with the Spark Pay API we can start by setting up a security token. We are going to use the single token authentication since it will not expire and we only need to use one user for the integrations. In the Spark Pay dashboard you will need to navigate to Tools>>API Apps & Integrations.

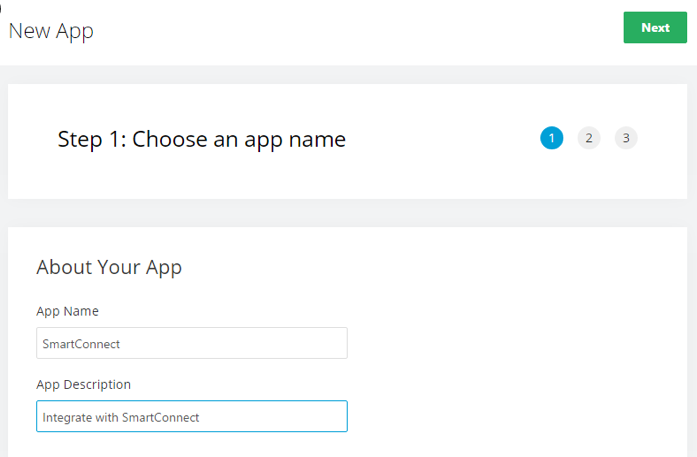
Enter an App Name and Description to start the process. You can choose whatever you want as this is just used to keep track of what applications have access to your Spark Pay account and does not matter for SmartConnect.
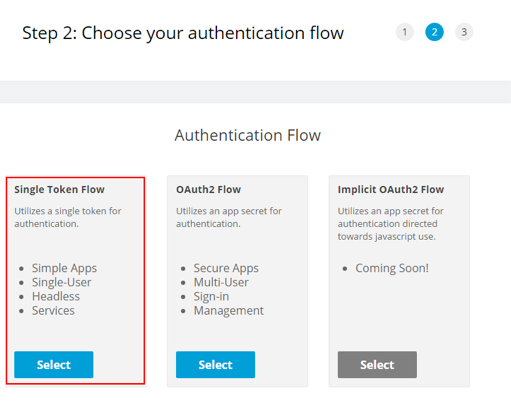
Step 2 will ask us what type of authentication we would like to use. Currently Spark Pay has two options available. We are going to use the Single Token Flow because the token will not expire so we will not have to worry about refreshing it in SmartConnect.
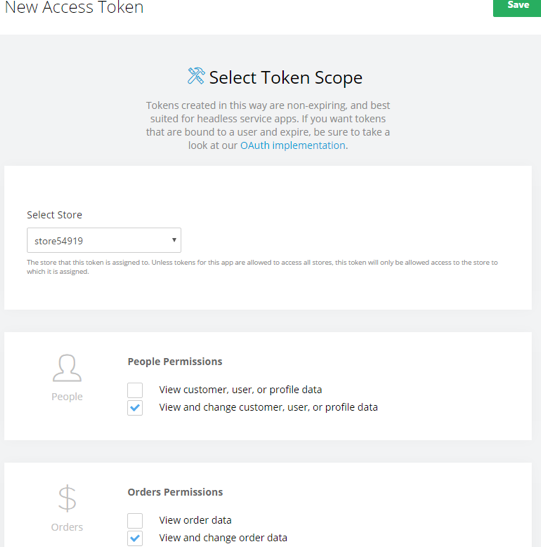
Next step is to setup the scope of the token. If you have more than one store in Spark Pay you will need to select which store you would like the token to be created for. If you want to be able to get and create data you will need to mark the checkboxes to view and change data for each section. If you want to only get data you can mark the view only boxes.
The last screen before you finish will have the data you need to keep as it will be used to setup the REST connector in SmartConnect. Save your access token and the base API URL and then click the finish button to complete the setup in Spark Pay.
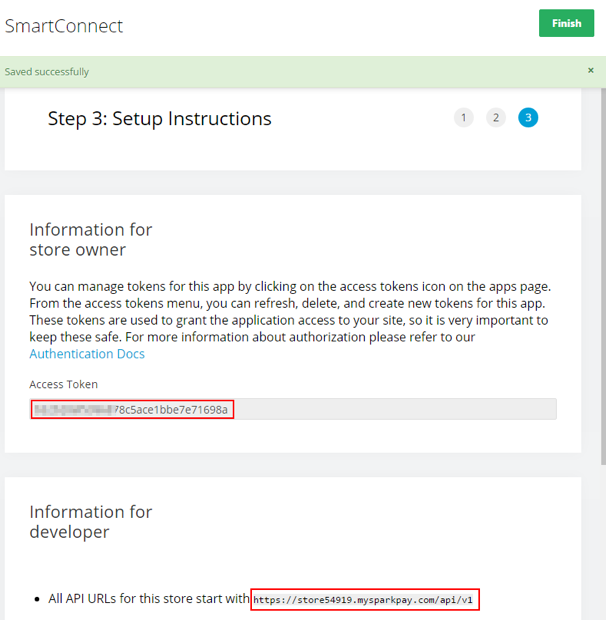
In SmartConnect we will use the Access Token as the default value for the authorization parameter and the store number as our storeid parameter. To simplify the setup I have included a file you can import to setup the Spark Pay REST Connector. These are the only two values you will need to enter to get started. Download the Spark Pay connector here.
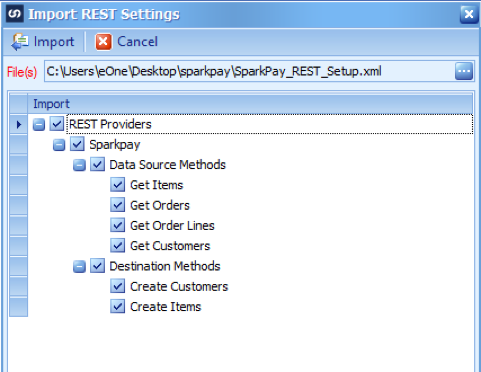
First we need to import the REST Provider I have included. To import the REST provider in SmartConnect navigate to the Maintenance tab and click Import in the REST Connector section.

Select the SparkPay_REST_Setup.xml file and mark the main REST Providers checkbox to include all source and destination methods.
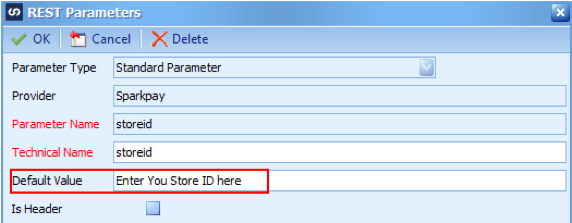
After the import completes, navigate to the Maintenance Tab>>REST Connector section>>Service Providers and double click Sparkpay to enter your token and store id parameters. Double click each parameter to edit the default value for each and save.
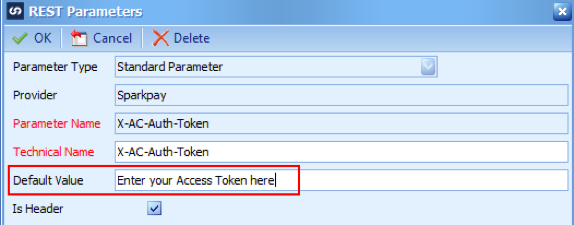
The X-AC-Auth-Token parameter is a header parameter so it will be passed in the header for every call made to Spark Pay. If you look at any of the methods you will see that this parameter is used every time and is required to make a successful call. If you do not include this parameter in your method(s) you will get an unauthorized error.
The storeid parameter is used to build the method url dynamically. It is not required as you can hard code the store id in the method url if you prefer. In the methods included with this import the storeid is passed into the method url using curly braces. The following two method urls accomplish the same result:
https://store54919.mysparkpay.com/api/v1/orders – store id hard coded into the method url
https://store{storeid}.mysparkpay.com/api/v1/orders – store id passed in based on the default value of the storeid parameter.
After setting up these two parameters you will be set to use the Spark Pay connector to get customers, items, and orders and also to create customers and items. You can expand the functionality of the connector by referring to the Spark Pay API to configure additional parameters, methods, return types, and Success Definitions if needed.