
If you’ve already setup a NetSuite saved search, you can easily use it in SmartConnect to get that data out for an integration. To use a saved search in SmartConnect.com, you first need to have setup your NetSuite connector.
An article on that setup can be found here.
Creating a new Netsuite saved search for use in SmartConnect
- In NetSuite, navigate to Reports>>Saved Searches>>All Saved Searches>>New
- Select the search type for the type of records you need to use. In this example I will use Customer.
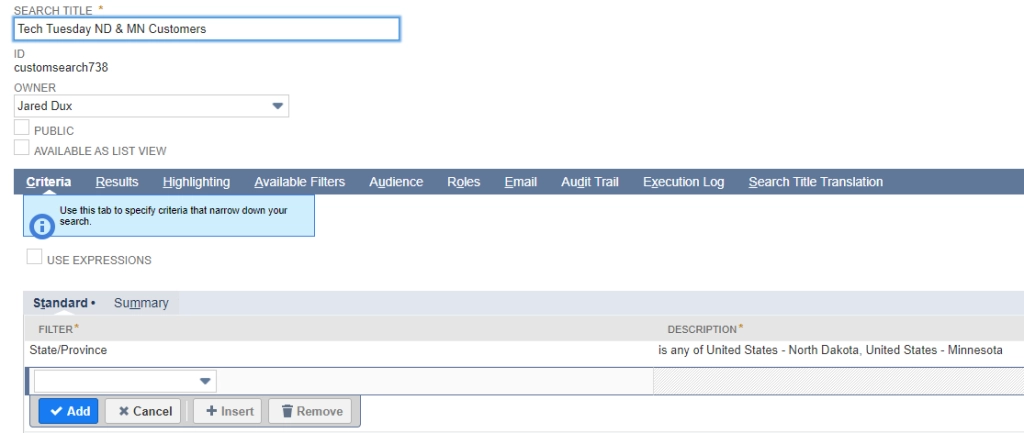
- Set a Search Title. This how the search will appear in SmartConnect.
- Add a filter to narrow down your data set. I set my criteria to only return customers from MN & ND.

- Save the search setup.
For a saved search to be valid in Smartconnect.com, it has to return a list of data. Summarized searches will not work. Functions and custom labels will also be ignored at this time.
Setting Up a Saved Search Data Source in SmartConnect
- Navigate to Data Sources>>Bulk Sources>>Query and click on Create Bulk Query.
- Choose NetSuite Query.
- Name your query, select your NetSuite connector, click Validate, and then choose Saved Search as the Query Type.
- Select your search type. This is the same list that is used when you setup a new saved search in NetSuite, so select the same search type as when the saved search was created.
- Choose the Saved search you would like to use as your data source.
- Choose which columns you would like to make available in your data source and Save.
- Preview the data to make sure you are getting data in the fields you need.
You can now use this NetSuite saved search data source on as many integration processes as you need. If you make any changes to the saved search in NetSuite, those changes will automatically be applied to the query data source in SmartConnect that is linked to the saved search.
If you have any more questions, feel free to reach out to us at sales@eonesolutions.com