Use these steps when using a Salesforce Realtime or change data source integration to move the custom Apex triggers and objects to the production environment. For this we will be using Salesforce Change Sets.
Connector Setup
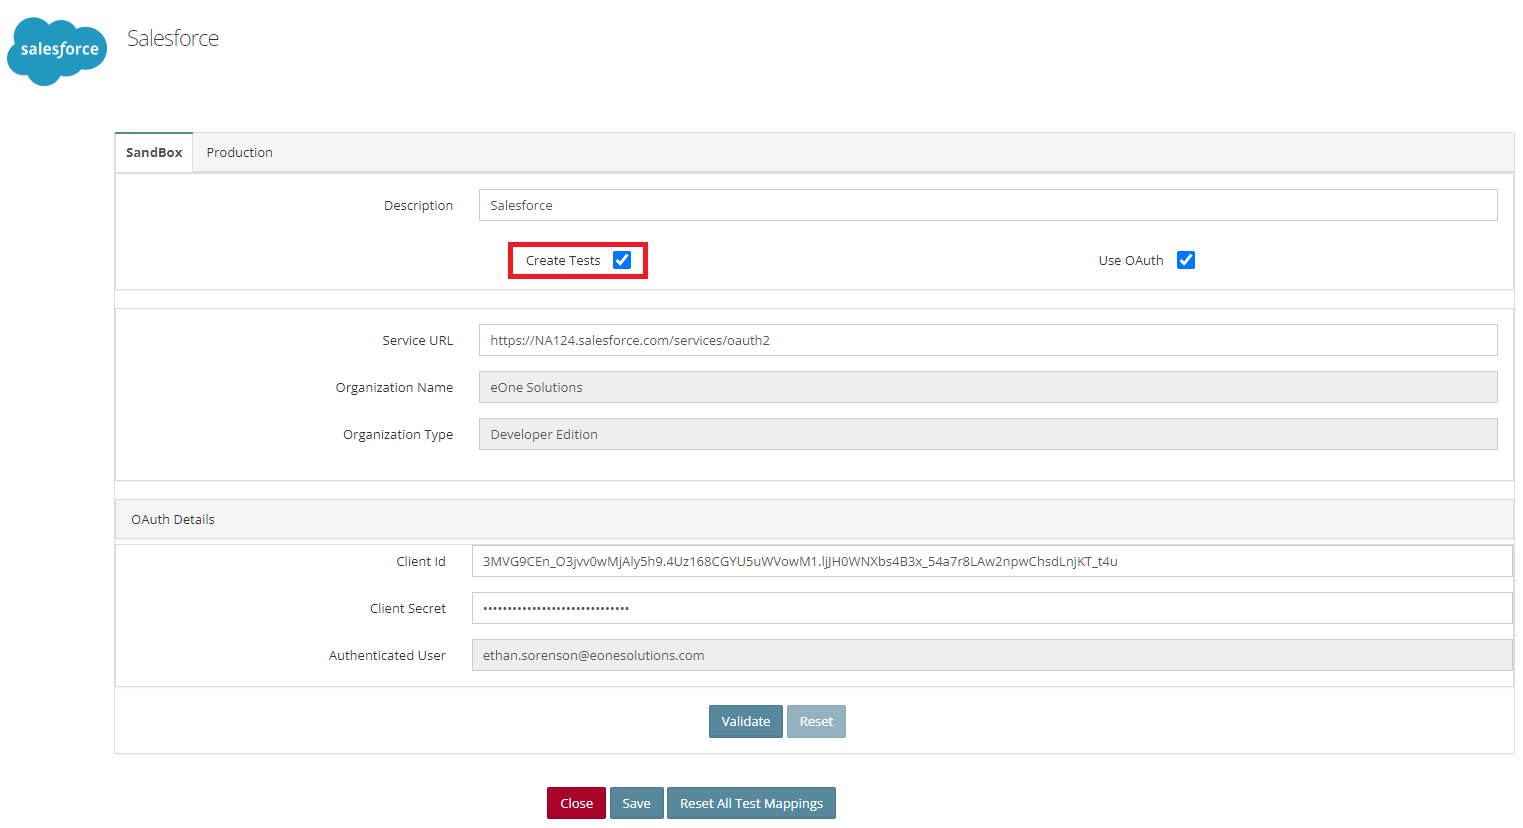
- Navigate to Connections > and Edit your Salesforce Sandbox connector.
- Verify the Create Tests box is checked.
- Note: If this checkbox is left unselected the Apex test class will need to be manually created.
Apex Unit Tests
Before Apex code can be moved from a Sandbox environment to Production, the code needs to pass code tests. SmartConnect automatically builds the test classes, but it may be required to manually edit the tests if they fail. It is good practice to run the Unit Tests in the Sandbox first, before pushing the changes to Production.
- Log into the Salesforce Sandbox > Setup
- Search for Apex Test Execution
- Click Select Tests
- Choose the eOne_Master_Tests test class
- Click Run
- Wait for the test to complete
- If the test fails, correct the errors and run the test again from step 3.
Enable Salesforce Deployments
The Salesforce Production instance will need to allow deployments from the sandbox.
- Log into the Salesforce Production > Setup
- Search for Deployment Settings
- Click Edit
- Make sure the Allow Inbound Changes check box is checked
- Click Save
Create an Outbound Change Set
When sending customizations to a Production instance of Salesforce, all changes need to be bundled into a Change Set and pushed to the Production environment before they can be deployed.
- Log into the Salesforce Sandbox > Setup
- Search for Outbound Change Sets
- Click New
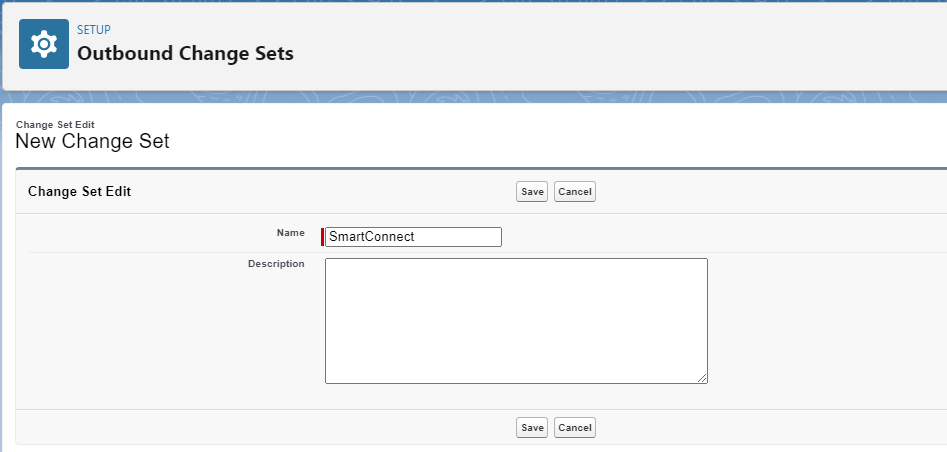
- Provide a Name for the test
- Click Save
- Click Add on the Change Set Components.
- Add the following Components
| Component Type | Name | Required For |
|---|---|---|
| Apex Class | eOne_Master_Tests1 | All |
| Apex Class | eOne*SC_RTDS12 | Realtime |
| Remote Site | SmartConnect3 | Realtime |
| Apex Trigger | eOneCh_<mapId>__tr_I4 | Change Tracking |
| Apex Trigger | eOneCh_<mapId>_tr_U4 | Change Tracking |
| Apex Trigger | eOneSC_RTDS1<SFobject>_I5 | Realtime |
| Apex Trigger | eOneSC_RTDS1<SFobject>_U5 | Realtime |
| Custom Object | eOne Realtime Data Source Master6 | Realtime |
| Custom Object | Change <object> (.com)7 | Change Tracking |
- The Apex Test class needs to be moved over for all trigger types.
- If using Realtime data sources, you will also bring the trigger class definition.
- If using Realtime data sources, you will need to bring the Remote Site setting allowing communication with the SmartConnect web service.
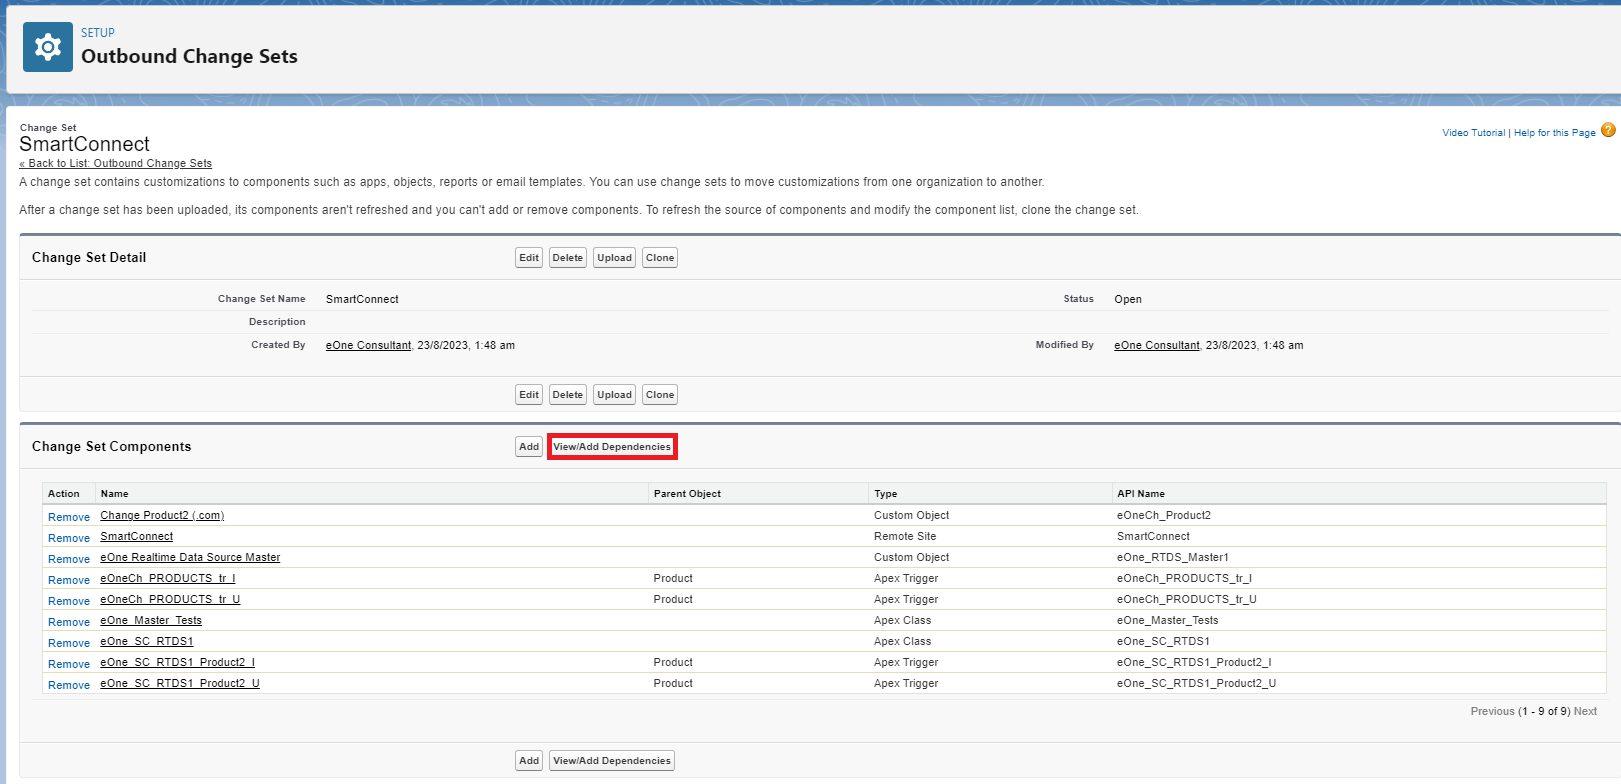
- If using Change data sources, a unique trigger will be created for each action and map combination. In the below screenshot, I have a create and update trigger on an integration named Product.
- If using Realtime data sources, a unique trigger will be created for each action linked to that object. If multiple integrations are linked to the data source, they will all use the same trigger.
- If using Realtime data sources, this object is required as it stores a list of registered integrations and their SOQL queries.
- If using Change data sources, a custom change tracking object will be required for each table being tracked. In the below screenshot, I am tracking changes on the Product2 object.
- Click View/Add Dependencies
- Navigate to the bottom of the screen
- Click Add Profile
- Add a profile with access to deploy to Production
- Click Upload
Process an Inbound Change Set
Now that the Change Set has been pushed to the Production environment, it can be tested and deployed into the Production environment.
- Log into the Salesforce Production > Setup
- Search for Inbound Change Sets
- Open the Change Set you previously created in the Sandbox
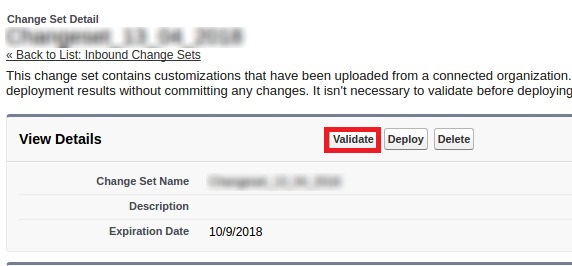
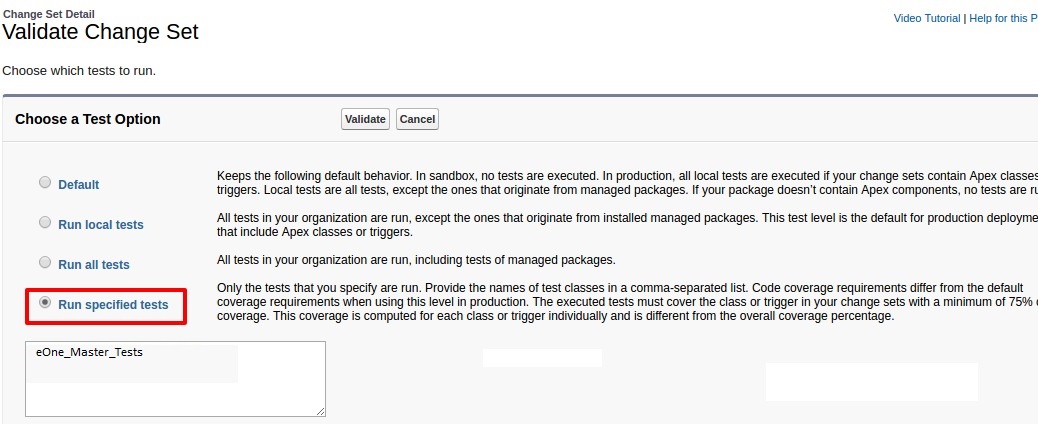
- Click the Validate button
- Check the box for Run specific tests
- In the text box enter eOne_Master_Test
- Click Validate
- After the validation completes, click View Results
- If the tests passed successfully you can now click Deploy
- The triggers and custom objects are now in the Production environment
Reregister SmartConnect integrations
The Apex triggers that are now in production need to be pointed to the correct integrations.
- Log into SmartConnect
- If using Realtime data sources:
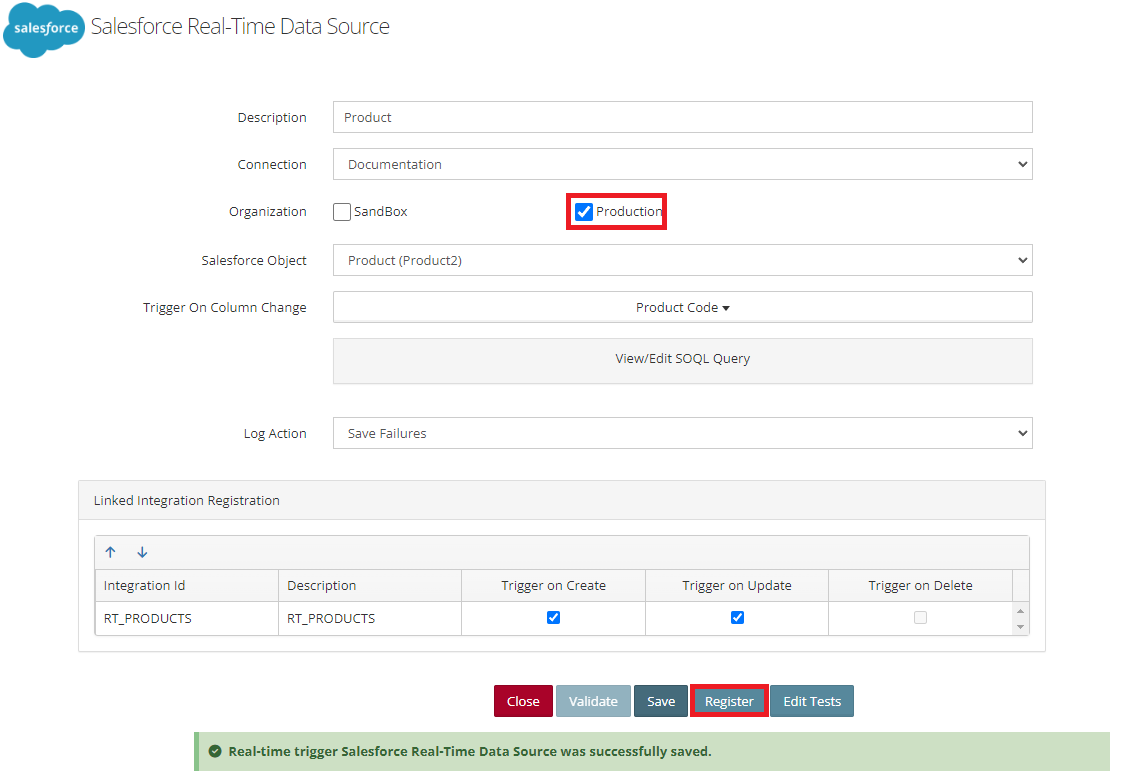
- Open Data Sources > Realtime Triggers
- Open each Salesforce Realtime data source and make these changes
- Check the box for Production
- Click Validate
- Click Save
- Click Register
- Note: you will also want to make sure your linked integration is pointed to the Production target system too.
- If using a Change data source:
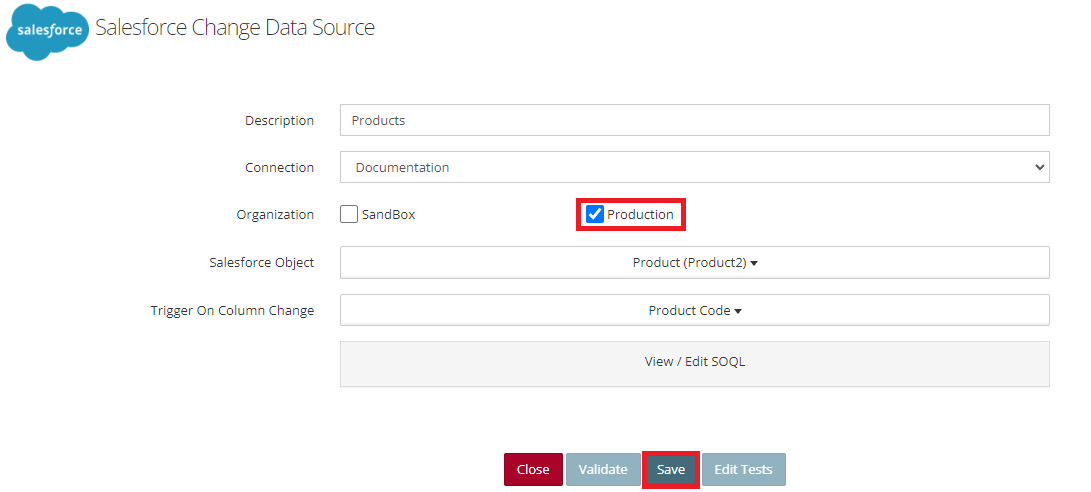
- Open Data Sources > Change Triggers > Trigger
- Open each Salesforce Change data source and make these changes
- Check the box for Production
- Click Validate
- Click Save
- Note: you will also want to make sure your linked integration is pointed to the Production target system too.
Managing Future Changes
If changes are made to a Change based or Realtime data source after the triggers are deployed into Production it may require a new change set.
Changes not Requiring a Change Set
- Modifications to field mappings in the integration.
- Adding new fields to the Realtime or Change based SOQL query.
- Enabling or disabling the Salesforce triggers.
- Registering an additional integration to a Realtime trigger.
Changes Requiring a Change Set
Change data sources:
Any of these actions will require a new change set.
- Creation of a new change data source tracking an Object not currently tracked.
- Linking an additional integration to an existing change data source.
- Add/remove change tracked fields on the data source setup.
- Editing the triggers on a change data source integration.
- Example: Checking the box for Track Updates when previously only Track Creates was selected.
This change set only needs to include the following components.
| Component Type | Name | Required For |
|---|---|---|
| Apex Class | eOne_Master_Tests1 | All |
| Apex Trigger | eOneCh_<mapId>__tr_I2 | Change Tracking |
| Apex Trigger | eOneCh_<mapId>_tr_U2 | Change Tracking |
| Custom Object | Change <object> (.com)3 | Change Tracking |
- The master test class is always required.
- The Apex trigger is only required if it was a new tracked action or if the change tracked fields was modified.
- This is only required if the Salesforce object being tracked was not previously tracked.
Realtime data sources:
Any of these actions will require a new change set.
- Creation of a new Realtime data source tracking an Object not currently tracked.
- Add/remove change tracked fields on the data source setup.
- Editing the triggers on a Realtime data source registration.
- Example: Checking the box for Track Updates when previously only Track Creates was selected.
This change set only needs to include the following components.
| Component Type | Name | Required For |
|---|---|---|
| Apex Class | eOne_Master_Tests1 | All |
| Apex Trigger | eOneSC_RTDS1<SFobject>_I2 | Realtime |
| Apex Trigger | eOneSC_RTDS1<SFobject>_U2 | Realtime |
- The master test class is always required.
- The Apex trigger is only required if it was a newly tracked action, object or field.
Troubleshooting
-
Error Message: ‘Allow Outbound Change Set from Production To Sandbox‘
- When deploying the change set, if you see the above error revisit the Enable Salesforce Deployments step.
-
If Realtime data sources are not running, you can refer to this help article Troubleshooting Realtime data sources.
If you have any other issues, please reach out to our support team at support@eonesolutions.com.
