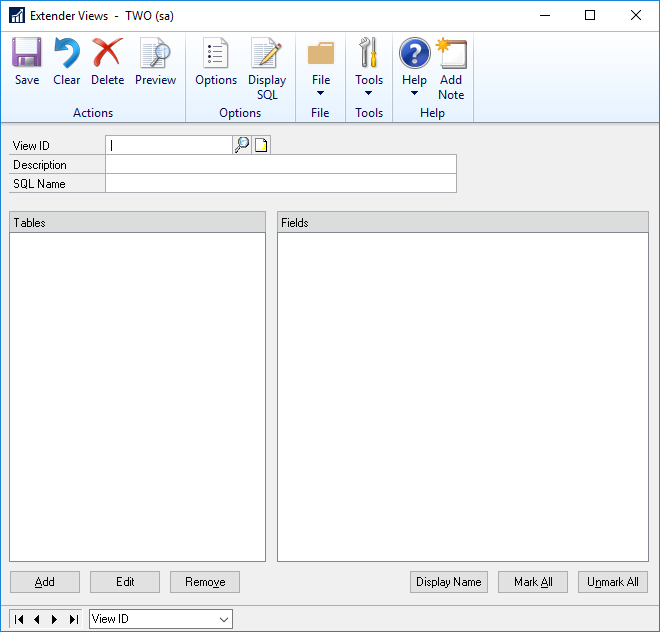
Use the Extender Views window to define new Views.

|
You can create and edit Views only when logged in as a user that has the SQL server role of sysadmin or the database role of db_owner.
|
To add a new View:
| 1. | Open the Extender window (Microsoft Dynamics GP >> Tools >> Extender >> Extender). |
| i. | Expand the Solution that the view is to be added too. |
| ii. | Select Views from within the solution. |
| i. | Select the Solution that the view is to be added too. |
| ii. | Click the drop down arrow next to the New button. |
| 3. | Enter a View ID and Description for the View. |
| 4. | Enter a SQL Name of the view. This is the name that will be used when the SQL View is created. |
| 5. | Select the Primary Table |
| 6. | Select additional tables. |
| 7. | Select fields to include in the view. |
| 8. | Click the Display Name button to change the display name of the views fields. |
| 9. | Click on the Save button. |
To select the Primary Table:
| 1. | Click on the Add button. |
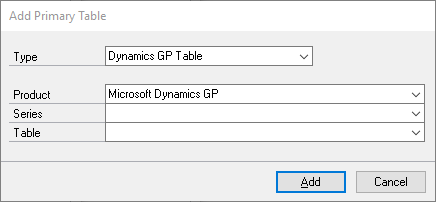
| • | If the Type is Microsoft Dynamics GP Table, select the Product, Series and Table. |
| • | If the Type is Extender Window, select the Window ID. |
| • | If the Type is Extender Form, select the Form ID. |
| 3. | Click on the Add button. |
To select an additional table:
| 1. | Click on the Add button. |
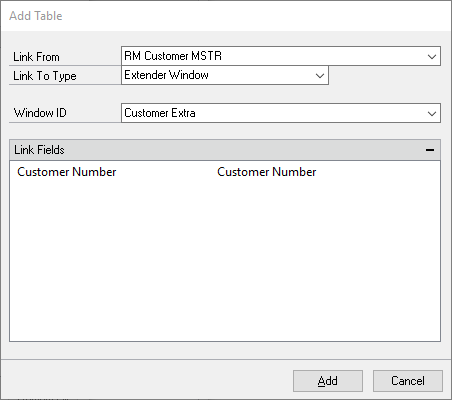
| 2. | Select the table already selected to link the additional table to. |
| 3. | Select the Link To Type: |
| • | If the Type is Microsoft Dynamics GP Table, select the Product, Series and Table. |
| • | If the Type is Extender Window, select the Window ID. |
| • | If the Type is Extender Form, Extender Detail Form or extenders Linked Form, select the Form ID. |
| 5. | Click on the Add button. |
To select a link field:
| 1. | Click on the Add  button above the Link Fields list. button above the Link Fields list. |
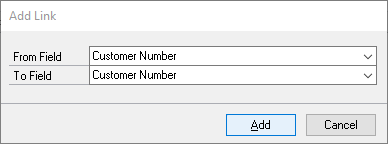
| 2. | Select the Link From Field. |
| 3. | Select the Link To Field. |
| 4. | Click on the Add button. |
|
The linking of two fields always uses a Left Outer join.
|
To remove a link field:
| 1. | Select the link that you want to remove from the Link Fields list. |
| 2. | Click on the Remove  button above the Link Fields list. button above the Link Fields list. |
To change the display name:
| 1. | Click the Display Name button. |
| 2. | Change the display name of any of the fields in the view by changing the name in the SQL View Display name column. |
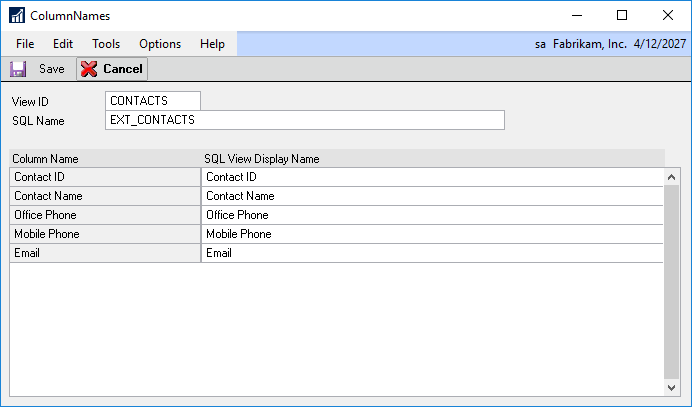
| 3. | Click Save to save the file names. |