SmartConnect allows the retrieval of data from events triggered inside Microsoft Dynamics CRM. This is achieved by first specifying which fields and related fields will be available during an event, and then registering a map against a CRM event which uses the event data to call SmartConnect and run the registered map.
To create a Dynamics CRM real time data source:
| 1. | Open the SmartConnect real time data sources window. Go to Map >> Real Time Data Sources. |
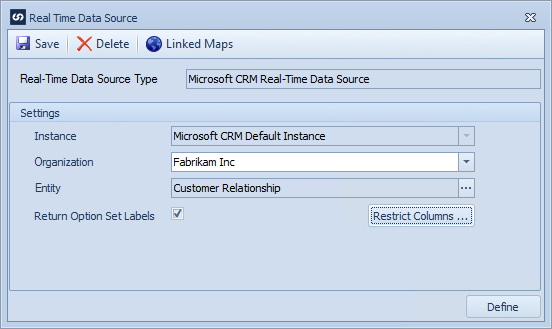
| 2. | Select Microsoft CRM Real Time Data Source as the real time data source type. |
| 3. | Double click the data source to be edited or select the Add button on the toolbar to create a new data source. |
| 4. | Select the required organization. |
| 5. | Select the CRM entity to trigger the real time data source. |
| 6. | If option set values in the query should be returned as description strings instead of an integer value check the Return Option Set Labels checkbox. |
| 7. | If more than just the base selected table is required for the SmartConnect integration, select the Define button at the bottom of the window to access Query Builder and define the required query. |
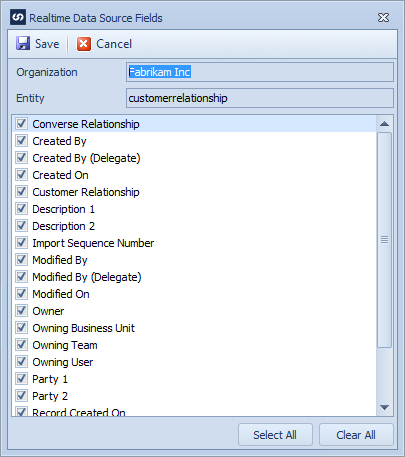
| 8. | If only changes to specific fields should trigger this real time data source select the restrict columns button to select the required fields. |

| 9. | Select OK to save the data source. |

To add a Dynamics CRM real time data source to a map:
| 1. | Select create or select the Maps Quick Link and double click on the map to be edited. |
| 2. | If a new map enter the map id and description. |
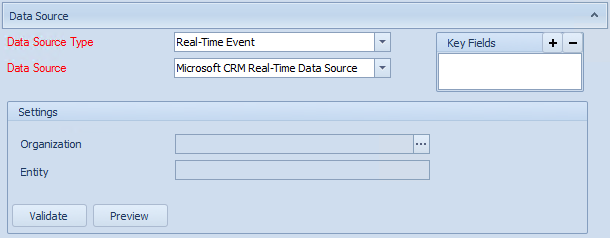
| 3. | Select the Data Source button on the map toolbar. |
| 4. | Select Real Time Event as the data source type. |
| 5. | Select Microsoft CRM Real Time Data Source as the Data Source. |
| 6. | Use the lookup to select the required organization / entity combination. Note: the real time data must already have been created using the steps above. |
| 7. | To preview the columns that would be returned by this data source select the Preview button on the toolbar. |
| 8. | To validate the query select the Validate button on the toolbar. |
| 9. | Select OK to save the data source. |

To register a Dynamics CRM real time data source:
| 1. | Open Map >> Setup, or select the Maps Quick Link and double click on the map to be edited. |
| 2. | If not already selected select the map to be registered. |
| 3. | Select the Register button on the map toolbar to open the Real Time Map List window. All maps linked the real time data source used in this map will be displayed. |
| 4. | Select the map(s) and event(s) that should trigger this real time data source. |
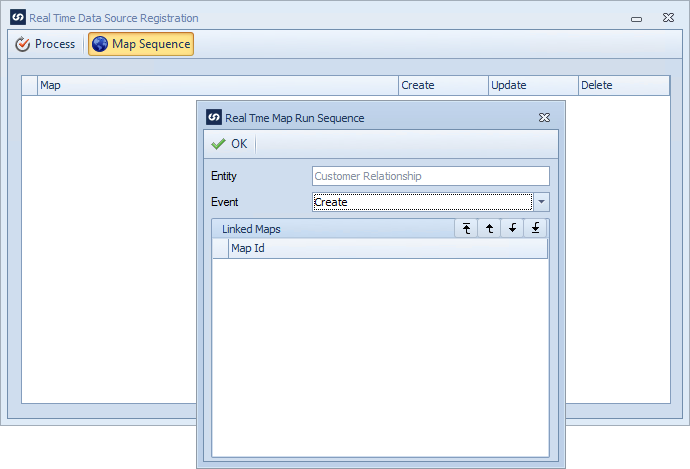
| 5. | If more than one map is linked to this real time data source, and the order the maps are required to run is important, select the Map Sequence button on the toolbar. This will open the Real Time Registration window and allow the order of maps to be specified. Specify the required map order and select OK to close the window. Note: maps must be selected in the real time map list window before they will appear in the real time registration window. |
| 6. | Select Process to update your changes. This will save your changes in SmartConnect and make the required updates to CRM. Note: a user must be a deployment manager within Dynamics CRM in order to register a real time data source. |


