In order for a web service to be used as a data source in SmartConnect, the web service must first be set up through Data Source Setup.
To set up a web service data source:
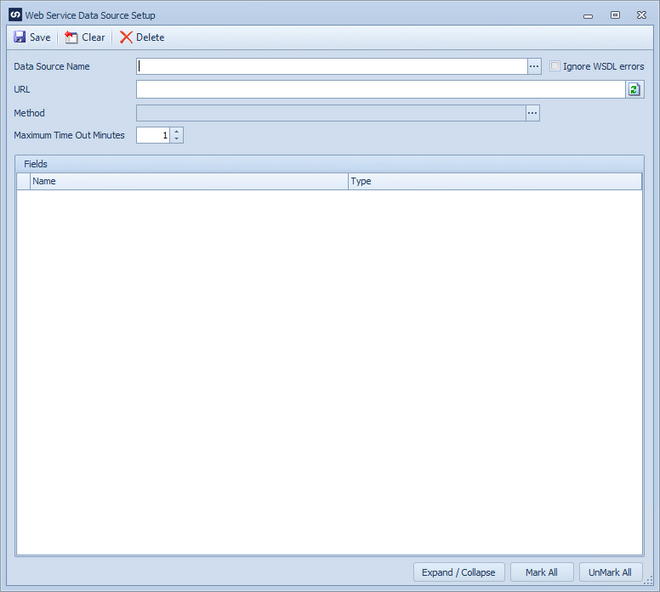
| 1. | Open the data source setup window by selecting Data Source Setup on the Maintenance ribbon tab |
| 2. | If the web service connector temporary file directory has not been defined the user will receive a message and will need to set up the connector before proceeding. |
| 3. | Enter a name for the web service data source. Names must be unique. |
| 4. | Enter the url for the web service. |
| 5. | Select the refresh button  to connect to the service and download the available methods. to connect to the service and download the available methods. |
| 6. | In some instances if not all classes or types are defined by the web service WSDL an error may be returned. Selecting the Ignore WSDL errors checkbox and then re-selecting the refresh button will in most cases bypass compilation errors and return the available methods. |
| 7. | Use the lookup to select the required method from the web service. |
| 8. | The data/class(es) returned from the web service will then be displayed in the fields window. Selecting + in the grid header will expand all items in the field list. Selecting - will minimize all items in the list. |
| 9. | Select the fields/data items to be returned in the data source. Select the Mark All button to automatically select all the fields, select the UnMark All button to automatically de-select all fields. |
| 10. | Select Save to Save the setup and clear the window. |
Notes:
| • | If a field or data type returned by the service is a derived type that may be more than one type, the field type will be shown in blue. The correct derived type may then be selected. Once selected the field for the selected type will be displayed. |
| • | SmartConnect does not allow cyclical references within web service data sources. |
| • | SmartConnect does not allow for a return type of System.Data.DataTable. The return must be a single data type or an object defined in the web service. |