SmartView 2018
Installation
To install SmartView External:
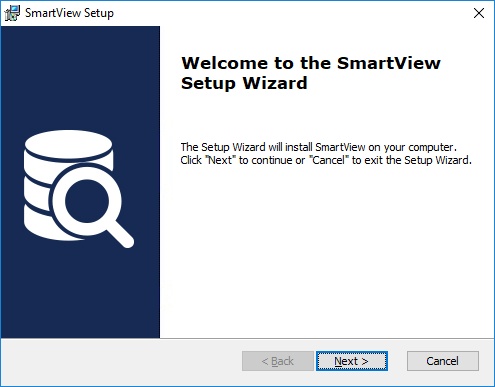
| 1. | Run the setup executable, SmartViewWinClient.msi, which will start the SmartView External installation. |
| 2. | Click on the Next button to continue. |
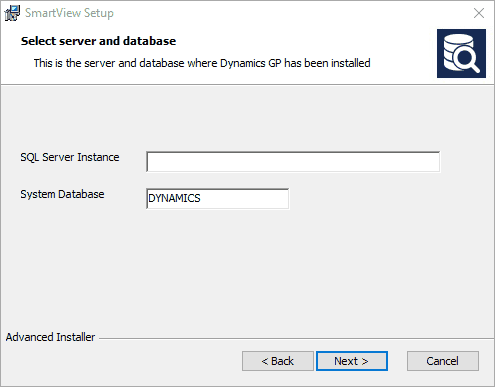
| 3. | Enter in the SQL Server Instance of the SQL Server where the Microsoft Dynamics GP databases are stored. Enter the System Database name. It will default to DYNAMICS. Click Next. |
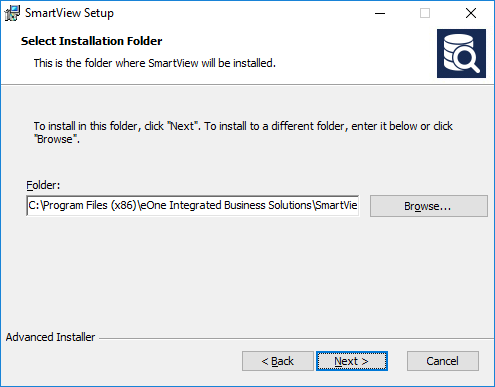
| 4. | Select the location where you would like SmartView installed and click Next. |
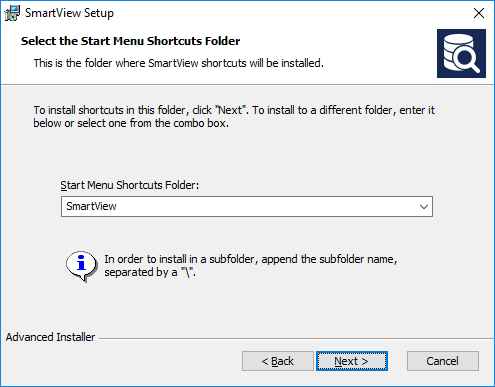
| 5. | Select the Start Menu Shortcut Folder to add SmartView External too. Click Next. |
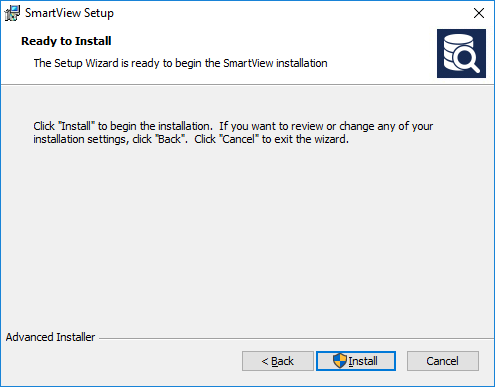
| 6. | Click on the Install button to begin the installation. |
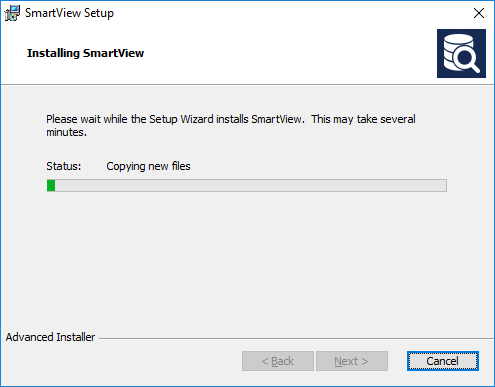
| 7. | The SmartView External Installation will run. It may take a few minutes for this to complete. |
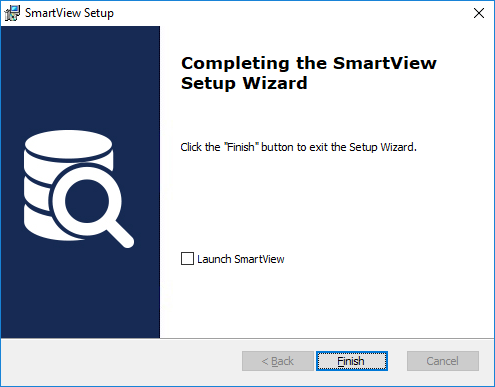
| 8. | Click on the Finish button to complete the installation. |