
In this article, we’ll take a deeper look at navigating the Azure Data Lake within Popdock and how to set things up when you don’t want to see all your history.
Similarly to our previous article, we’ll use a record from the Aaron Fitz company that has already made the transition from Dynamics GP to Business Central.
Looking inside your Azure Data Lake
Since we’ve already set up our Azure Data Lake, let’s take a look inside it.
In Popdock, under “Actions,” click on “Edit settings.”
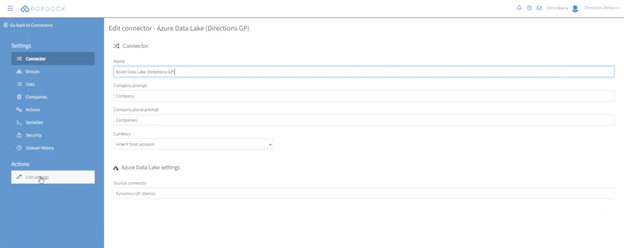
When we access it from settings, it’s simple to hook into:
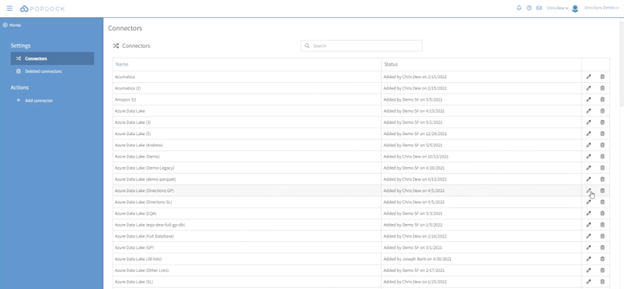
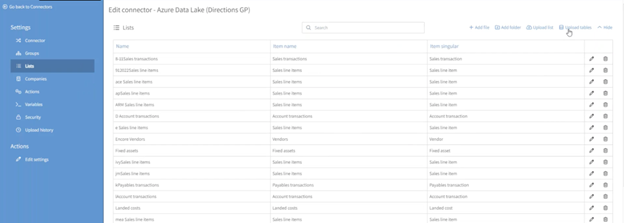
To access the container settings, use the pencil editing tool located on the left side of the “Azure Data Lake (Directions GP)” line.
Within this box, there’s a section dedicated to containers, which allows you to organize and store different pieces of data. In this case, we’ll be using the container named “demo” to store the data.
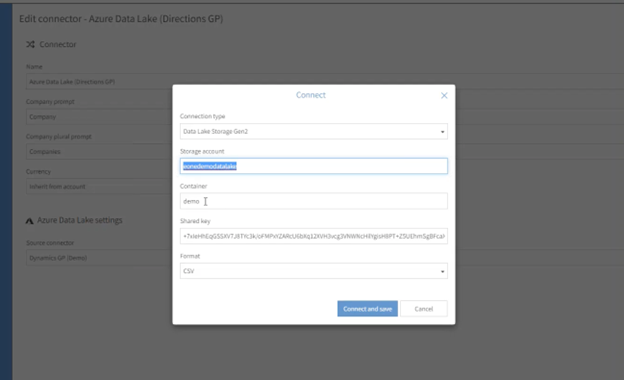
This box also includes the shared key and the format we are using, which in this case is CSV. The format of the data is important because it determines how the data will be structured when it is transferred to the Azure Data Lake. By using a standardized format like CSV, we can ensure that the data will be readable and usable in a variety of applications.
So, how does this make your life easier? By having the data stored in a standard format and in one central location, you can easily access and manage it. For example, if you need to share this data with other team members or use it in other applications, you can simply pull it from the Azure Data Lake without having to worry about compatibility issues or searching through multiple sources.
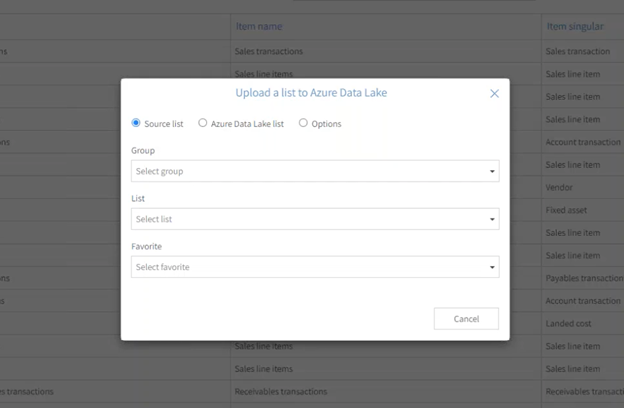
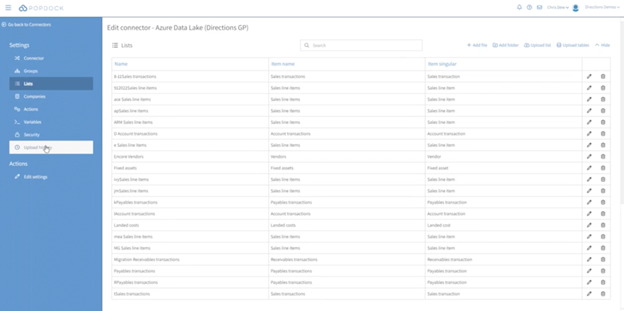
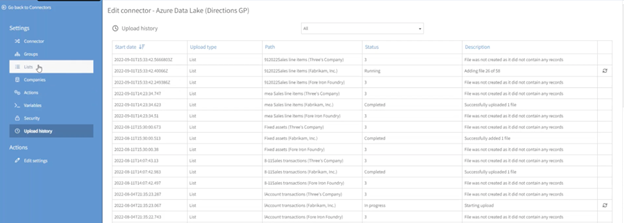
To upload lists to the Azure Data Lake, simply click on “Lists” and then “Upload list.” From there, you can choose which lists you want to upload and customize the settings to meet your specific needs.
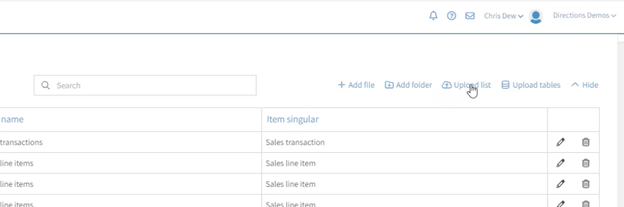
For instance, if you only require specific data such as account transaction history, sales line-item history, or purchase history, you can choose to move only those lists. However, if you need to move all data, we have made provisions for that too.

This is hooked directly to the Dynamics GP connector, which already offers numerous options. For instance, you can move sales line items. This is possible by selecting from the “List” section.
The key takeaway is that you can move any data you need, including complex sales line items lists with hundreds of columns. However, you may not need all those columns, and some of them you may never use again. With Popdock, you have the flexibility to select only the data you need, even if you have decades of GP data to sift through. You can save your favorite configurations and create custom views that show only the essential fields you need.
In addition to the default view, you can select different timeframes to include in your data. This feature allows you to narrow down your data to specific time periods and avoid storing unnecessary information.
If you only require a subset of data, for example, 30 fields out of 400, you can create a custom view that only includes those fields. This method of customizing your data saves time and helps you focus on the data that matters the most.
These are just a few examples of the many ways Popdock can help you save time and streamline your data management processes.
Chunking: Moving smaller chunks of data
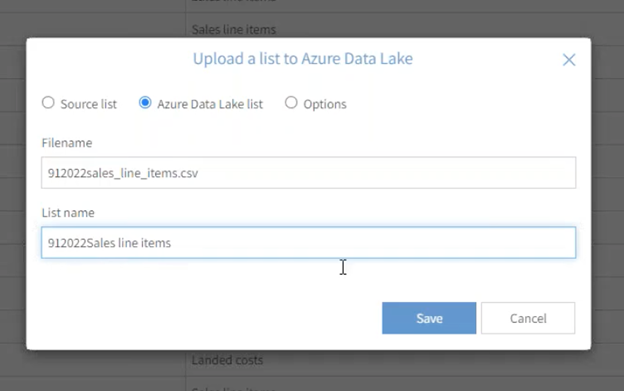
In this example, we have selected the “Azure Data Lake list” as the destination for our data, specified the file name and list name, and then clicked on the “Save” button to initiate the data transfer.
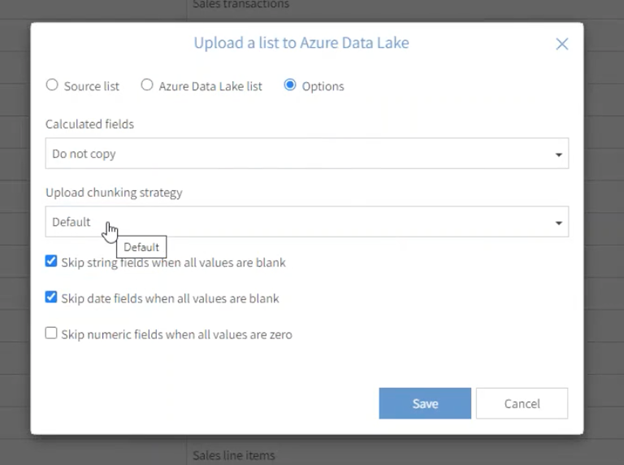
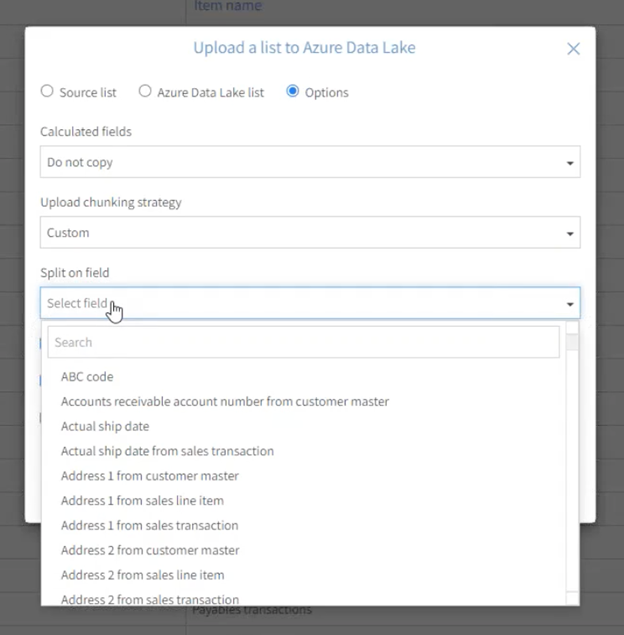
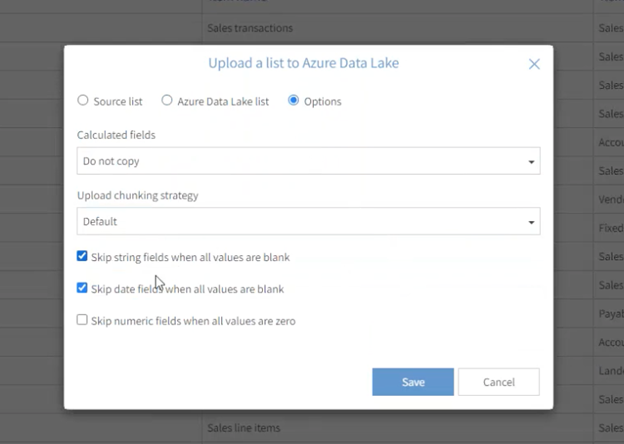
In the next box, we provide you with several options, but we will mainly focus on the “Upload chunking strategy” section.
The “Default” option is designed to optimize moving the data in an efficient manner. If you have a large amount of data, such as 10 million transactions in your GP sales line-item history, we want to ensure that it does not overload your SQL server when we attempt to request all of them. Therefore, we break down the data into smaller chunks at a time, which is known as “chunking.”
Custom option
However, you still have the capability of choosing a custom method that would allow you to pick specific fields for smaller chunks of data. This can be helpful if you need certain pieces of information and don’t want to retrieve unnecessary data. We can then put all the smaller chunks together for you to create a complete dataset.

But for this example, we’ll choose the “Default” setting.
Further optimization
This pop-up box also provides additional options to further optimize how the data is stored.
In the “Options” section at the top of the box, you can choose to either include or exclude certain data fields. For example, you can select or deselect the options to “Skip string fields when all values are blank,” and/or “Skip numeric fields when all values are zero.” These options are useful because they allow you to minimize the amount of data that is being stored, making it more efficient and easier to manage.
String fields
When dealing with multiple Dynamics GP tables, many string fields may be blank, taking up unnecessary storage space. By selecting the “Skip string fields when all values are blank” option, Popdock will avoid storing needless data, resulting in smaller files and reduced storage costs.
Date fields
Dynamics GP stores date fields with a blank time component, while time fields have a date of 11-1900 at 12 o’clock. Even if the field has no value, it is still stored as a meaningless, blank date. By selecting the “Skip date fields when all values are blank” option, Popdock will skip storing these unnecessary dates.
Removing all blank information
Thankfully, for both string and date fields, there is a way to remove all the blank information. That way it isn’t storing the empty fields, making the file bigger, and costing you more to store it in the data lake.
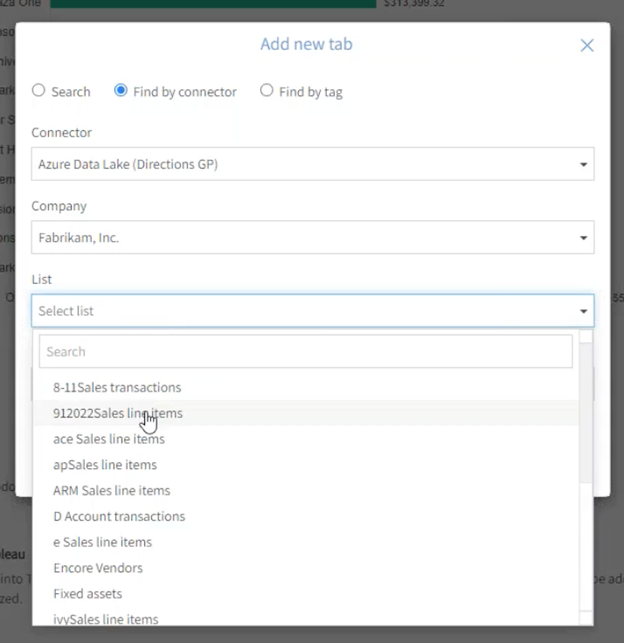
Once the data has been successfully loaded into the Azure Data Lake, we can access it through the Popdock interface. To do this, we need to click on the Popdock logo, which will take us to the home screen. From there, we can click “Add new tab” at the top of the window. This will open a new box where we can select the name of the new list.
Then, we can click “Add” to complete the process. Now, we can easily access the data we moved into the data lake, and create custom views using the Popdock interface.

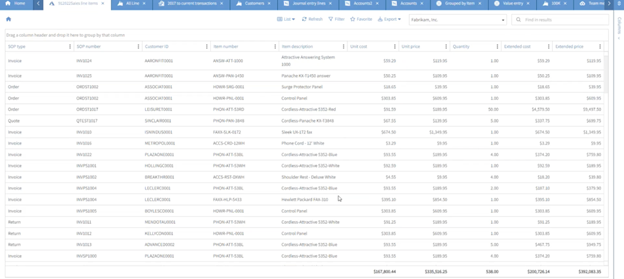
It’s important to note that accessing data from the data lake is different from accessing data directly from Dynamics GP. However, with Popdock, the data retrieved from the data lake will have the same look and feel as the data from GP.
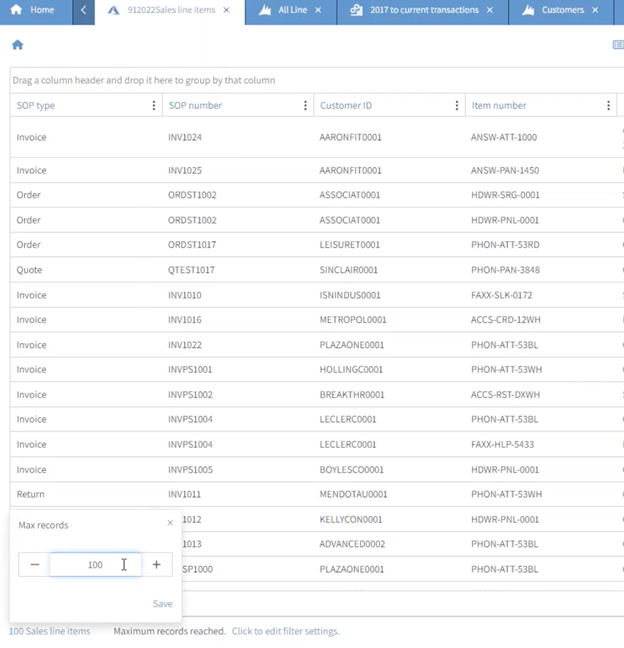
If we want to retrieve all the data from the data lake, we can change the “Max records: value from 100 to 1,000 at the bottom of the window. This will retrieve all 983 sales line items from the data lake.
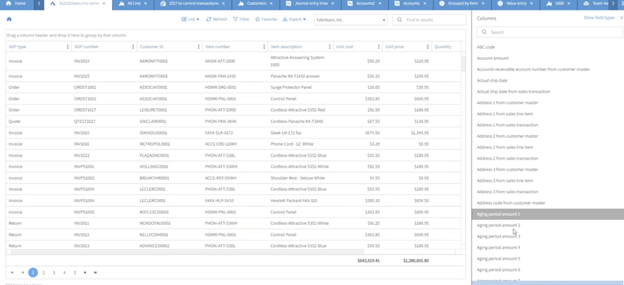
You still have the same capabilities of adding columns as you would in GP.
For example, if we want to include the aging periods, we can do that. We can also sort, filter, and group the data just as we would in GP.
By using Popdock and the Azure Data Lake, we can access all of our GP history without hitting the old SQL server.
Moving unnecessary companies
In the following example, we will demonstrate how to track the location of the data and identify which companies can be archived or removed.
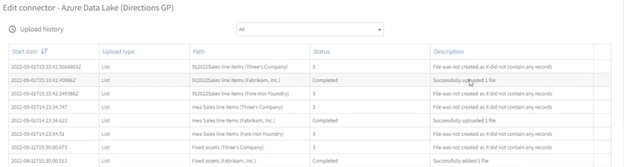
The list below shows the process for three different GP companies, which were initiated in our demo account. By monitoring the progress and location of the data, we can determine which companies have successfully transitioned to the data lake and can be archived or removed from the SQL server.
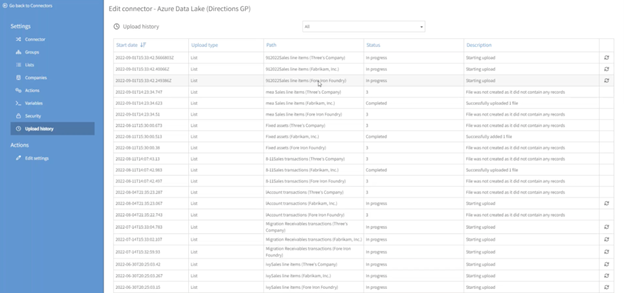
Popdock makes it easy to move as many companies as you need and choose which ones to archive. You can also easily track where the data is, and which companies can be removed.
If we hit refresh on the right side of the screen, you can see that this first company did not contain any records.

If we do the same with the third company in the list, we can see that it also doesn’t have any records.
However, the second company in the list does have records, and we can see that it has been chunked.
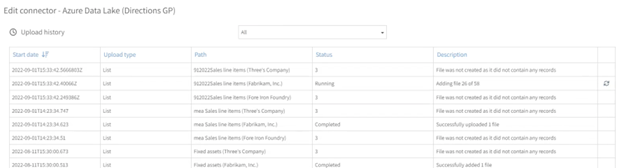
It has basically come up with 58 different chunks and is adding all of them together. This process doesn’t take long to complete.
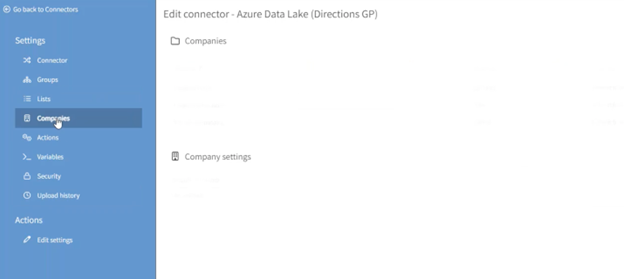
A closer look at the GP companies
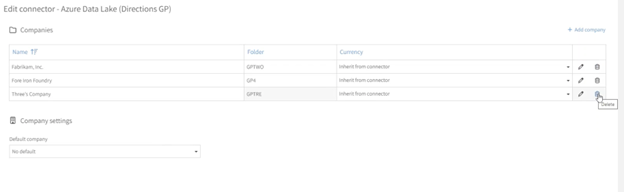
On the left-hand menu, click on “Lists” and then “Companies.” Here, we can see more details about the three companies that were pulled from GP.
If you want to delete a company and not archive it, you can easily do so. For example, if we wanted to remove “Three’s Company” and not archive it, we can simply hit the trash button on the right to delete it.
Moving the entire database
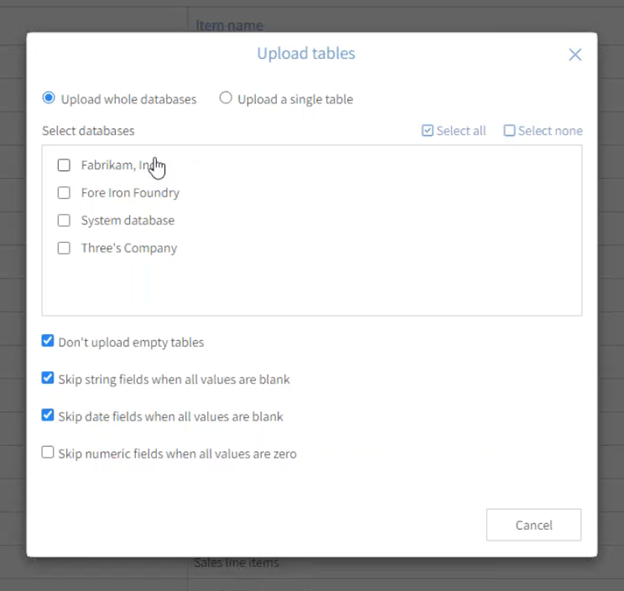
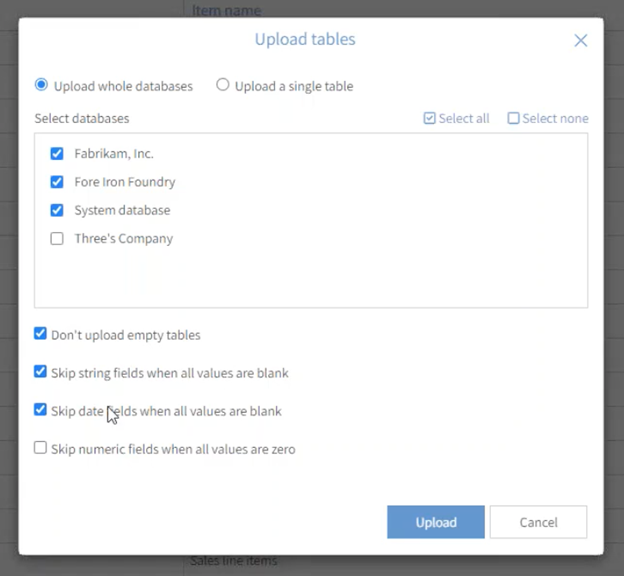
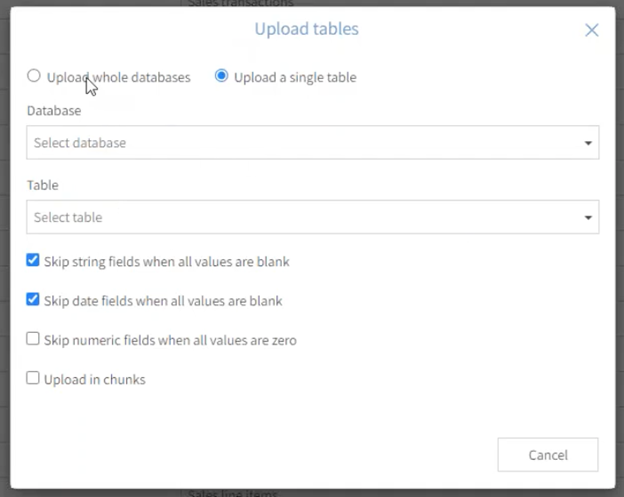
Next, we will go back to “Lists” and click on “Upload tables” at the top. Popdock not only allows you to move individual lists, but also provides the capability of moving the entire database.
Using the preset options is like having an insurance policy. They work well for most users since they provide everything you need, including the same Smart Lists, the names of other favorites, and more. By using these options, all this information is brought over to the new database with recognizable names, making it easy to identify your lists and favorites. This ensures a seamless transition to the new database.
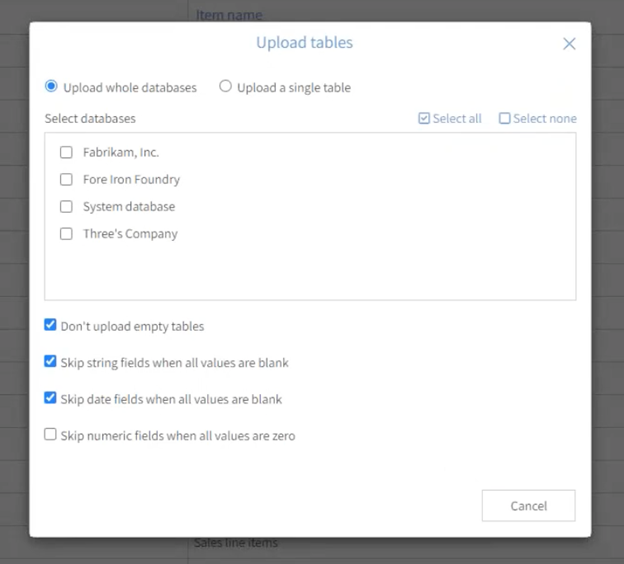
The section inside this “Upload tables” box is a little different. It allows you to move the entire Dynamics GP database to the data lake. However, selecting this option will not only archive the GP tables but also any custom tables, third-party tables, or other information included in the database. This means that all your data will be moved to the data lake, giving you a comprehensive backup.
If we were to select these three options, it would move these two companies and the Dynamics database, along with all the tables inside them.
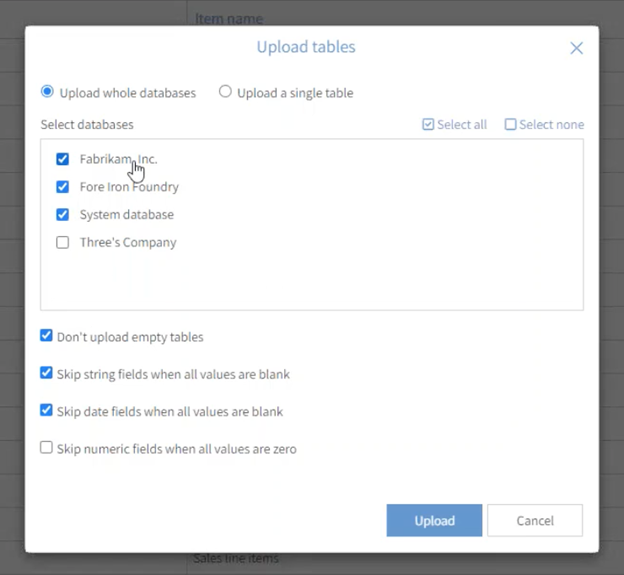
Earlier, we went over skipping string, date, and number fields, but there’s a new option available now. It gives you the ability to not upload empty tables, which is a powerful option. If you’re only using GL, AR, and AP inside of GP, you might not be using all 2,500 tables that are in there. In fact, you may have 2,400 empty files included, which is just wasted space and structure.
With this option, you have the ability to go through the tables and if there isn’t data in them, we won’t bring them over. Popdock includes helpful options to optimize this process as well.
When you are no longer using GP and everything has been migrated, you can archive it and turn off your SQL Server.
This way, you can move everything and be assured that you can access any kind of GP data in the future.
Alternatively, if you only need to move a single table, you can select similar options and do so.
Further help
In our final article on “Moving from Dynamics GP and Accessing Your Historical Data,” we will demonstrate how to access the data in your new system.
If you have further questions about anything in this article or Popdock, please contact our sales team at sales@eonesolutions.com or 888-319-3663 ext. 1. They are always eager to provide help and answers for your migration and historical data needs.