
In our previous article, we demonstrated how to access your historical data with Popdock. In this article, we will show you how to set up an Azure Data Lake when you don’t need to see all your historical data.
For this example, we’ll use the Aaron Fitz company, which has already transitioned from Dynamics GP to Business Central.
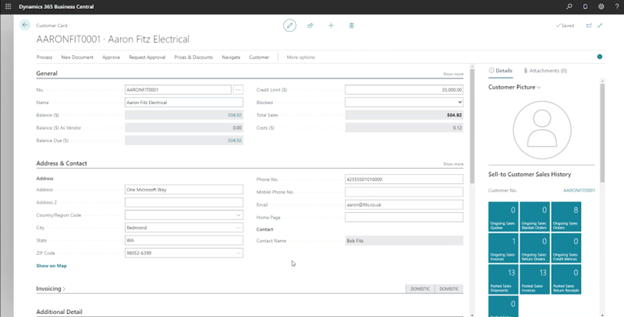
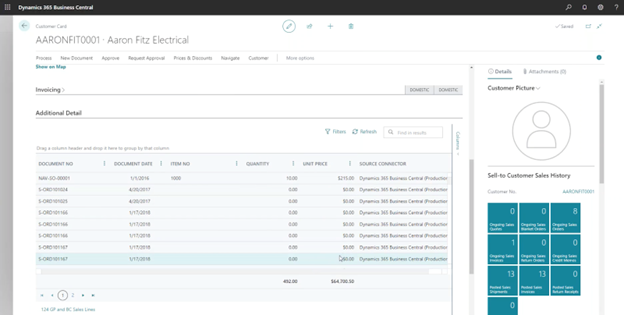
As you scroll down, you can see that Popdock is embedded.
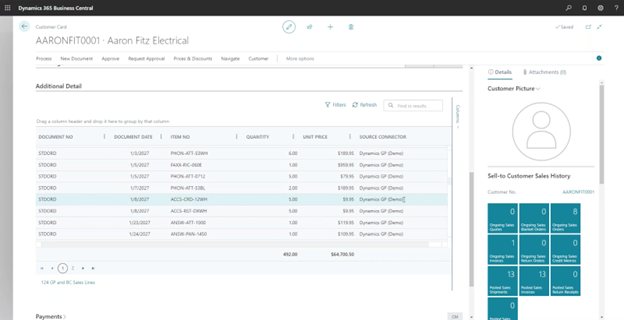
Most of the records showing up are historical, but there are a couple of records coming from the new system as well. There are 124 line items coming from Dynamics GP.
This demonstration is meant to give you an idea of how to set up an Azure Data Lake, which will be a great option for you moving forward.
We will also show you what is involved in the setup: what to select, the costs, and what you should expect.
Costs
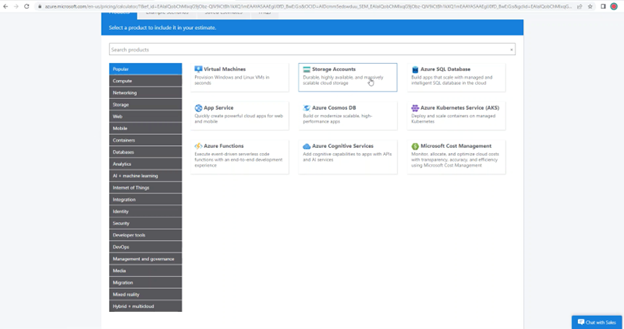
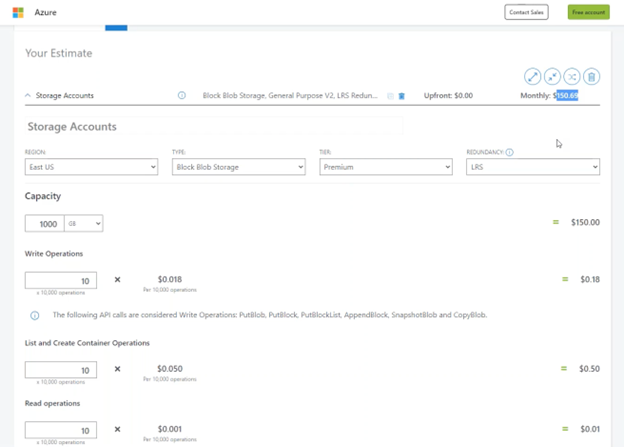
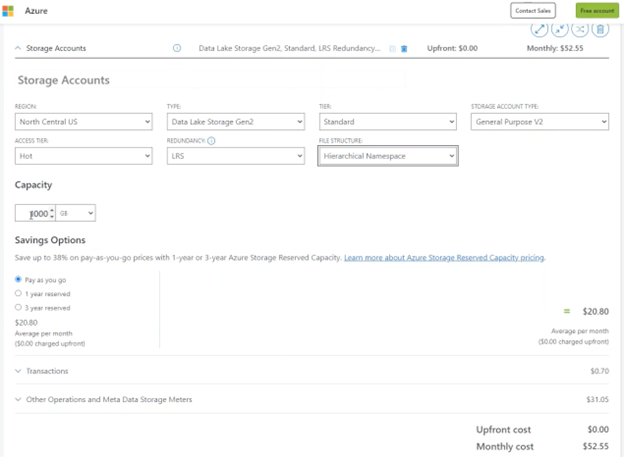
First, visit the Azure pricing calculator and select “Storage Accounts.”
If you scroll down, you will see the pricing calculator.
Pay close attention to the monthly cost number on the right-hand side because this number will change as you fill in the necessary information. Most people who have less than a terabyte of data will only pay $20 a month or less for their Azure Data Lake storage.
Region
The first field you will need to fill out is “Region”. Here you will enter where you are located.
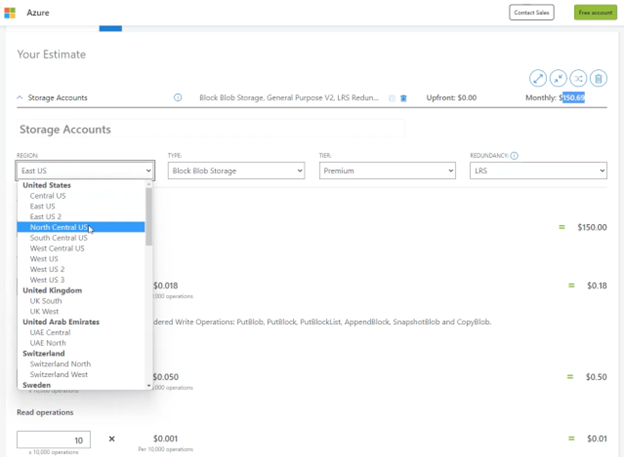
If you’re in the United States, you can choose the North Central US, as it offers the fastest performance for reading the data.
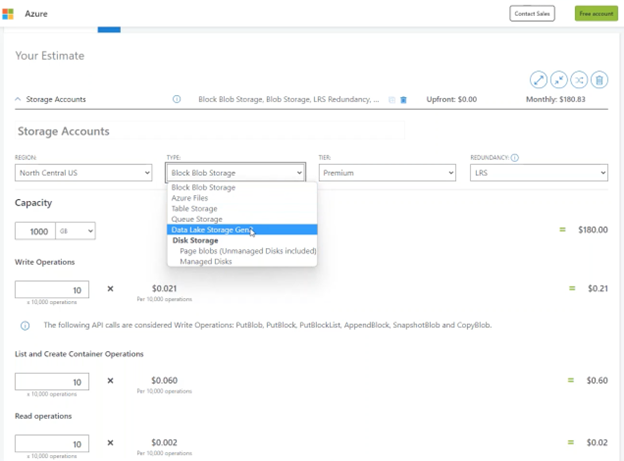
Type
We recommend choosing “Data Lake Storage Gen2” as it gives us the capability to ensure proper placement.
Tier
In the “Tier” section, you can choose either the premium or standard option. If you need less than a terabyte of storage, we recommend choosing “standard” as we haven’t seen any performance benefits by choosing “premium.” Unless you need 100 terabytes of GP data storage, you will be fine choosing the standard option.
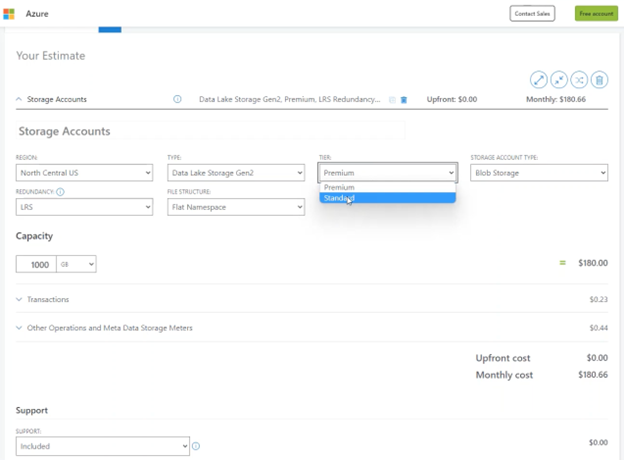
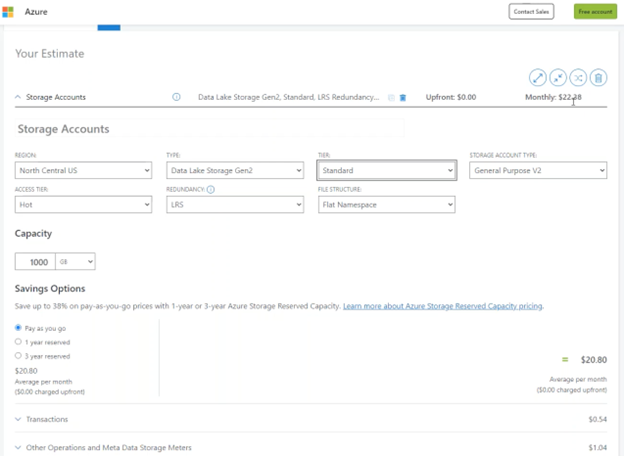
By customizing our options, we have already brought our monthly costs down from $180.66 to $22.38.
Storage account type
Under “Storage account type,” we will stick with “General Purpose V2.”
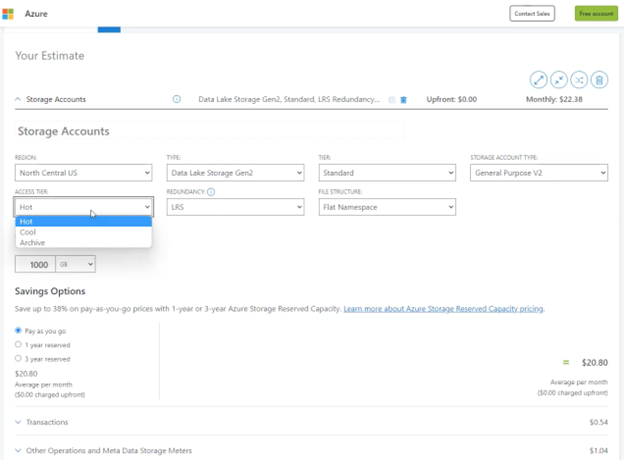
Access tier
In “Access tier,” if you select “Archive” (which offers slower storage), the price goes up $50. If you select “Cool,” the price goes up $5. We recommend “Hot” storage because it will give you the fastest access to data and everything you need for the most affordable price.
Redundancy
“Redundancy” is another area that alters the price. The LRS (locally redundant storage) option means Microsoft will store this in your Azure account at the same data warehouse. They will have a backup of it.
The only way you could potentially lose this data would be in the case of a catastrophic event affecting Microsoft’s storage facility.
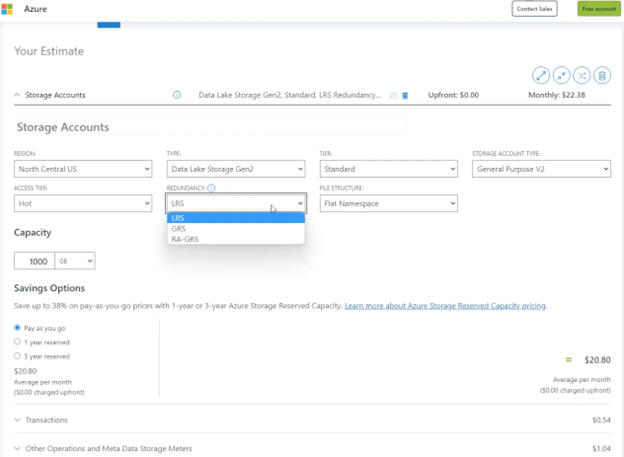
That’s why some people choose “GRS” (geo-redundant storage) instead of locally redundant storage so they can store it in another geography. However, choosing GRS doubles the price. If your data backup is stored somewhere other than the same facility, it will raise the price.
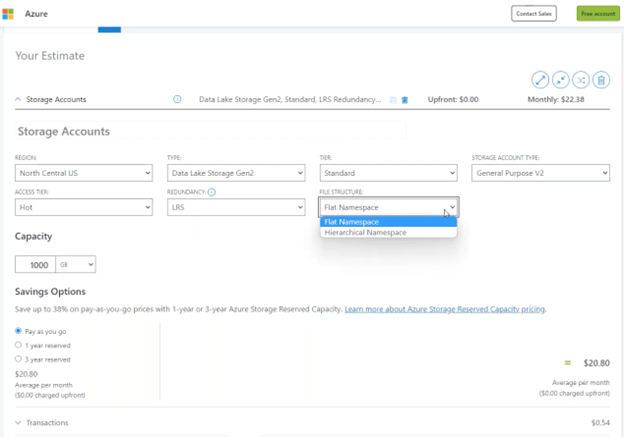
File structure
The next option that fluctuates the cost is file structure.
For this example, we will put things in multiple folders, so we need to choose “Hierarchical Namespace”, but this almost doubles the price.
“Hierarchical Namespace” allows you to place information inside organized folders instead of having an unorganized pile of loose files.
Capacity
Under “Capacity,” You can see that the default storage capacity is one terabyte per month.
However, after cleaning up unnecessary data before moving it to an Azure Data Lake, you may find that you only need 100 gigabytes of storage, which would significantly reduce the cost to $33.83 per month.

Transactions
Under the “Transactions” dropdown, you can see the “Write operations,” “Read operations,” and “Query Acceleration” options. If we focus on “Write operations” and “Read operations”, these sections give you options for thousands of transactions.
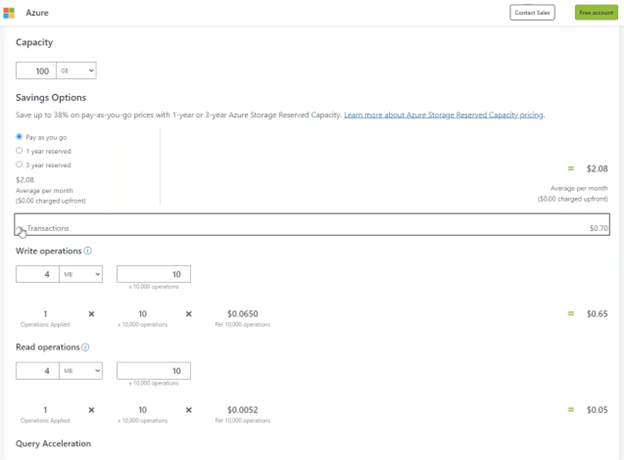
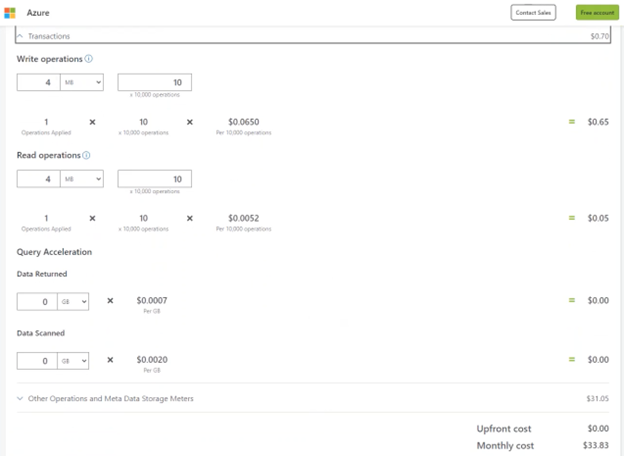
For “Write operations,” you will likely only need to perform a one-time write when moving data from Dynamics GP to the data lake, which won’t significantly impact the cost.
For “Read operations,” setting it to 10,000 times will only cost 5 cents.
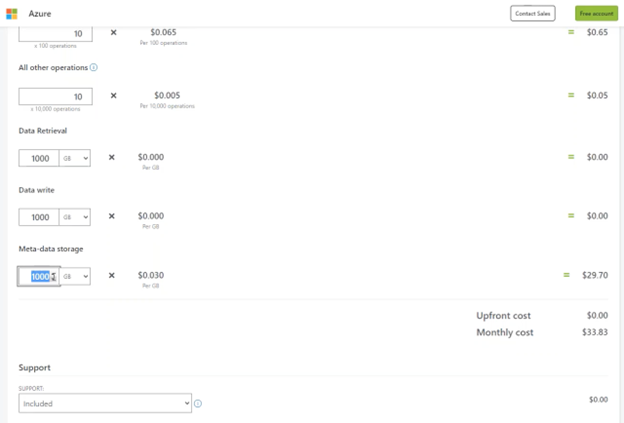
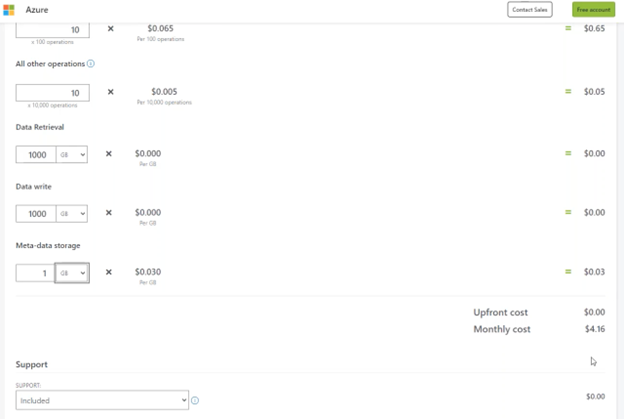
Other Operations and Meta Data Storage Meters
Under “Other Operations and Meta Data Storage Meters,” most of the fields are insignificant except for the “Meta-data storage field.” This field refers to the storage of the file structures and the folder structures. By default, it is set at 1,000 gigabytes, but you can reduce it to one gigabyte without incurring significant costs.
By adjusting the storage capacity, the monthly cost can be reduced to as low as $4.16, making it an affordable option for storing data.
Setting up your Azure account
Next, we will show you how to set this up inside Azure when you, your partner, or whoever else is setting up this account.

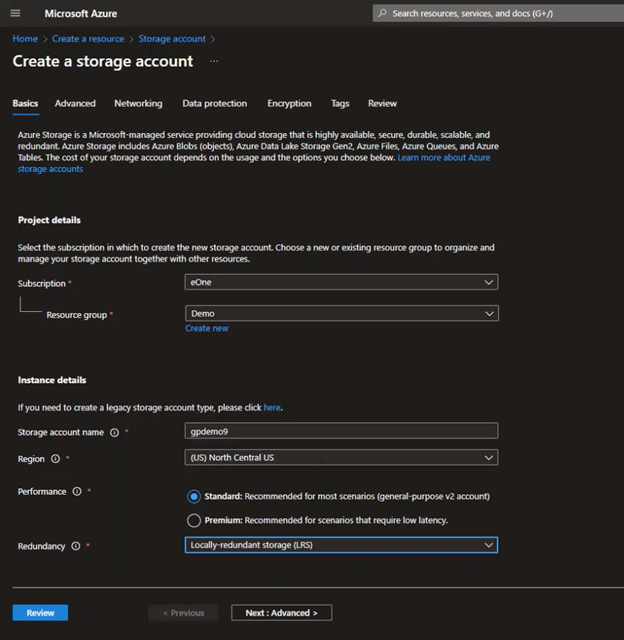
To set up your Azure account, start by giving it a name and indicating your region. We recommend choosing the North Central US region for faster access.
Next, set the performance to standard. Then, set the redundancy field to locally redundant storage (LRS), as we discussed previously.
Hit the “Next: Advanced” button at the bottom.
On the next page, click “Enable hierarchical namespace,” which will allow you to store the folder structures.
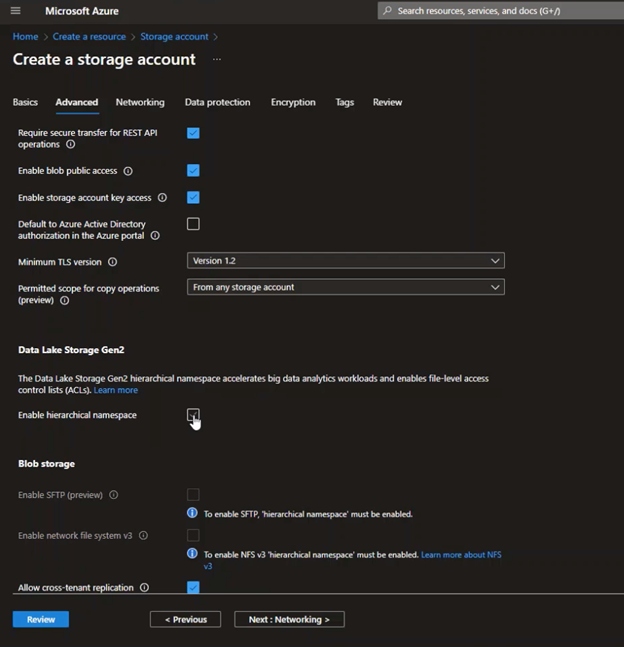
In just 30 seconds, you can have an Azure Data Lake at your disposal.
Further help
Watch this video to see a live demo of setting up an Azure Lake.
In our next article, we will demonstrate how to access and optimize your data inside the Azure Data Lake and provide a FAQ section to answer your questions.
If you have questions about anything in this article or Popdock, please contact our sales team at sales@eonesolutions.com or 888-319-3663 ext. 1. They are always eager to provide help and answers for your migration and historical data needs.