
In a scenario where you would want to target a specific market of customers and you have multiple applications storing customer data, you can use Popdock’s custom merged list to gather all those contacts together into one list and then filter them for the targeted audience that you want. For example, if you use Hubspot CRM and you use Square for your payment system, you have contacts in both systems that you may want to target. I have connected Hubspot and Square to show you how to merge the contacts from multiple applications with Popdock.
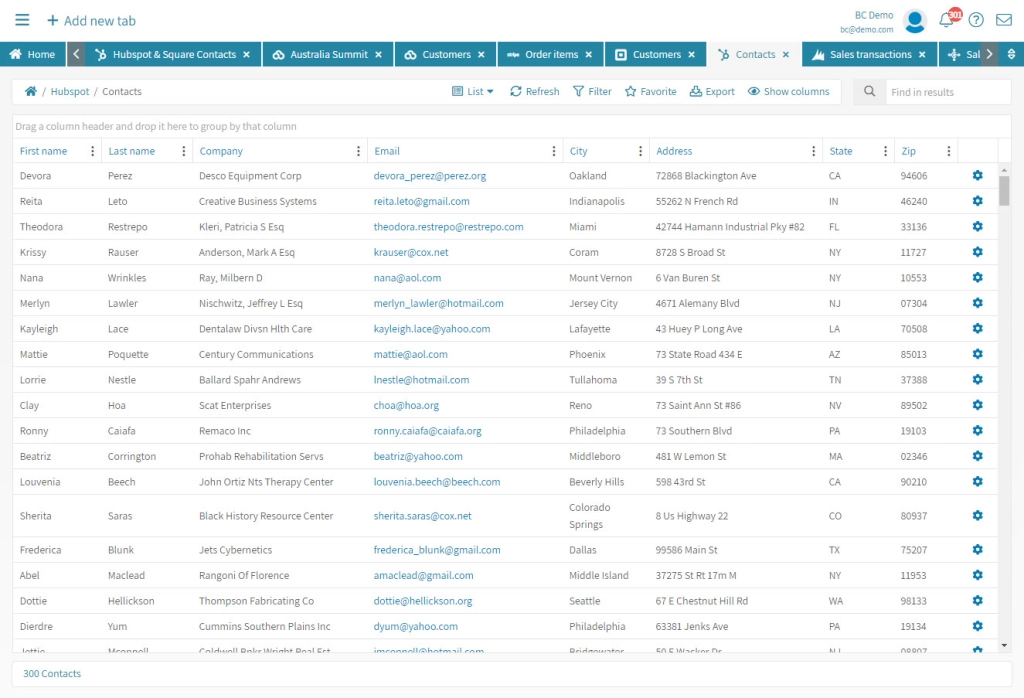
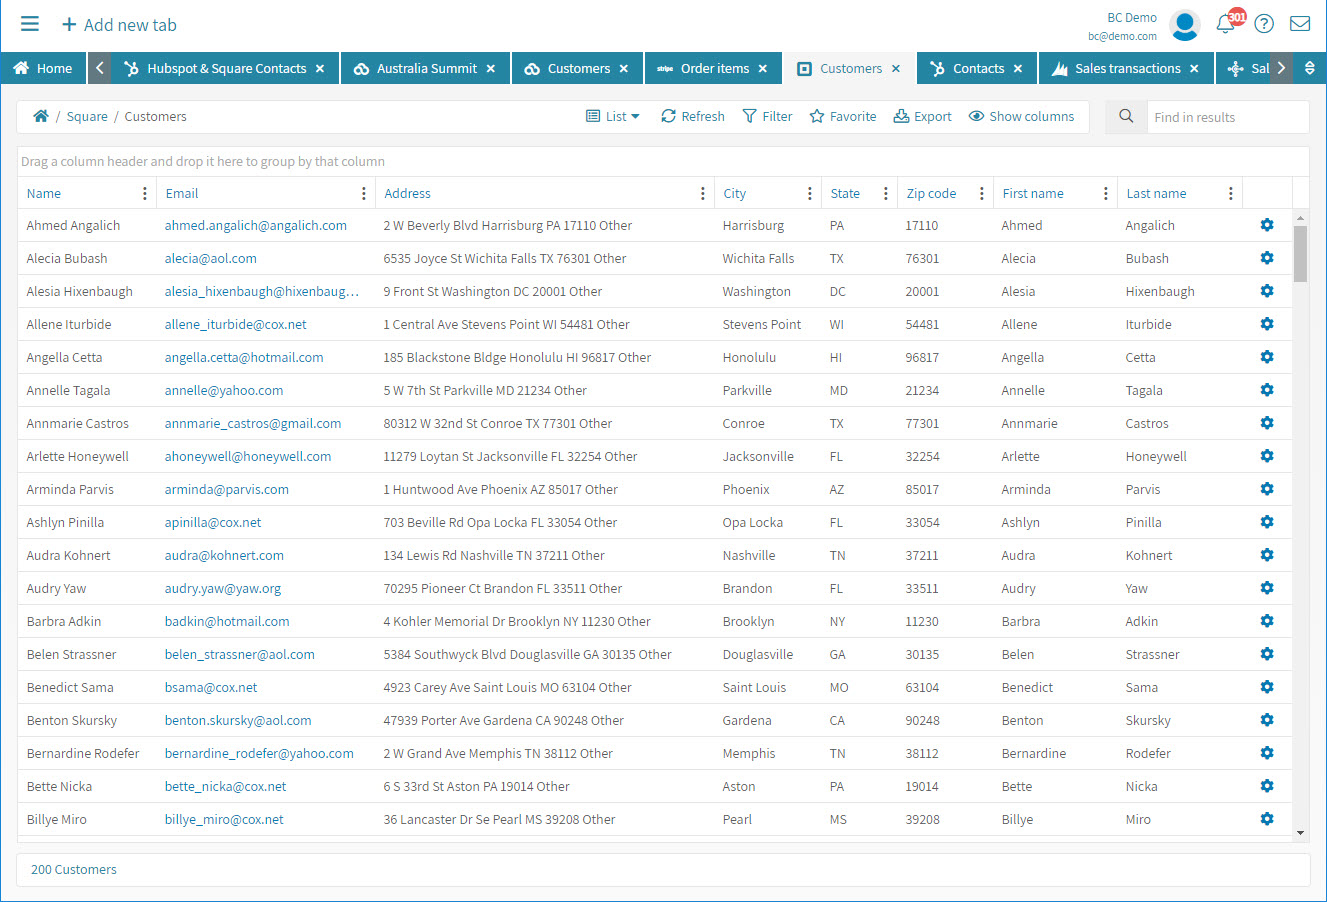
Here I am showing each of their contacts list where I have 300 contacts in Hubspot and an additional 200 in Square.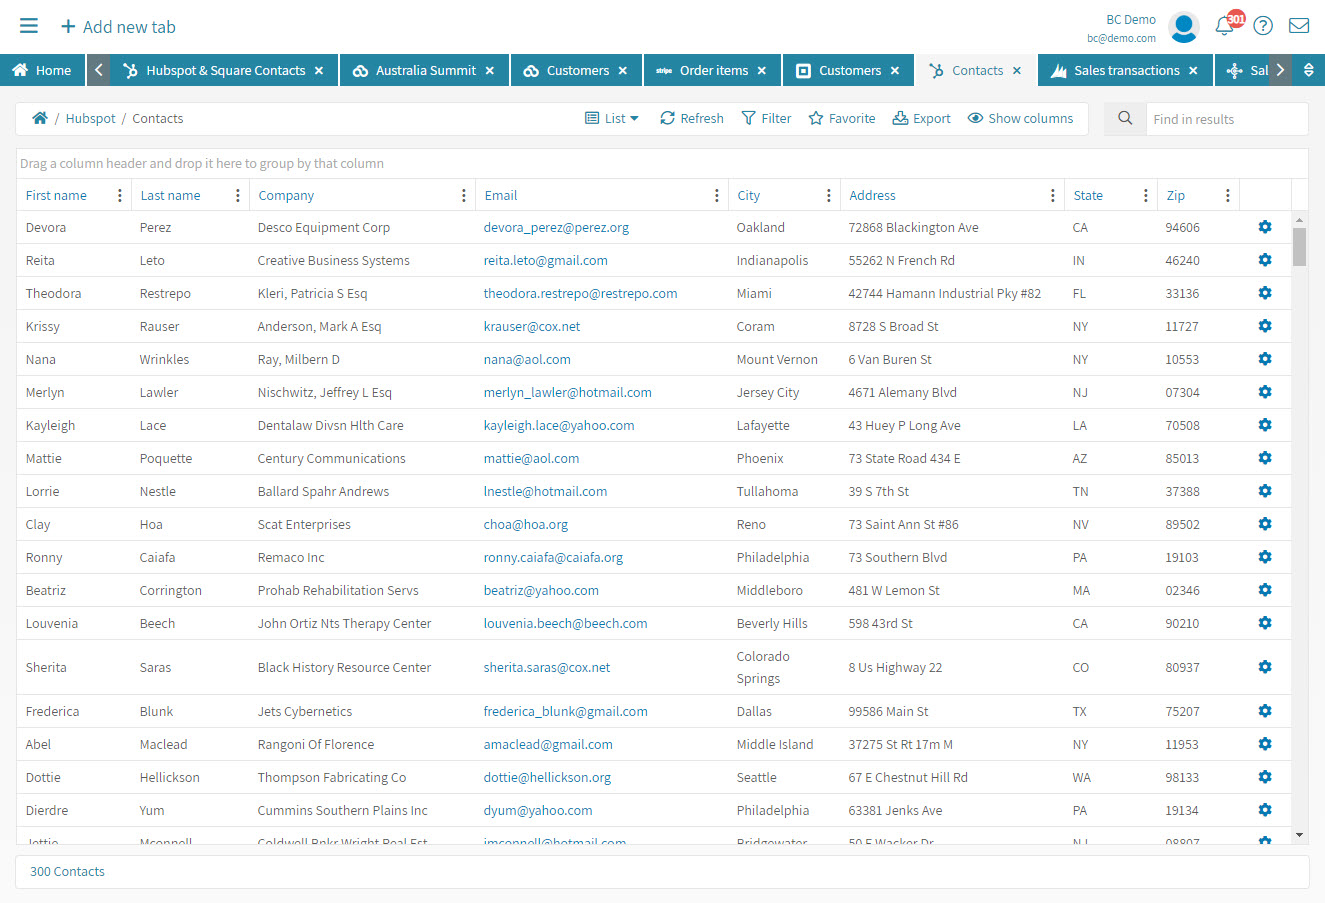
In the steps below, I will show you how to merge the list of contacts and then filter, for example, contacts in Florida that you might want to reach out to because you have training courses available at Summit in Orlando coming up. A merged list is not limited to just 2 lists. You can merge multiple, but here I use 2 lists from 2 different connectors and they have identical data fields that merge easily.
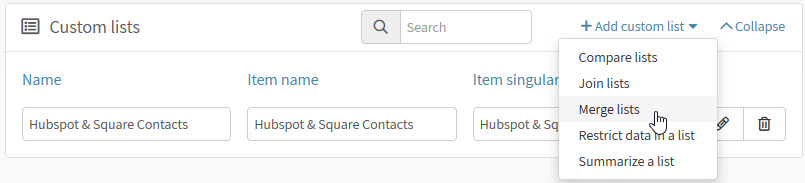
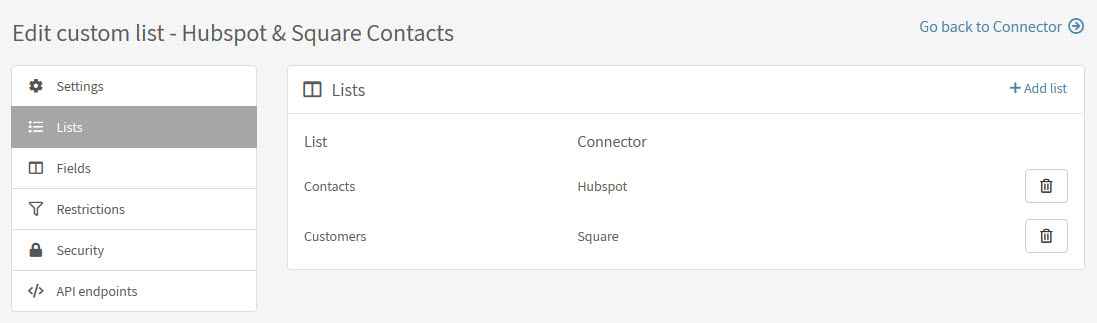
To create a custom list that merges these list together, you will first need to decide which connector you would like to create it in and go to edit that connector. Here, I just chose to put it in the Hubspot connector. After clicking the button to edit the connector, you want to go to Lists. This is where you will find the section for custom lists. Here you want to add a new merged list because we are merging data into a single list and not doing a join of data.
After you give your custom list a name, go to Lists in the left navigation to begin adding all the lists you would like to merge.
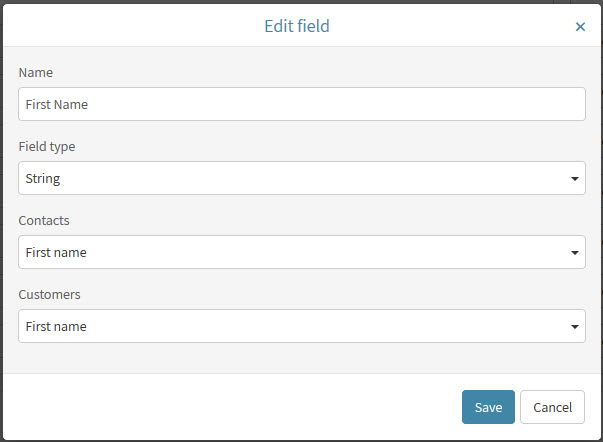
Next you will want to go to Fields in the left navigation to start adding all the fields you would like in your list. Both lists basically have the same columns so you have to add the field names you want to use and then select which field from each list matches to that field you are creating. For example, I am going to use First Name and Last Name as separate columns and each of the lists has those columns to match on for the merge of the data.
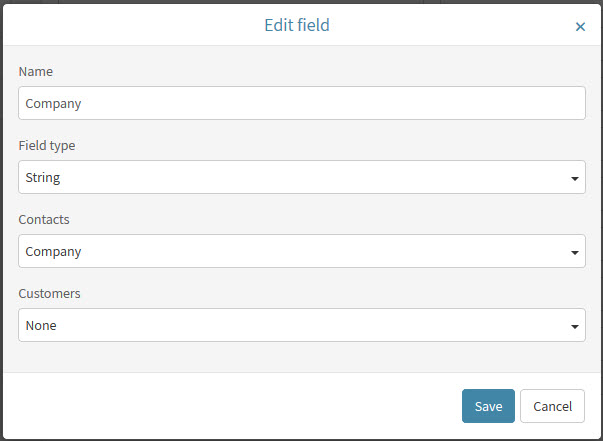
In some cases, like the Company field, it shows in the Hubspot list but not in the Square list so you can’t use this column. Instead, as shown here, I will pull in the Company from Hubspot and just not have the Company from Square so I select None from the dropdown. Also when adding each field, make sure the field type is “String”. If for some reason the field you were looking for is not set to “String” on one list then it will not appear in the dropdown.
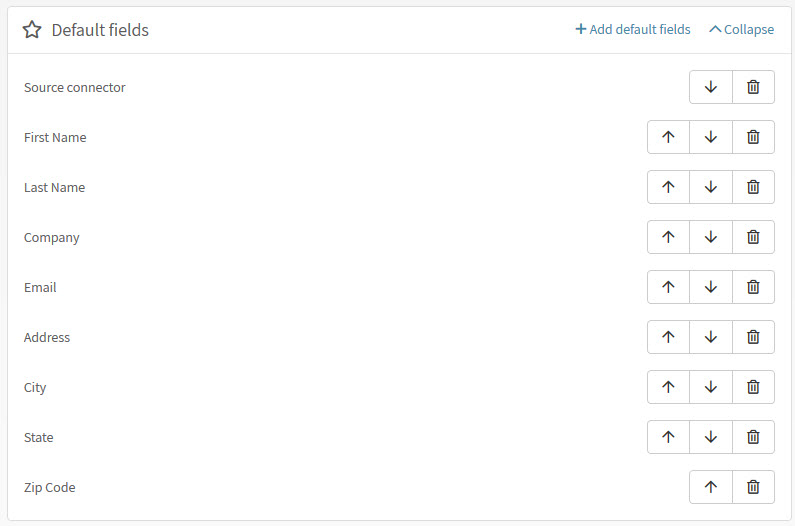
Next, you will set your default fields that you want to look for on your new list. You can also set the Source connector field to show which connector the contact was from if you required that info in the list.
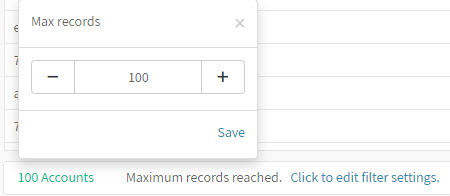
When you are finished, just return to home and add a new tab so you can choose your new custom list. When the list initially returns the data, Popdock defaults to 100 rows, so just click the Max Records count at the bottom left corner and increase that to the value so that it will show all your contacts.
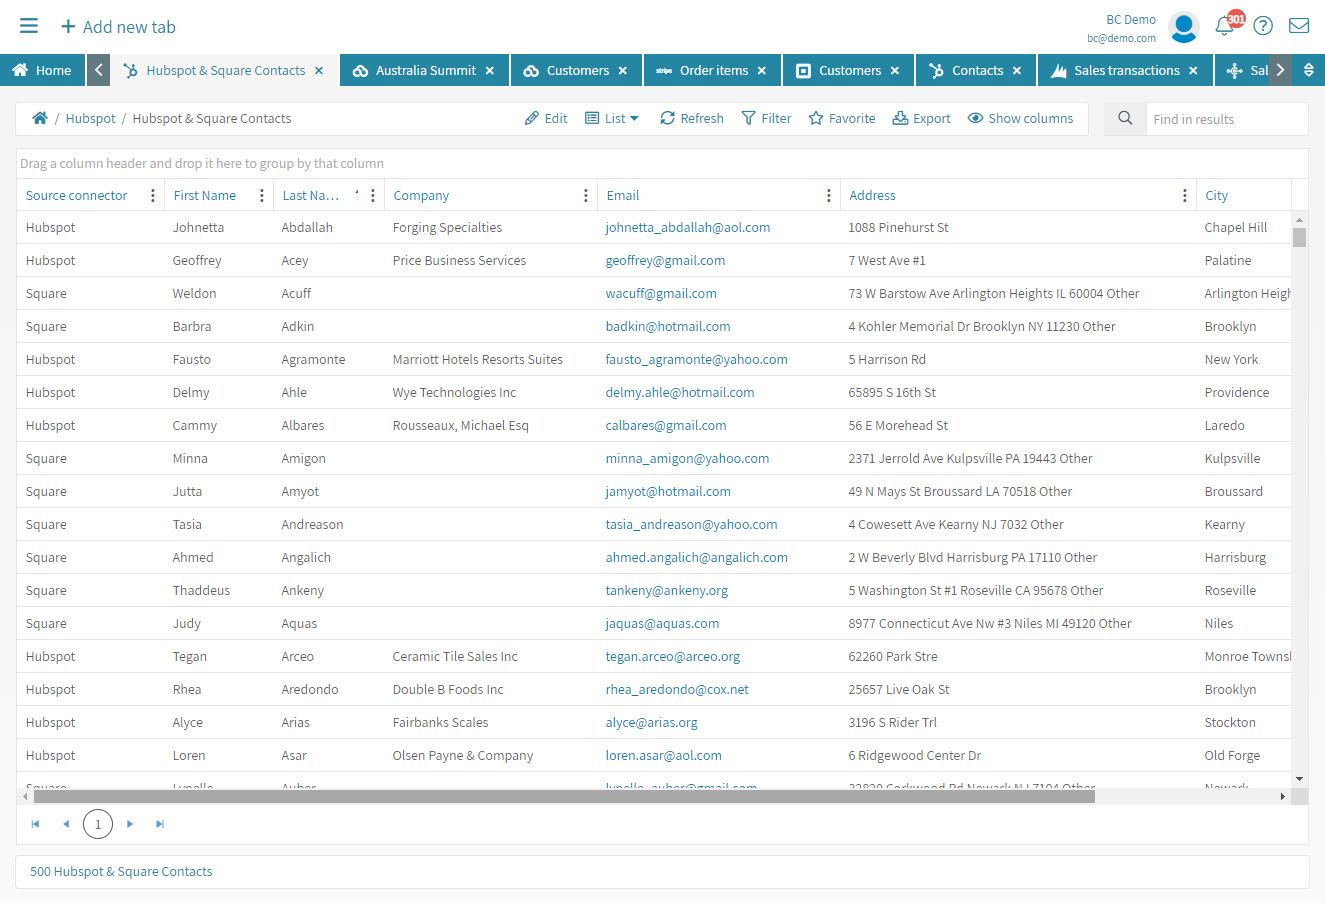
Here you see I have 500 contacts. The Source Connector is showing for the contacts from Hubspot and the contacts from Square, and you can see how Company is showing data from Hubspot contacts, but not the Square contacts.
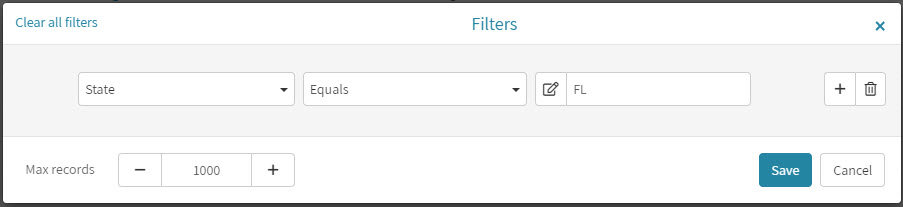
Now I can start my filtering: I will add a filter for State equals “FL”.
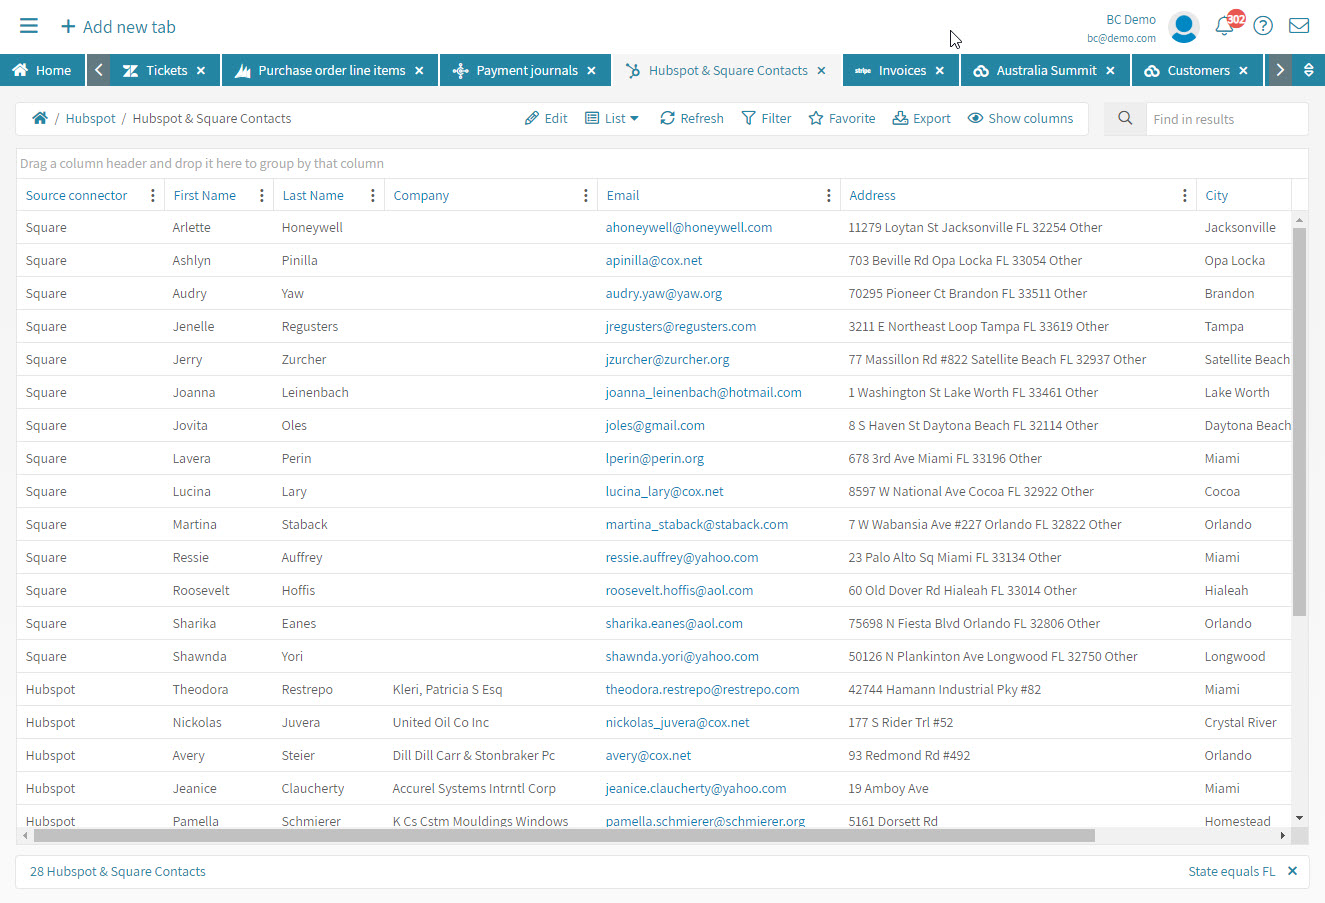
Now you have a list of contacts in Florida that you can reach out to and let them know you will be in there area with some training courses at Summit in Orlando.
I hope this article has been helpful for you. If you have any questions regarding Popdock please feel free to contact me at joseph.barb@popdock.com.