Tech Tuesday: Easily Run Multiple Maps from 1 Excel workbook
The Excel Add-in lets you replace a SmartConnect map’s data source with an Excel table, which already allows for many possibilities. A problem comes up if you want to run several different maps all from the same workbook. This functionality is pretty simple to set up and can really open up a lot of cool use cases.
A great example of using this is when running many bulk import templates when doing your initial integration. The recently released CRM Bulk Templates include 13 different CRM maps with 13 different Excel workbooks. If you combine all of these worksheets into one workbook, it’s much easier to see how each data source relates to the other.
I’m going to walk through building a single workbook to run every one of these templates quickly and easily. The CRM example I’m walking through below is included for download here.
How the Excel Add-in Works
After setting up the Excel add-in, unhide the ‘SmartConnectConfig’ worksheet.
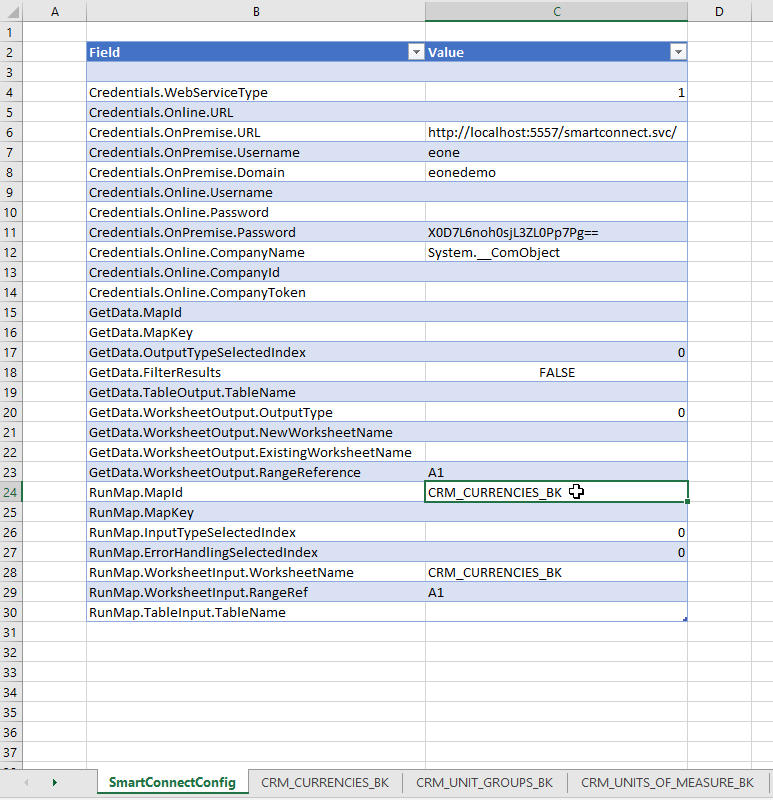
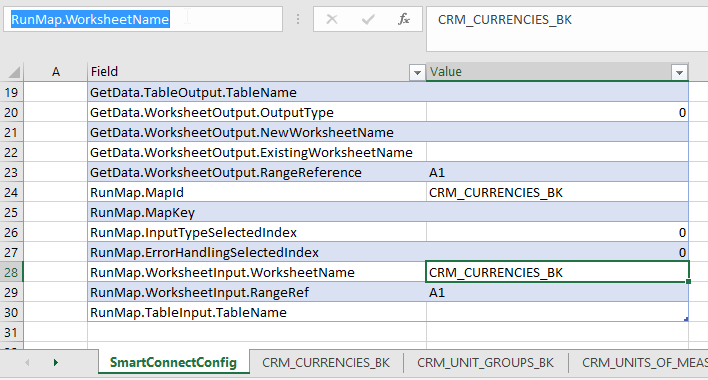
In the table, the fields ‘RunMap.MapId’ and ‘RunMap.WorksheetInput.WorksheetName’ tell the add-in what SmartConnect map to send the data to and what worksheet in the workbook the data is sitting. If we update those two fields with a formula or VBA, we can control what will happen every time we click the ‘Run Map‘ button in the ribbon. What I want is, every time I change worksheets, I want to be able to click ‘Run Map’ and the add-in will run the worksheet I am currently on.
To make the example workbook work:
- Rename all of my worksheets to the name of the SmartConnect map that worksheet’s data goes to.
- Make both of the ‘RunMap.MapId’ and ‘RunMap.WorksheetInput.WorksheetName’ cells named ranges so I can control them easily
- Add a short VBA script to run every time the worksheet is changed (it’s very simple, I promise!)
The example workbook I’m using includes all 13 maps included in the CRM Bulk Templates released today. The templates are available for download. The CRM example I’m walking through below is included for download here. Make sure to set up the add-in to point to your instance of SmartConnect!
Steps to making the workbook
Step 1: Rename Worksheets
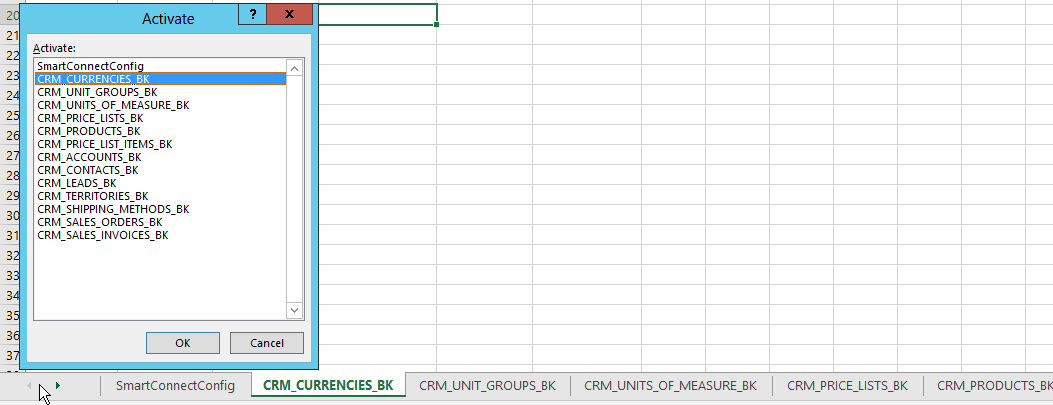
My workbook has a 13 worksheets with the same names as every one of the 13 SmartConnect maps.
TIP: If you right-click the bi-directional arrows in the bottom left, Excel will display a list of all of the worksheets.
Step 2: Create Named Ranges
On the ‘SmartConnectConfig’ worksheet, create your named ranges by clicking on the name box in the top left corner:
- in Cell C24, name this range ‘RunMap.MapId’
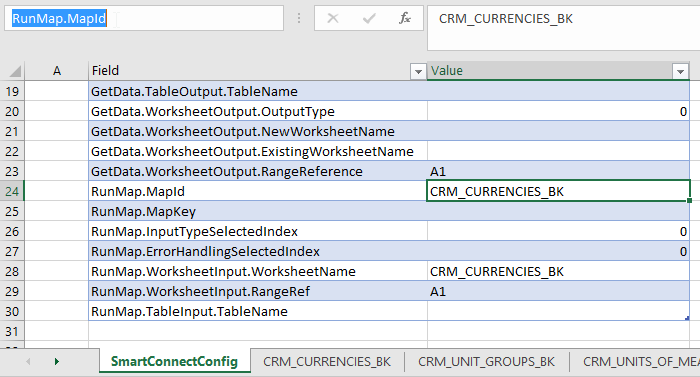
- in Cell C28, name this range ‘RunMap.WorksheetName’
Step 3: Add The VBA Event
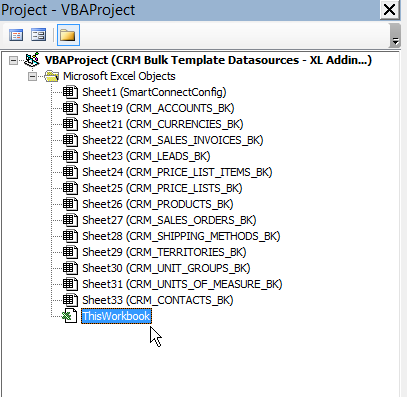
Open the editor by pressing ALT-F11. In the Project window on the right, double click the ‘ThisWorkbook’ link to open up the code window.
Copy in the following code:
Private Sub Workbook_SheetActivate(ByVal Sh As Object)
    On Error Resume Next
    Application.StatusBar = Sh.Name

    ThisWorkbook.Names("RunMap.MapId").RefersToRange.Value2 = Sh.Name
    ThisWorkbook.Names("RunMap.WorksheetName").RefersToRange.Value2 = Sh.Name
End Sub
This code will:
- Update the status bar to say the name of the worksheet. This lets us know the VBA is running and updating our map name
- Set both of our named ranges to be equal to the currently selected worksheet.
And that’s it!
Using it
Every time we switch to a new worksheet, we can just click ‘Run Map’ in the ribbon and the add-in will send the data on the selected worksheet to the SmartConnect map named to our current worksheet. My example workbook containing all of the CRM worksheets is meant to be ran from left to right starting at CRM_CURRENCIES_BK. Run each worksheet as is or change out the data to suite your needs.