Popdock is a powerful tool that can empower Business Central users to do more with their ERP. Data can be accessed from any standard, custom, or ISV table. Once the data is retrieved, Popdock can merge, join, calculate, and even color code the data before displaying it back inside Business Central or any other app you desire. All this functionality can be achieved without writing a line of AL code.
This week we’re going to look at the Business Central connector. You’ll learn how to configure, customize, and deploy it in your environment.
Installing the Business Central Connector
Installing the Popdock Business Central connector requires a two-step process.
- The ‘Popdock for Dynamics 365 Business Central’ app needs to be installed to publish the queries used by the 55 standard Business Central Lists used by the connector. It also adds the Popdock Multi-list widget to the Business Manager Role Center for easy setup.
- A new Dynamics 365 Business Central connector can then be added into your Popdock account.
Note: you will need to repeat both steps for every environment you want to configure Popdock in. In most cases, this means installing a Sandbox and Production version of the connector.
Configuring the Business Central Multi-List Widget
Popdock Lists and reports can be run at any time from the Popdock app, but most users would rather access their Popdock lists directly in Business Central. A widget is automatically created when installing the Business Central connector that will give users access to any Business Central data from the Popdock tab. The widget can quickly be added into Business Central with these steps.
The widget can also be edited at any time to add or remove lists from any Popdock connector by modifying the ‘Lists’ tab.
Bonus Tip: You can add lists from any connector to this widget. For example, it can show ledger entries from a historical ERP or a live view of web shop orders from Magento.
Creating Custom Lists
If you find the default lists don’t include the data needed, you can easily create a new list using the Query Builder to create a new optimized API query to pull any data you need out of Business Central.
There are some limitations to the Query Builder because AL queries don’t allow unions or nested queries, but that isn’t a problem for Popdock. Any Popdock list can be combined with another list using Custom Lists. For example, a Merge List can be used as a union of Post Sales Invoices and Posted Sales Credit Memos to provide a more accurate overview of customer transactions. Another example is using a Joined List to combine Business Central total Customer Sales with CRM Account information to create an overview of the customer segmented by CRM data.
Bonus Tip: You can combine custom lists, so a merge list of Historical and current sales transactions can be joined with CRM Accounts to create a powerful multi-app view of the customer.
Embed a Popdock List on a Business Central Page
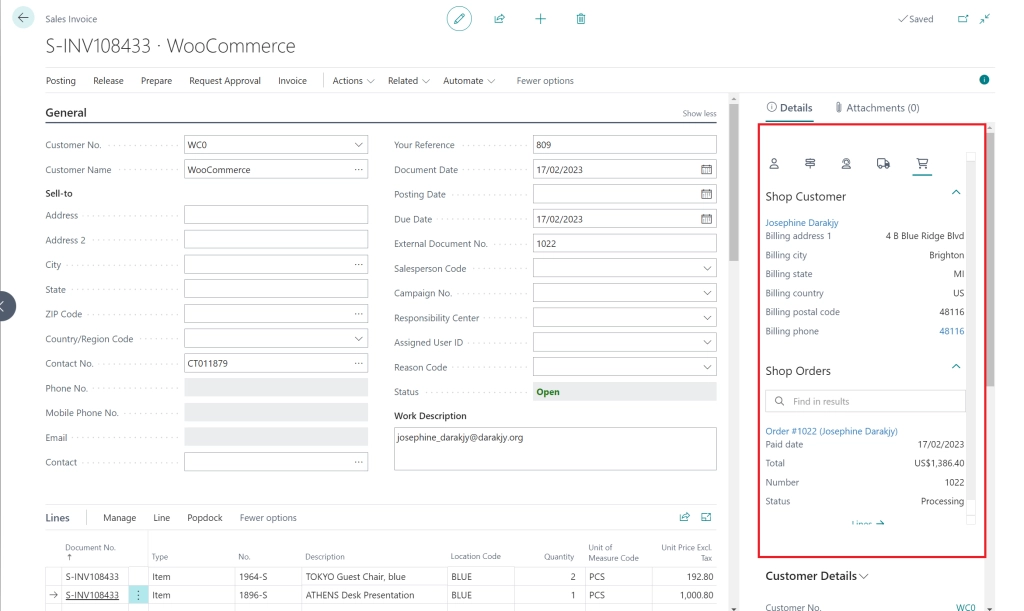
Popdock data is the most useful when it is presented to the user pre-filtered in the area the user is already working. That is where the embedded Popdock FastTab and FactBox widgets come into the story.
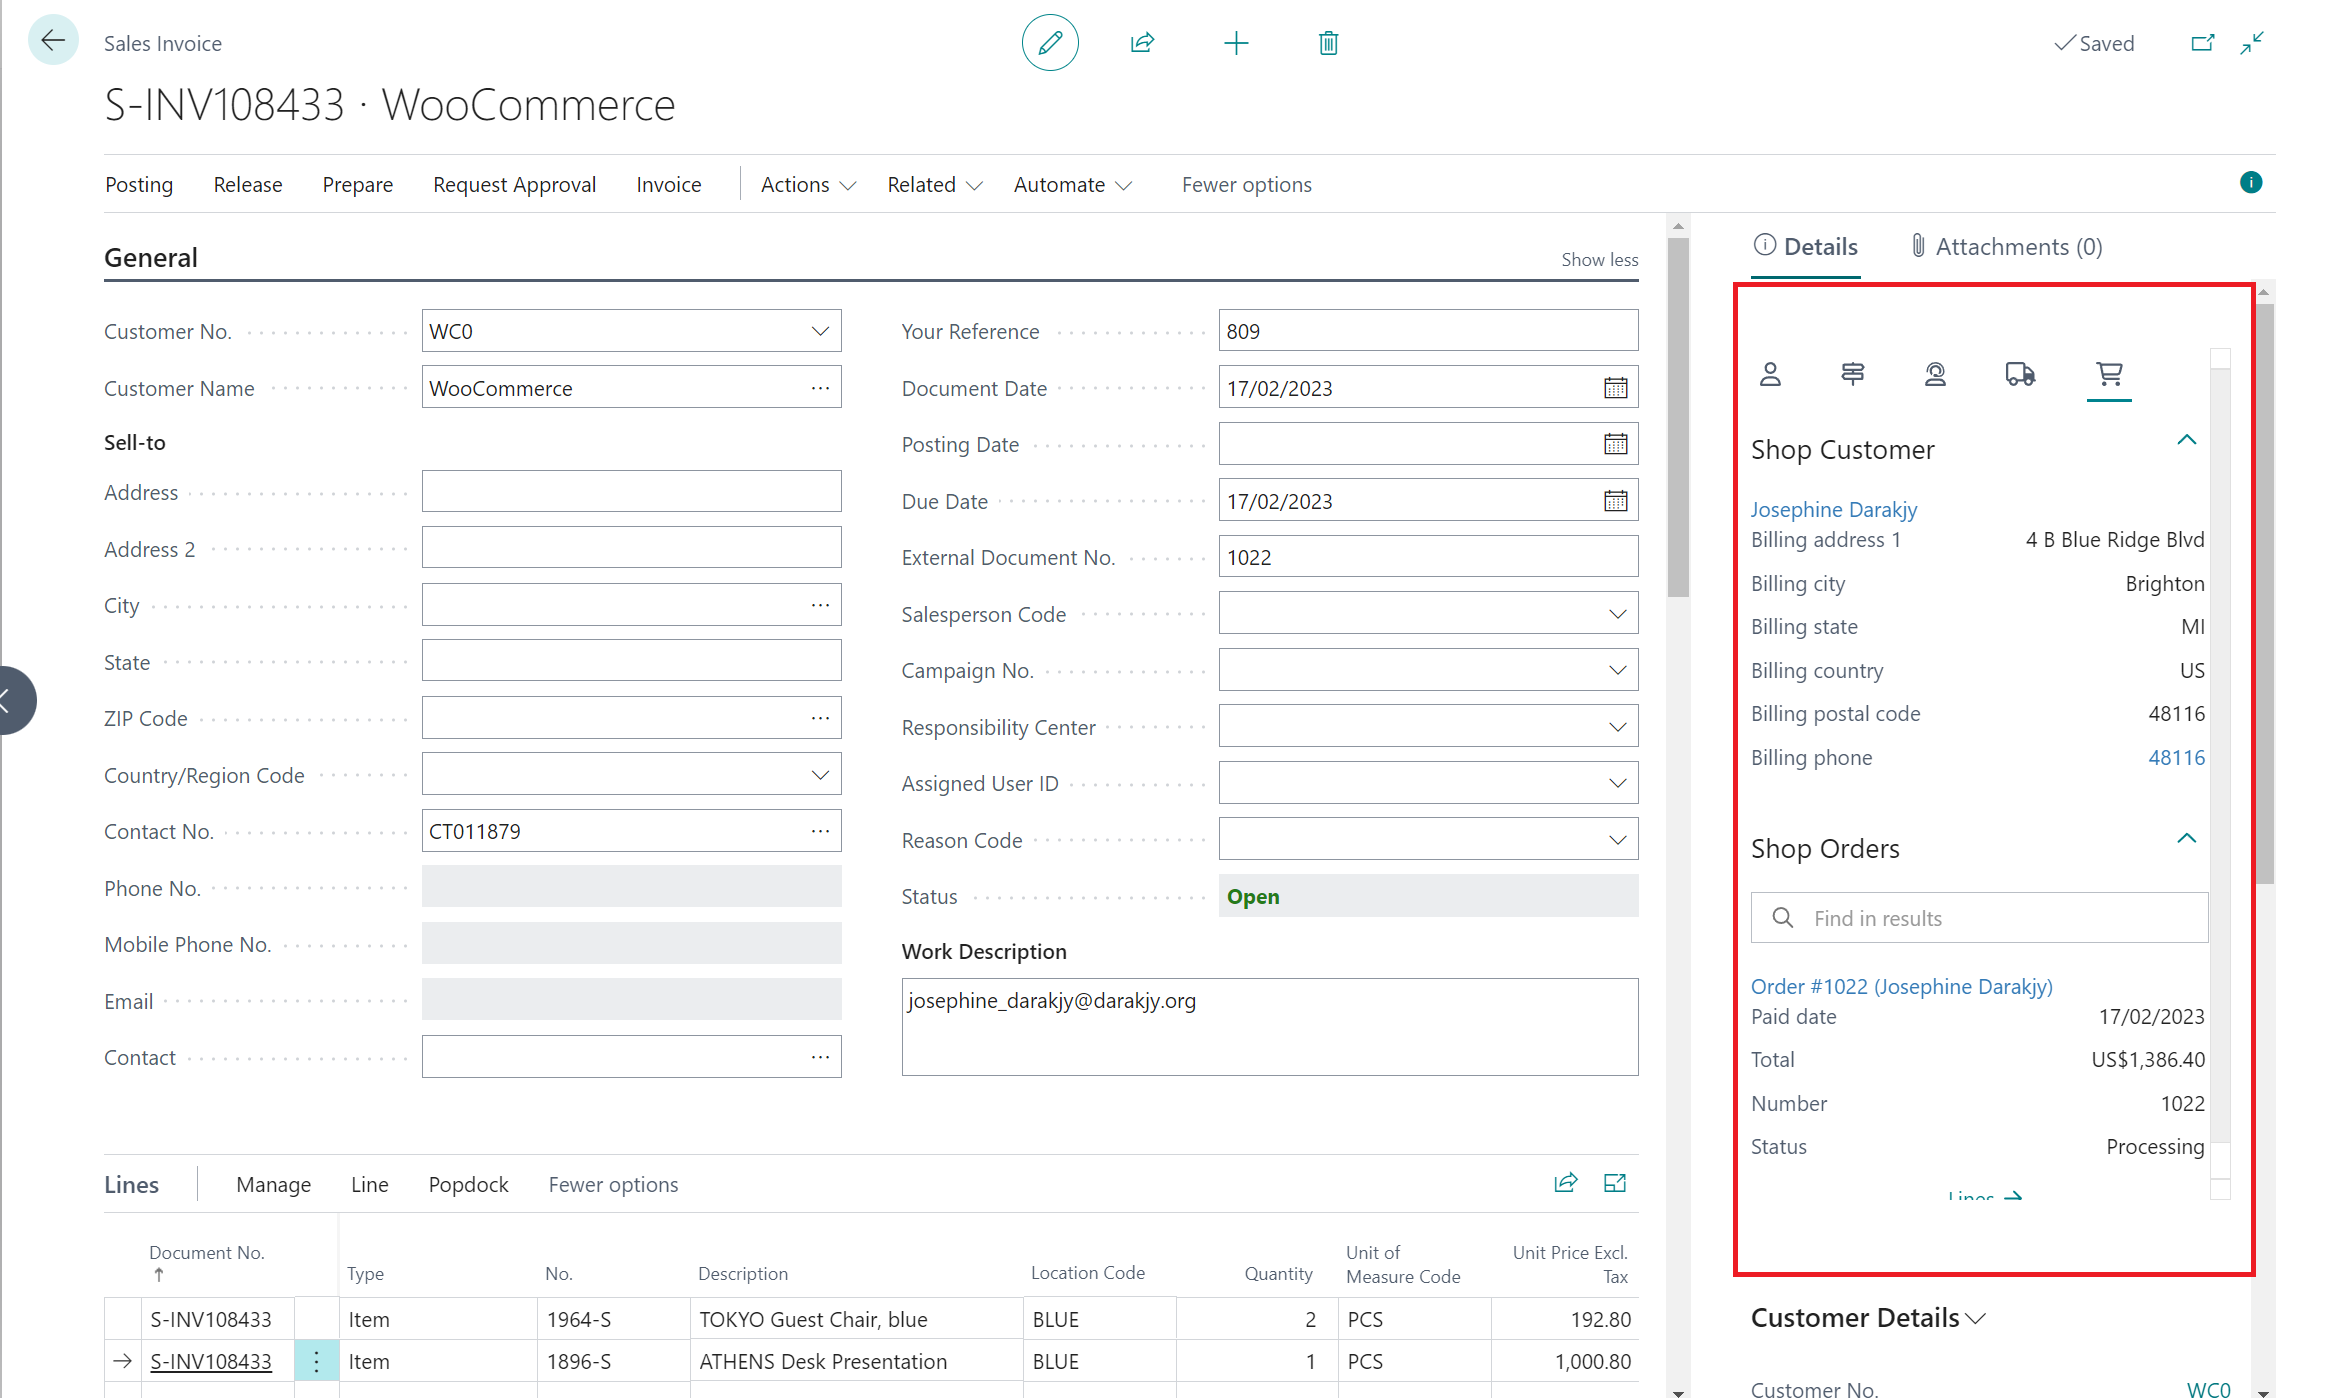
Create a new Widget in Popdock and using the Business Central Environment Parameters, embed the widget directly on the page where users need it. Some common scenarios are displaying a Merge List of historical and Business Central Customer Ledger Entries as a FastTab on the customer card, or showing Shipping details as a FactBox on the Sales Order page.
Bonus Tip: Use the widget type ‘Widget Group’ to embed multiple widgets into a single FactBox or FastTab as shown in the above screenshot.
The ‘Popdock Customizations’ Extension
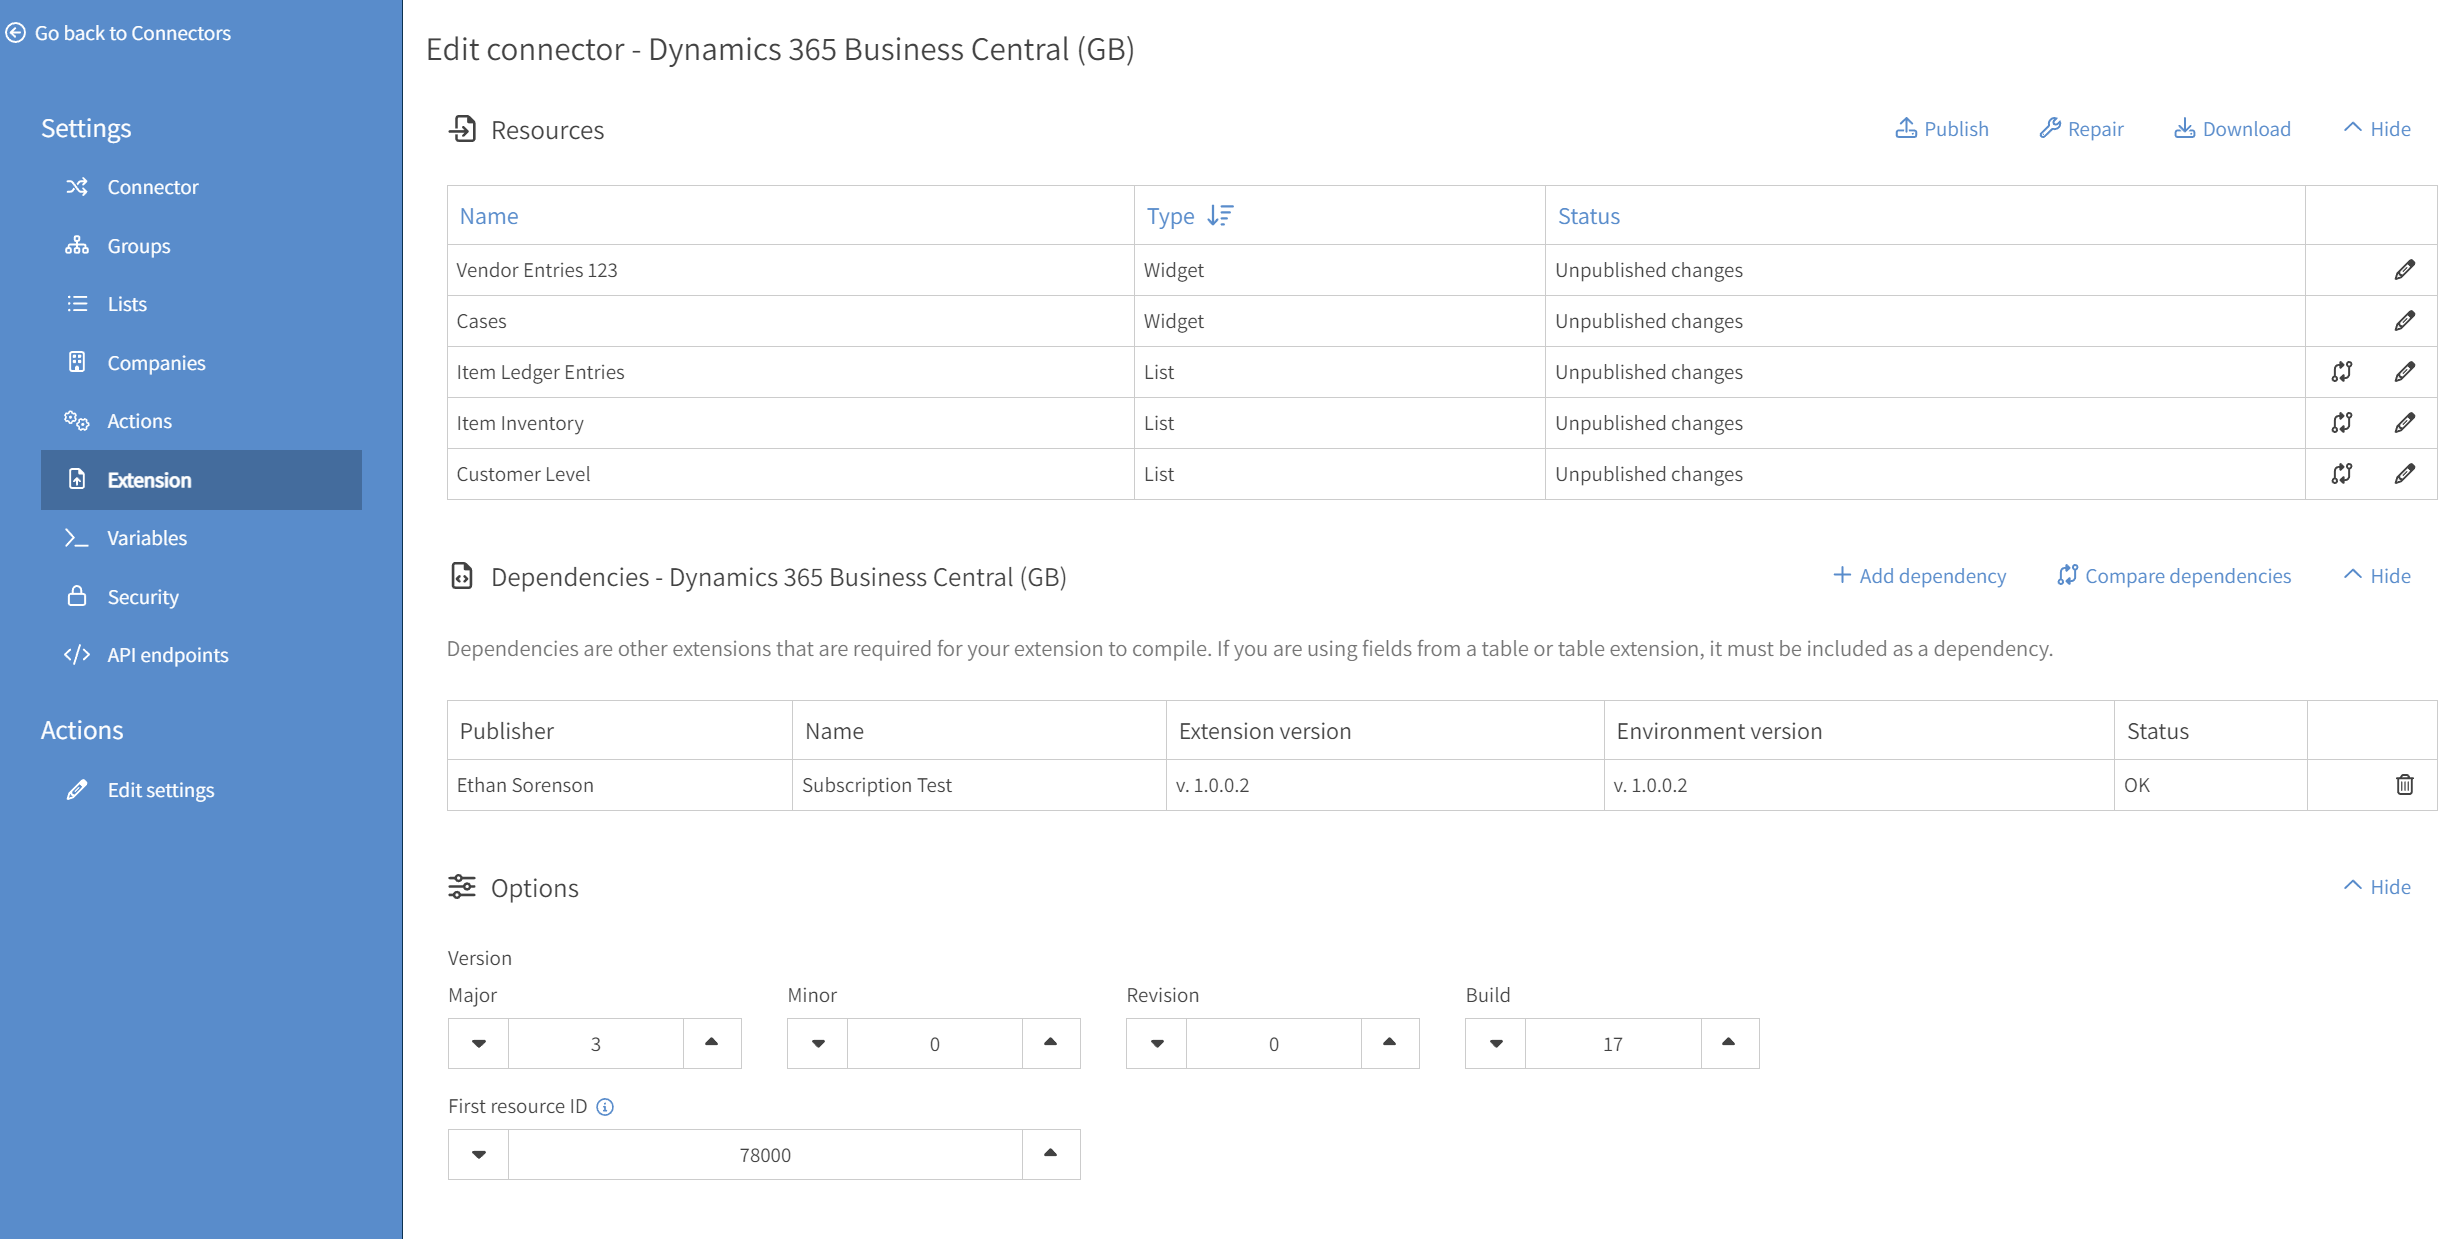
The ‘Popdock Customizations’ App is managed from the ‘Extension’ tab of the Business Central connector. Each list built using the Query Builder and each widget using a Business Central Environment will be added as a new Resource in the extension.
If the Query Builder list references tables or fields outside the base app (Custom or ISV tables), the other extensions will need to be added as dependencies on the app to allow access to their code.
Note: New extensions can only be made using connectors pointed to a BC Sandbox. Once an extension is created and tested, it can be promoted to production using the steps in the promotion section below.
Promoting the ‘Popdock Customizations’ Extension
When you are ready to move your custom lists and widgets from the Business Central sandbox environment, you will be able to automate the publishing of the app into your Production environment and deploy the lists into the Production connector using the Extension tab on your Production Business Central connector.
Note: The customizations will be deployed as a DEV extension in the Sandbox, and as a PTE in the Production Business Central.
Careful management of Business Central connectors is important for testing and deploying custom lists and widgets from the Business Central Sandbox into the Production Environment. It is important to set up both connectors and ensure the custom extensions referenced in both environments are kept up to date.
We hope this helps you while you’re using Popdock! If you have any more questions, please reach out to our support team at support@eonesolutions.com.