With the new release of SmartConnect 2016 you will find there is a new connector available for Microsoft Dynamics NAV.
This article will provide you with the steps to enable the Microsoft Dynamics NAV web services and for configuring the SmartConnect connector to access information in Microsoft Dynamics NAV.
** Please note, the following steps outline configuring Microsoft Dynamics NAV 2015 and 2016. **
SmartConnect calls Web Services (SOAP) when accessing information in Microsoft Dynamics NAV. Before you can configure SmartConnect, you will need to enable the web services in NAV.
Using the Microsoft Dynamics NAV Server Administration Tool, select the NAV instance that you want to use, expand the SOAP Services/ OData Services Fast Tabs, and click Edit. Find the check the box next to Enable SOAP and OData Services, mark them, and click Save.
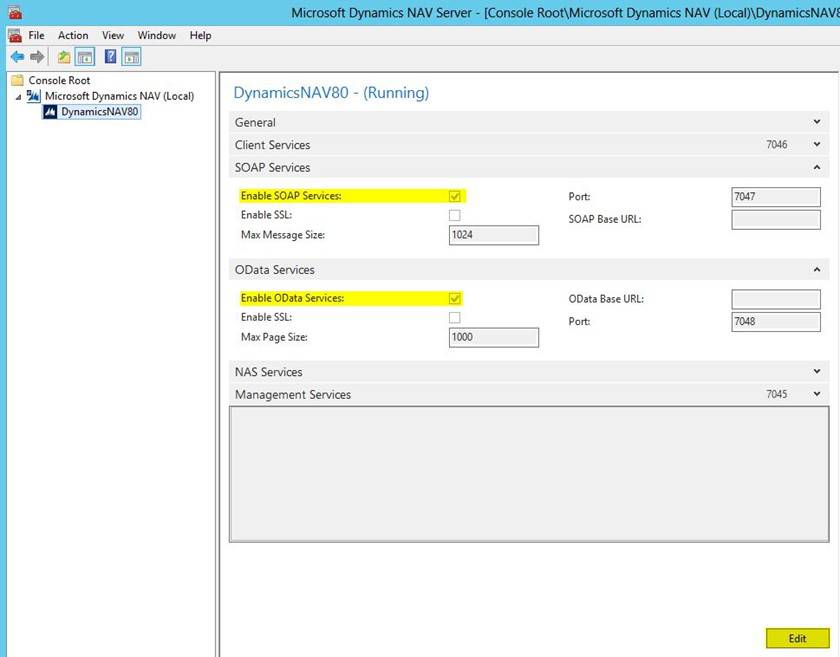
Once you have exited the Microsoft Dynamics NAV Server Administration Tool, you will need to restart your DynamicsNAV server. To do this, open your Services and find the Microsoft Dynamics NAV Server (DynamicsNAV80 is the 2015 version of NAV and DynamicsNAV90 is the 2016 version).

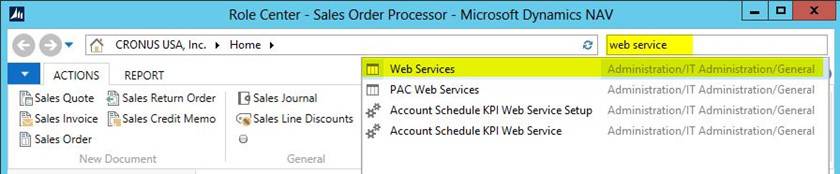
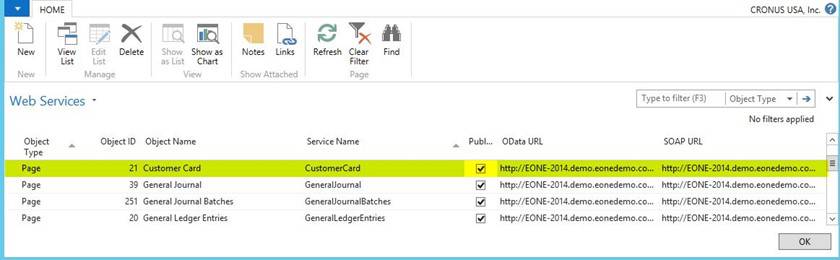
To confirm the Microsoft Dynamics NAV Web Services are available for use, launch Microsoft Dynamics NAV and create a Web Service. To do this, access the Web Services in NAV by typing in the word “Web Service” in your NAV Help Menu and select Web Services.
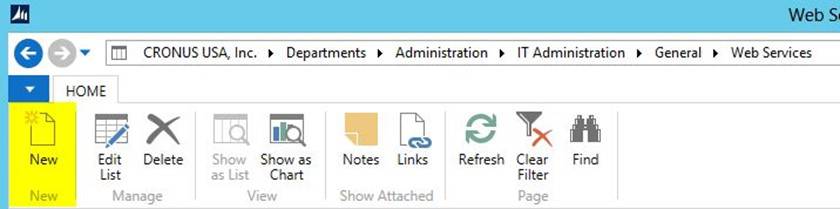
Select “New” found in the ribbon, which will open the New – Web Services window.
From here you will select an Object Type of “Page” and then the Object ID you wish to access.
In my example below I am using the Object ID “21” to access the Customer Card in Microsoft Dynamics NAV.
Tab across the line and enter a Service Name and then check the box under the Publish column to make the OData and SOAP URL’s available. Click ok to save your changes.
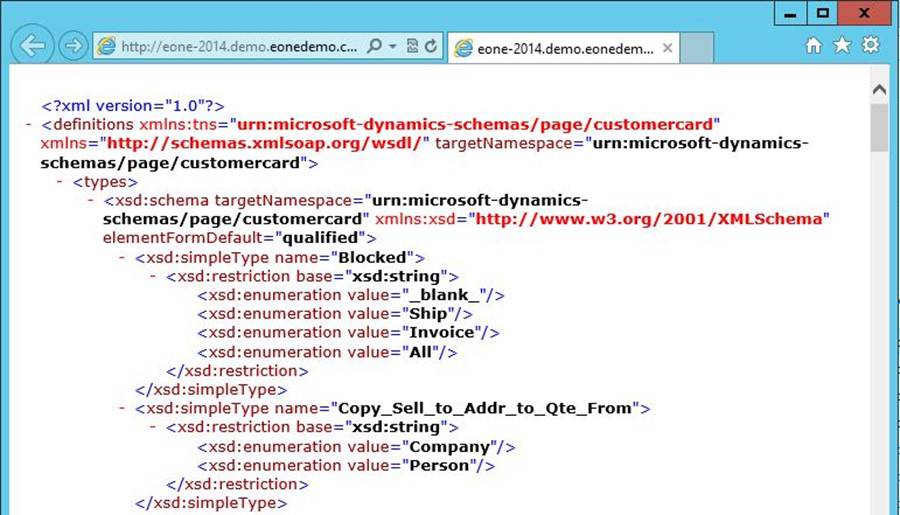
Click on the SOAP URL link to browse to the page using your default internet browser. If you receive data appearing in the window similar to what you see in the image below, then you know the SOAP data is available to access and you are ready to configure the SmartConnect Dynamics NAV connector.
If you receive a “page can’t be displayed” message when accessing the URL, then your SOAP data may not be enabled and you may need to check with your Microsoft Dynamics NAV administrator to ensure NAV is properly configured to access this data via the web service.
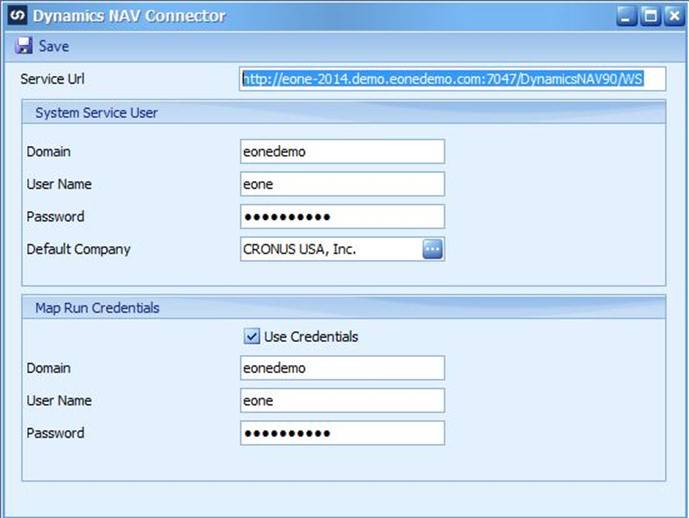
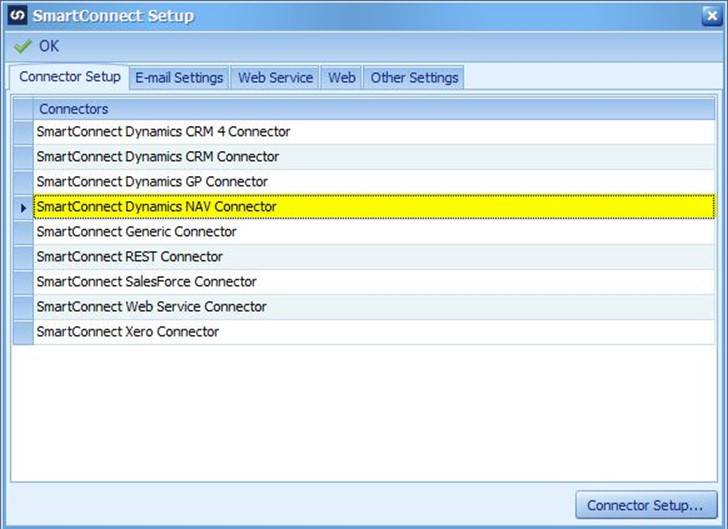
Once you have confirmed NAV Web Services are available to use, then you will need to configure the SmartConnect NAV connector. To complete this, log in as a SmartConnect administrator and access the Setup>Setup>SmartConnect Dynamics NAV Connector window.
Enter the Microsoft Dynamics NAV web service URL, the System Service user credentials, and the Map Run Credentials and save your changes. If you leave the Map Run Credentials blank, then SmartConnect will use the current logged in user’s credentials. We recommend that you complete the System Maintenance process (Setup>System Maintenance) to ensure all the connector information is updated properly. After this has been completed, you should be able to begin configuring SmartConnect Maps to integrated data with Microsoft Dynamics NAV.