
This week we are going to take a look at Shopify and how we can use SmartConnect’s REST Connector to integrate with Shopify. To get started you will need the following:
- Shopify store with a user that has access to create Apps.
- Postman
- Latest version of SmartConnect
- Reference to the Shopify Admin API
Shopify Setup
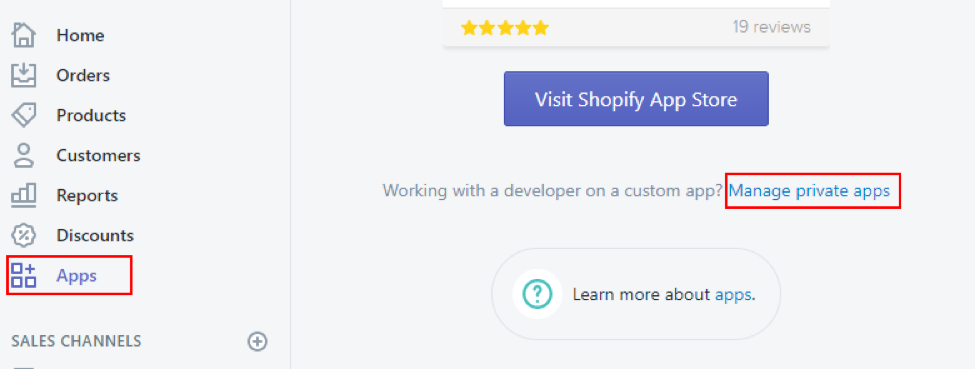
To start, we need to setup a Shopify app that will give us access to the Shopify API. Login to your Shopify account with a user that has permissions to create an App. Once logged in to Shopify you will need to navigate to Apps>>Manage private apps.
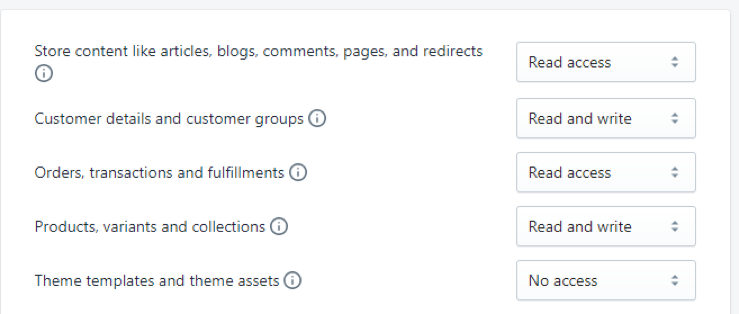
Enter a Private app name of your choice and then set the permissions appropriately for what you need to do with an integration. If you are planning on using Shopify as a Data Source only, you’ll only need to set Read access for all the endpoints. The REST provider that will be included in this article will be setup to GET Orders and POST Products and Customers so you will need Read and write access for those endpoints.
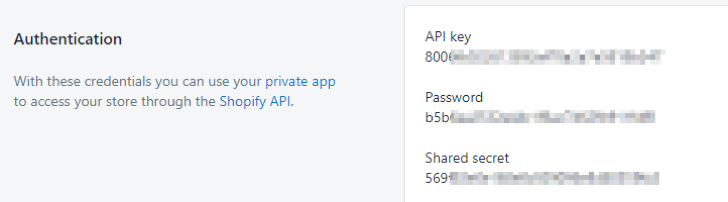
Make sure to save your App settings so an API Key and Password will be generated. We will need to use these values to generate our Basic Authentication in Postman.
Use Postman to get Basic Auth Value
Launch Postman and set the GET request url to https://YOUR_STORE_NAME.myshopify.com/admin/shop.json. The store name can be found by navigating to Settings>>General in Shopify. Next we need to set the Authorization Type to Basic Auth and enter the Username and Password from the previous screenshot. The Username is the API Key. After the credentials have been entered, click update request and then click Send. If everything was setup correctly we will get back a response with our store info.
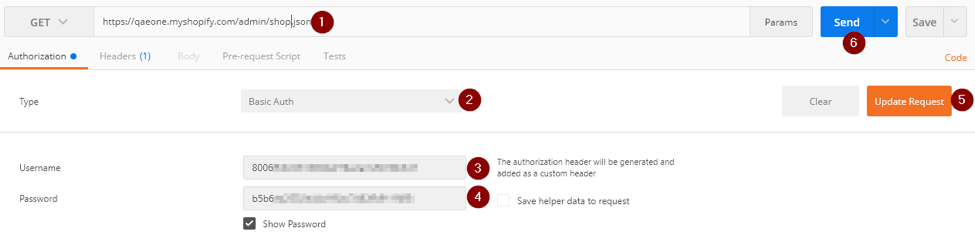
This will ensure that we have setup our App in Shopify successfully and also give us the Basic Auth Authorization that we will use in SmartConnect. Click the Headers (1) tab to get our Basic Auth value. You will need to copy the entire value including the word “Basic”.

Import and Setup Shopify Connector
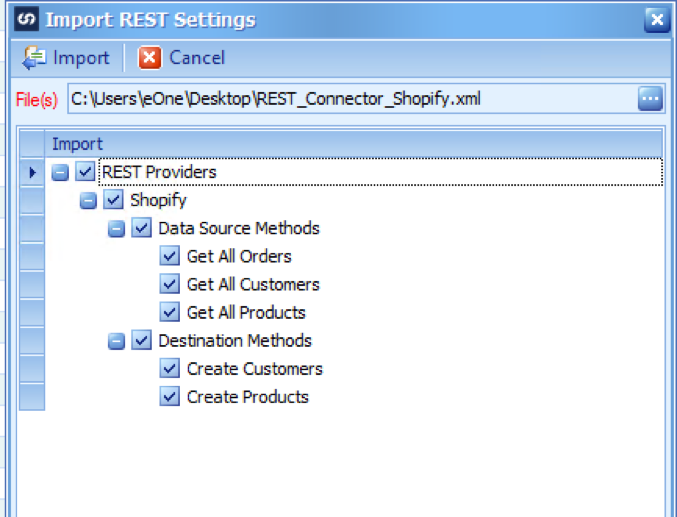
Next we can launch SmartConnect and import the included Shopify connector. Navigate to the Maintenance tab and then click the Import button in the REST Connector section of the ribbon. Select the xml file (Download here), mark all the methods and click import.
After the import finishes, navigate to Service Providers in the REST Connector section of the ribbon. We need to edit the Authorization and Store Prefix parameters to complete the connection to your Shopify store. Double click the Shopify connector to edit the settings. On the Parameters tab double click each parameter to enter your Shopify info. Once your Basic Auth value (acquired in Postman steps above) has been set on the Authorization parameter and your store name has been set for the Store Prefix parameter you can save the connector setup and close any remaining REST connector windows. You can now setup a new map using the rest connector to use the 5 included methods. As a data source you can get Shopify Orders, Products and Customers. As a SmartConnect destination, you can create Products and Customers. Please note that the Create Products method will not currently add product variants.
If you need more functionality added to the Shopify REST connector please refer to the Shopify Admin API. Depending on the endpoint you are planning to work with, you may need to enable more permissions in the Shopify private app that was setup in the beginning of this article.