In recent versions of Excel, Microsoft has put a lot of time into making it easy to pull data from many systems and web services using Power Query (or ‘Query And Connections’ in Excel 2016). At eOne, we are taking advantage of this by using Power Query in all new Excel templates to build rich, interactive interfaces for data entry. As more systems and capabilities are added to Excel and Power Query, it’s clear that learning to use Power Query is going to be an essential tool for Excel pros.
Connecting to each system is a bit ‘trial and error’ to get working initially. Finding the correct URL and figuring out the best method to authenticate are usually the main tasks for connecting. I’ve already gone through the ‘trial and error’ period for a few systems we use, so I’ll spare you the hassle and show you how to get connected to each. The screenshots and text should guide you through, but I’m also including the actual Power Query script at the end so you can copy parts out of and see the exact format of a URL.
Dynamics GP
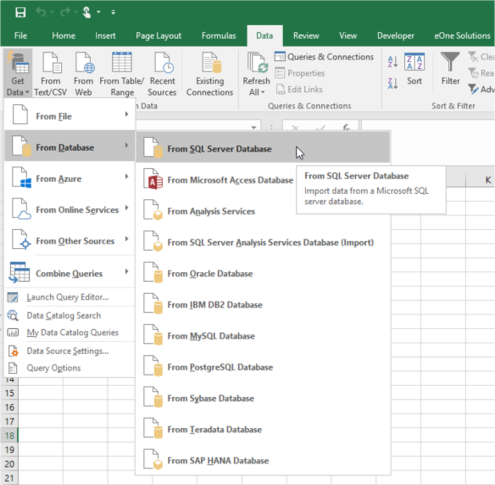
Connecting to Dynamics GP is just a connection to a SQL Server Database. Connecting and authenticating requires the path of the SQL Server and SQL Server credentials. After selecting ‘From SQL Server Database’, a series of pop ups will guide you through adding a query.
Enter the Server, Database, and SQL query next.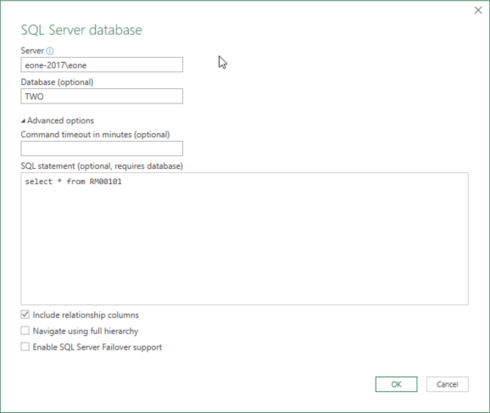
Enter the credentials. Clicking ‘Connect’ will show a preview of the query. 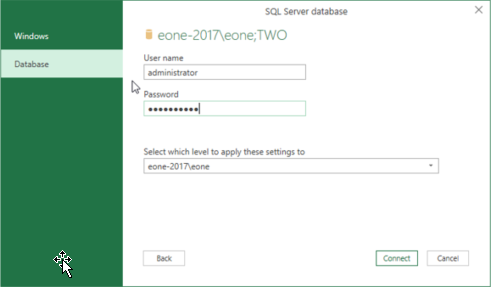
To use the table as-is, click ‘Load’. To modify the query, click ‘Edit’.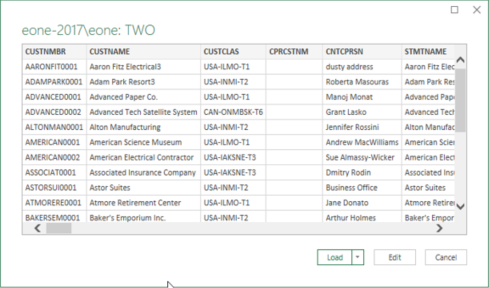
Because screen shots are hard to copy text out of, here is an example Power Query:
~~~~~~~~~~~~~~~~~~~~~~~~~~~~~~
let
Source = Sql.Database(“eone-2017eone”, “TWO”, [Query=”select * from RM00101″])
in
Source
~~~~~~~~~~~~~~~~~~~~~~~~~~~~~~
CRM On Premise
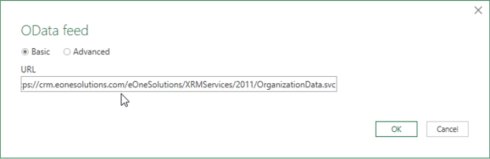
Dynamics CRM makes data available through an OData feed. There appear to be a few different URLs to pull data from. The URL I use is most consistent with the URL pulling from an on premise CRM install or CRM in the cloud. The URL is of the format “https://crm.<SERVER NAME>.com/<TENANT NAME>/XRMServices/2011/OrganizationData.svc”.
Start by selecting the ‘OData Feed’ query type.
Choose Windows credentials, use alternate credentials, and enter the username and password for the CRM user.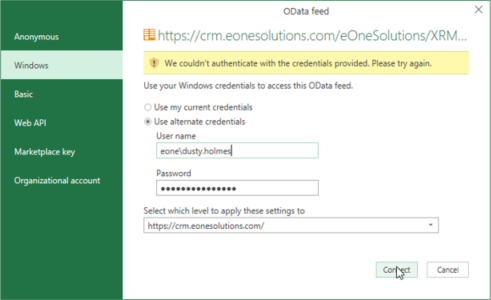
From the list of objects, select the table you want to pull data from.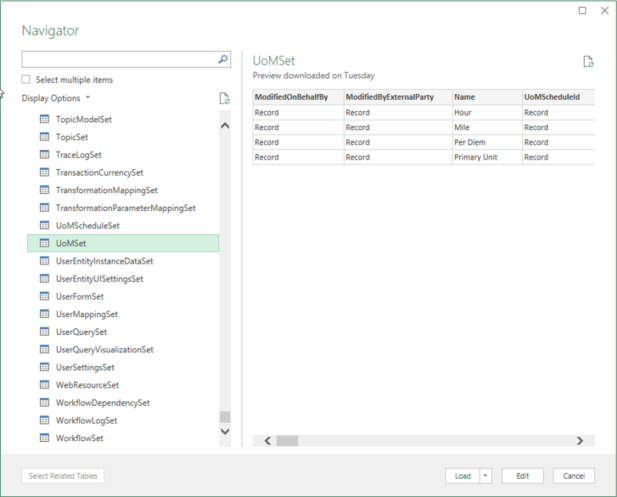
Because screen shots are hard to copy text out of, here is an example Power Query:
~~~~~~~~~~~~~~~~~~~~~~~~~~~~~~
let
Source = OData.Feed(“https://crm.eonesolutions.com/eOneSolutions/XRMServices/2011/OrganizationData.svc”),
UoMSet_table = Source{[Name=”UoMSet”,Signature=”table”]}[Data]
in
UoMSet_table
~~~~~~~~~~~~~~~~~~~~~~~~~~~~~~
Dynamics CRM Online
Dynamics CRM uses an OData format. The a URL is of the format “https://<TENANT NAME>.api.crm.dynamics.com/XRMServices/2011/Organizationdata.svc/” and authenticates using Office 365 credentials.
Select the OData Feed connection.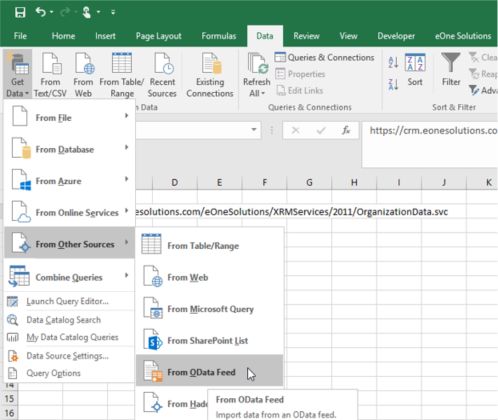
Enter the URL.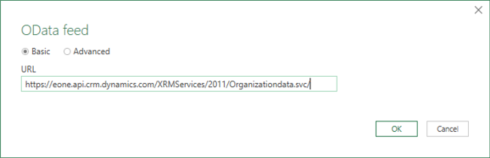
Select Organizational Account and click Sign in.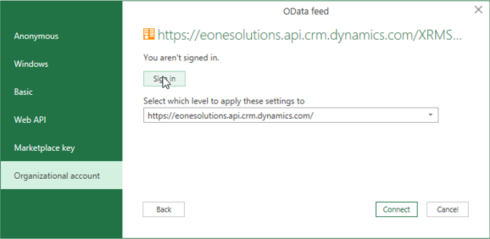
From here, follow through the account authentication screens.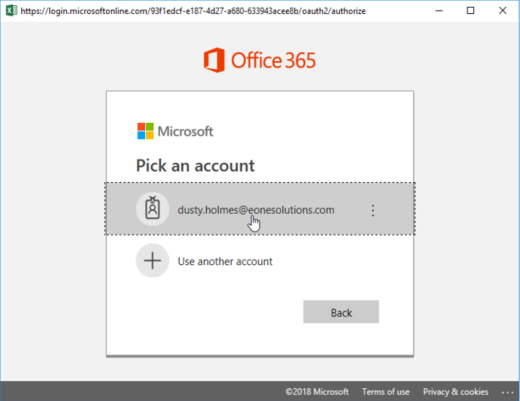
After authentication, it will display a list of objects. Choose the one you want to pull data from and click Load.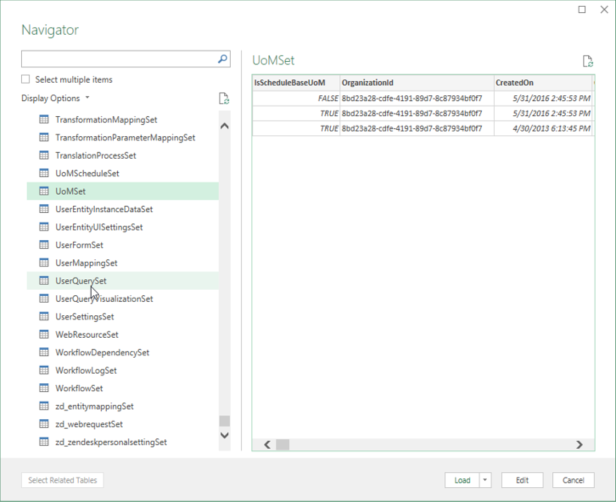
Because screen shots are hard to copy text out of, here is an example Power Query:
~~~~~~~~~~~~~~~~~~~~~~~~~~~~~~
let
Source = OData.Feed(“https://eone.api.crm.dynamics.com/XRMServices/2011/Organizationdata.svc/”),
UoMSet_table = Source{[Name=”UoMSet”,Signature=”table”]}[Data]
in
UoMSet_table
~~~~~~~~~~~~~~~~~~~~~~~~~~~~~~
Business Central
Business Central pulls from an OData feed as well, but the URL has a few more parts to it. The URL is of the format: “https://api.businesscentral.dynamics.com/v1.0/<GUID>/<TENANT>/ODataV4/Company(‘<COMPANY NAME>’)”. These missing elements can be found on the home screen in the main Business Central interface. 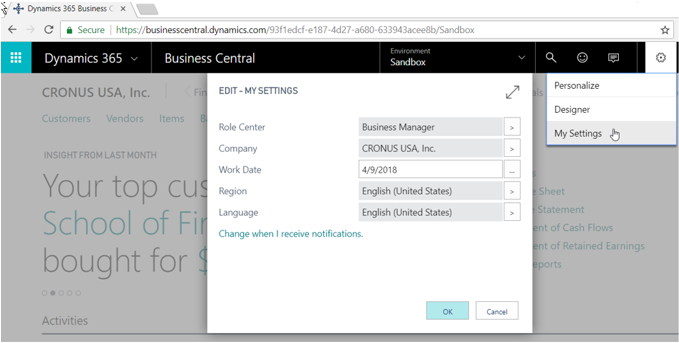
From the screenshot, my URL looks like: “https://api.businesscentral.dynamics.com/v1.0/93f1edcf-e187-4d27-a680-633943acee8b/sandbox/ODataV4/Company(‘CRONUS USA, Inc.’)” where company comes from the ‘My Settings’ dialog and the tenant and GUID come from the URL.
With the URL ready, prepare the credentials before adding the query. For the credentials, you need your user name and the ‘Web Service Access Key’ for the password. You can find these on the user page in Business Central.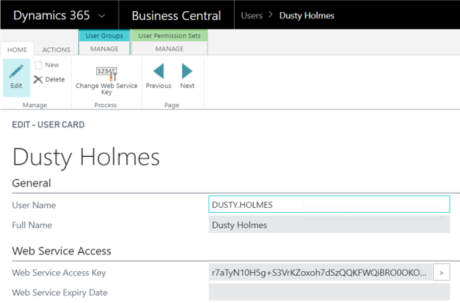
With the URL and credentials ready, add a new OData Feed and enter in the URL into the pop up.
Choose Basic authentication and use the Business Central username and access key as the password.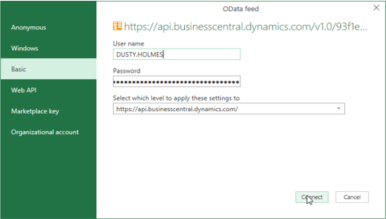
From here, choose the table you want to add.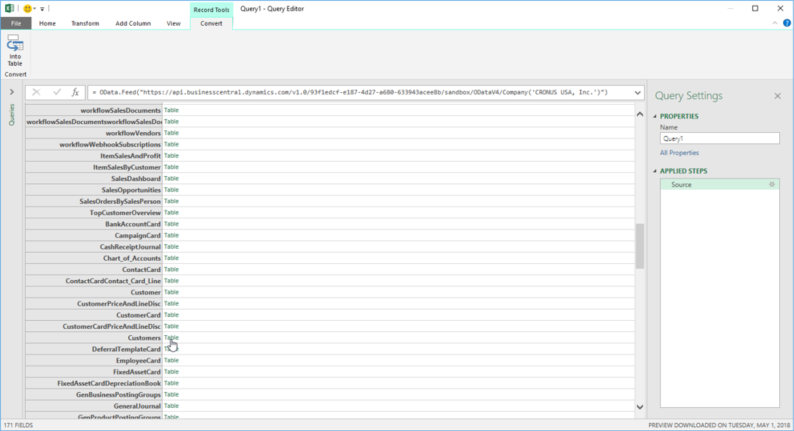
From the preview window, click “Close & Load” to load it to the workbook.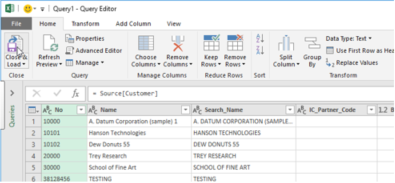
Because screen shots are hard to copy text out of, here is an example Power Query:
~~~~~~~~~~~~~~~~~~~~~~~~~~~~~~
let
Source = OData.Feed(“https://api.businesscentral.dynamics.com/v1.0/93f1edcf-e187-4d27-a680-633943acee8b/sandbox/ODataV4/Company(‘CRONUS USA, Inc.’)”),
Customer = Source[Customer]
in
Customer
~~~~~~~~~~~~~~~~~~~~~~~~~~~~~~
Dynamics NAV
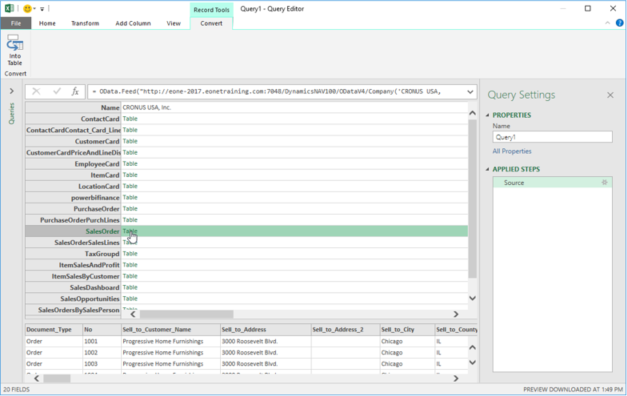
Dynamics NAV pulls from an OData feed as well and the URL has a few parts to it as well. The URL is of the format: “http://<SERVER & PORT>/DynamicsNAV100/ODataV4/Company(‘<COMPANY NAME>’)/”. These missing elements can be found on the web services page in NAV.

From the screenshot above, my URL will be “http://eone-2017.eonetraining.com:7048/DynamicsNAV100/ODataV4/Company(‘CRONUS USA, Inc.’)/”.
With the URL figured out, add a new OData Feed to the workbook.
Enter in the URL from above.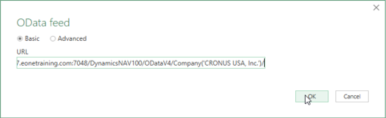
Use Windows authentication, use alternate credentials, then enter the username and password used to access NAV.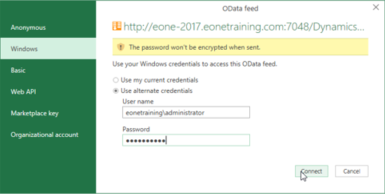
After authentication, chose the table you want to import by double-clicking.
Because screen shots are hard to copy text out of, here is an example Power Query:
~~~~~~~~~~~~~~~~~~~~~~~~~~~~~~
let
Source = OData.Feed(“http://eone-2017.eonetraining.com:7048/DynamicsNAV100/ODataV4/Company(‘CRONUS USA, Inc.’)/”),
data = Source[ItemCard]
in
data
~~~~~~~~~~~~~~~~~~~~~~~~~~~~~~
SalesForce
SalesForce is easy in that there is no URL to enter; it’s all set up in the SalesForce connector. You will need login information and you may need access to your email account if they send a verification email.
Add a new SalesForce Object to the workbook.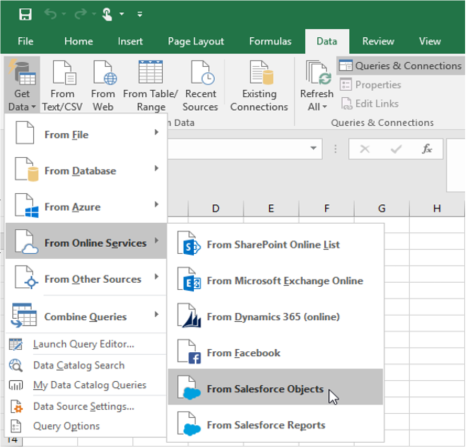
Keep Production selected and click OK.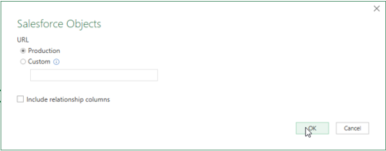
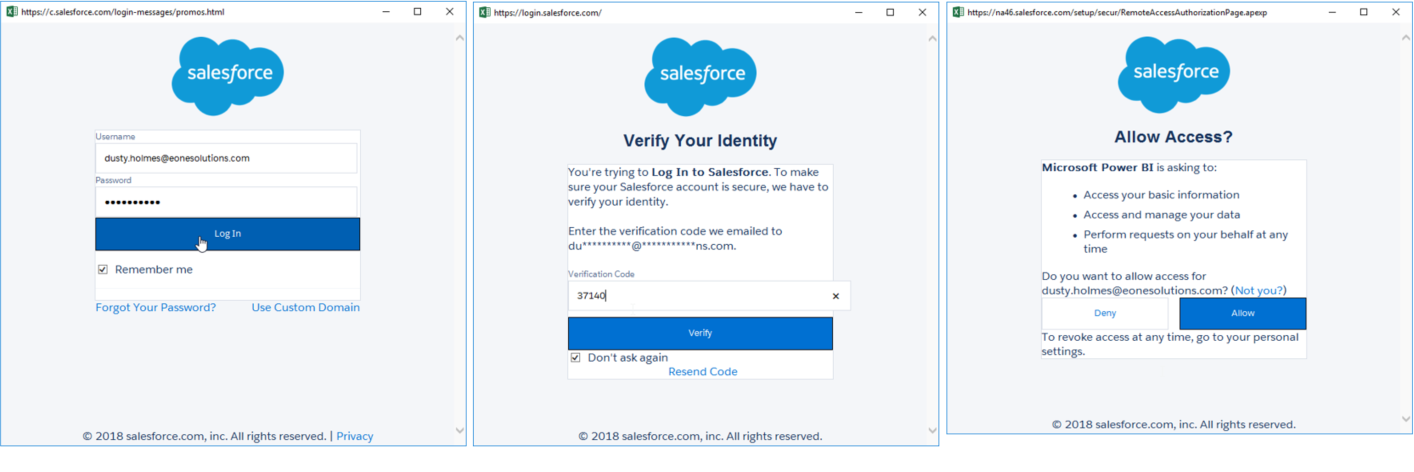
SalesForce only allows using an Organizational Account login, so click the Sign In button.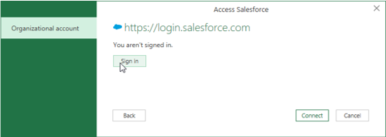
A series of dialog boxes appear to authenticate. You may not get a verification code every time, but I had to enter one.
After authentication, select the table you want to add to the workbook.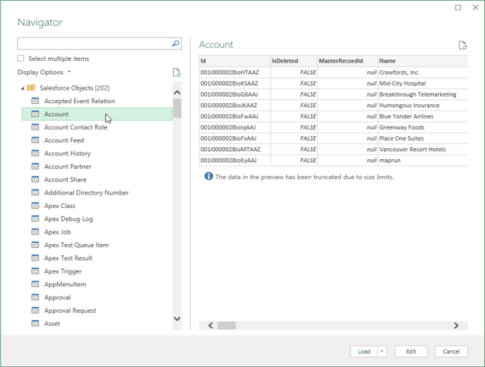
Because screen shots are hard to copy text out of, here is an example Power Query:
~~~~~~~~~~~~~~~~~~~~~~~~~~~~~~
let
Source = Salesforce.Data(),
Account1 = Source{[Name=”Account”]}[Data]
in
Account1
~~~~~~~~~~~~~~~~~~~~~~~~~~~~~~
Hope this helps, happy Querying!