Real time SalesForce data sources make use of what are called Apex Triggers. When you register the map, it creates an Apex Trigger, when you unregister the map, it removes the Apex Trigger.
However, on occasion, you might want to activate and deactivate these triggers manually instead of going into SmartConnect and registering and unregistering your maps. These are the steps you would follow to inactivate and activate the triggers without using SmartConnect to do it for you.
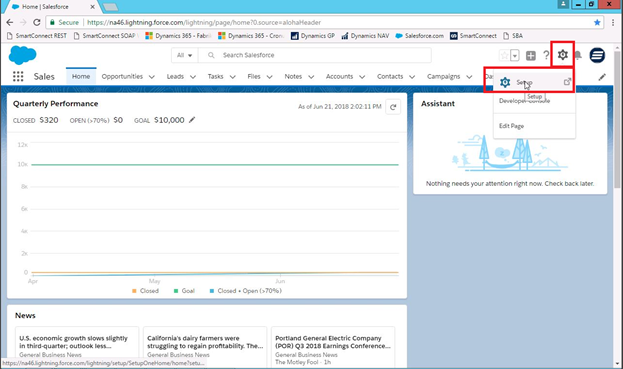
Login to your SalesForce environment where you need to inactivate the triggers. Click on the gear icon and press the “Setup” icon.
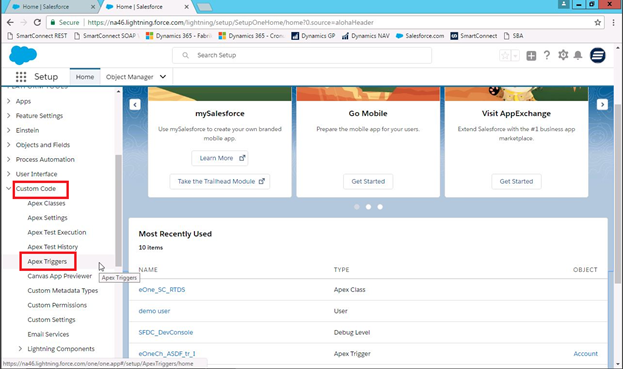
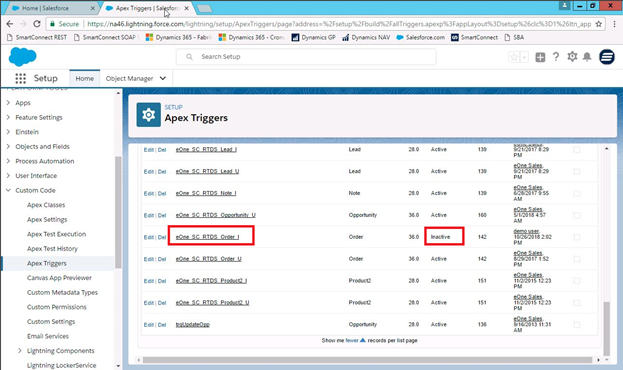
On the left side of the Setup screen, go down to Custom Code and select Apex Triggers
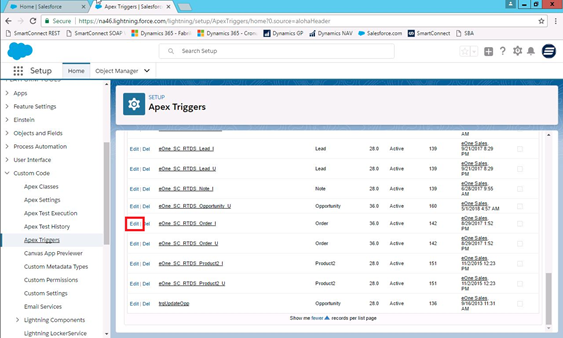
The real time triggers created by SmartConnect will have eOne_SC_RTDS in the name. The “I” stands for Insert, and the “U” stands for update. Find the ones you want to inactivate, and then click the “Edit” link. The one in my screenshot is a real time “Order” insert trigger.
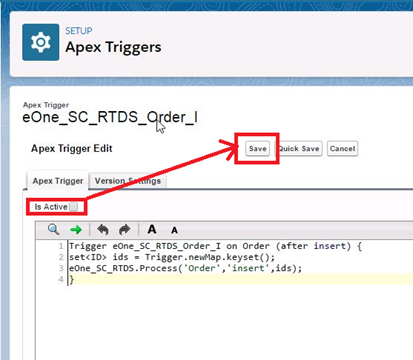
Uncheck the “Is Active” checkbox and hit Save
After making it Inactive, it should show up as Inactive in the Triggers window
You can follow the same process when you want to make the trigger active again.