
Excel is a very common data source for SmartConnect maps, but sometimes causes problems when SmartConnect reads blank lines from a worksheet. This isn’t an issue with SmartConnect, but rather an issue with Excel not knowing what cells are being ‘used’. After building a spreadsheet, sometimes Excel thinks that blank rows at the bottom of a table contain information (usually after clearing the contents). Because this can cause problems in a SmartConnect map, it’s best to remove the blank rows from the source before running a map, but how do we do that?
The first problem is knowing if we have blank lines, and the second problem is to actually remove them. We can check if there are blank lines using the SmartConnect Map Setup window or from Excel. If we open up the Map Setup window in SmartConnect and click Preview, we will see a bunch of blank lines being included.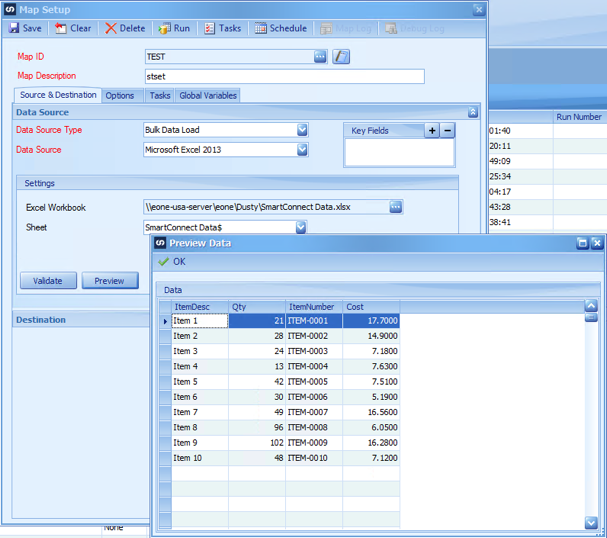
There are a bunch of blank rows in the preview window, so we definitely have blanks. The other way to check for blanks within Excel is to find the ‘UsedRange’ property on the worksheet being sent. If we open up the spreadsheet, the tiny scrollbar already tells us that Excel thinks the workbook has a lot more data than it really does.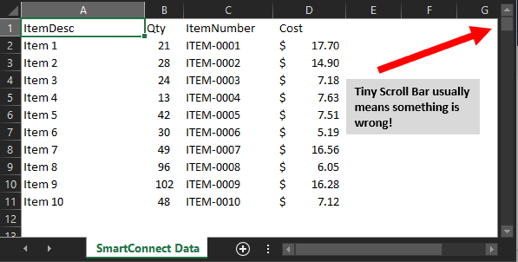
To find everything Excel thinks has stuff in it, hit CTRL-END on the worksheet you are checking. The CTRL-END shortcut will select the bottom-right cell of that worksheet’s UsedRange property. The picture below shows where Excel thinks our data table extends down to.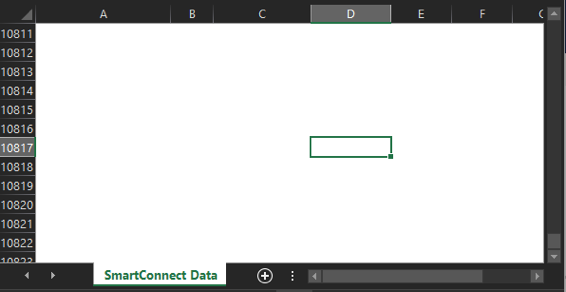
Not even close! We need to delete these 10 thousand or so rows and re-save the workbook. You can use whatever method you want to delete these rows, but I’ll give you the keyboard shortcuts in case you aren’t familiar (or you want to impress a very particular type of geek)
- Click A12 (the first blank cell below our table)
- Hold Control-Shift and press down arrow to select A12 to A1048576
- Press Shift-Space to select the entire rows
- Press control and the negative sign to delete the rows, or right-click any of the row numbers and click delete.
- Save the workbook (Control-S)
After saving the workbook, the scrollbar should be a more appropriate size. If you press CTRL-END again, now it should go to the bottom of the table as expected.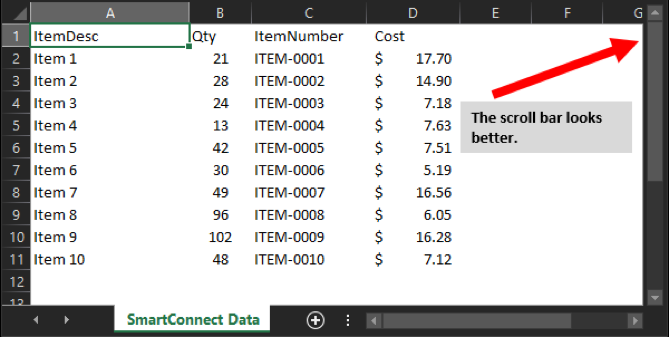
After saving and closing the workbook and previewing the data again in the map setup window, we now see the correct number of rows in the preview.
Problem solved!