
Setting up an Excel template can take less than 5 minutes or can take more than a day if you don’t know what you’re doing. After reading this article, I’m hoping to move a few more people into the 5 minutes or less crowd. The setup is the same for Microsoft D365 Financials Business edition, but I’m calling everything ‘NAV’ below unless otherwise noted. Luckily the setup process is essentially the same for each system.
There are 4 main parts to the setup process:
READ the README tab – This tab contains all of the setup information as well as how to use the template. This tab is meant to be read by whoever is using the template! Start at the top and work your way down.
Setting up the SmartConnect Config tab – This tells the template how to connect to SmartConnect and Dynamics NAV.
Publishing NAV pages – All of the Excel data tables pull data from published NAV pages. Those pages need to be published as a specific name for the download to work.
Setting up NAV Credentials – The credentials aren’t stored with each query or even within the workbook. The credentials are managed by Excel through the Power Query tool included in Excel 2016. This is good because we only have to add the credentials once, and credential information is encrypted and managed by Excel. If you download multiple Excel templates, Excel is smart enough to apply the same credentials if going to the same server.
1. Setting up the SmartConnect Config tab
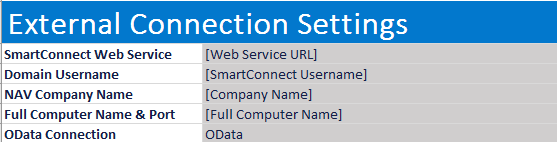
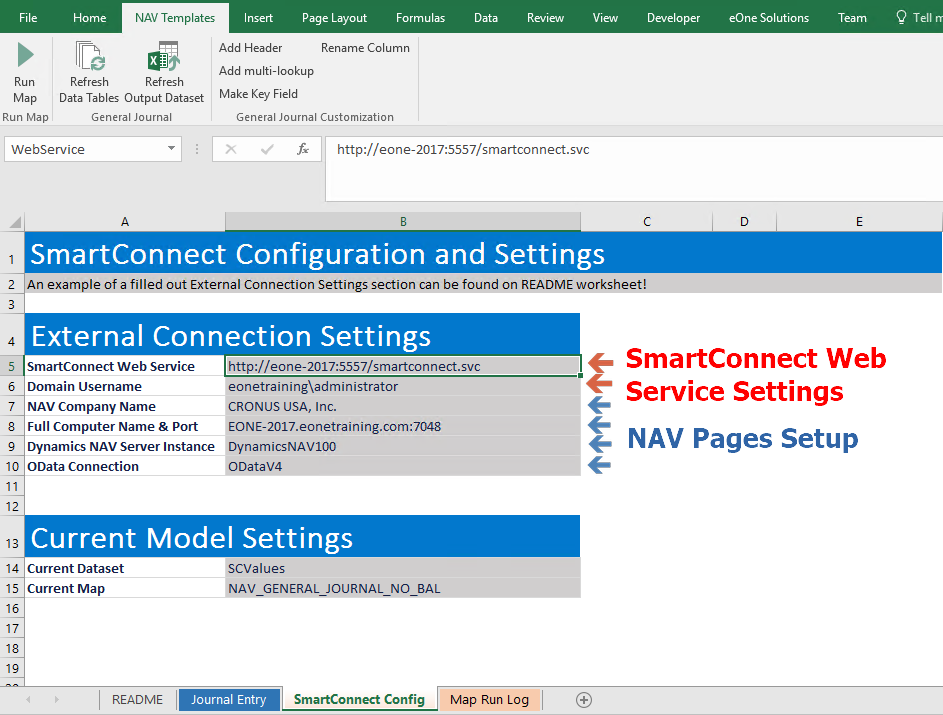
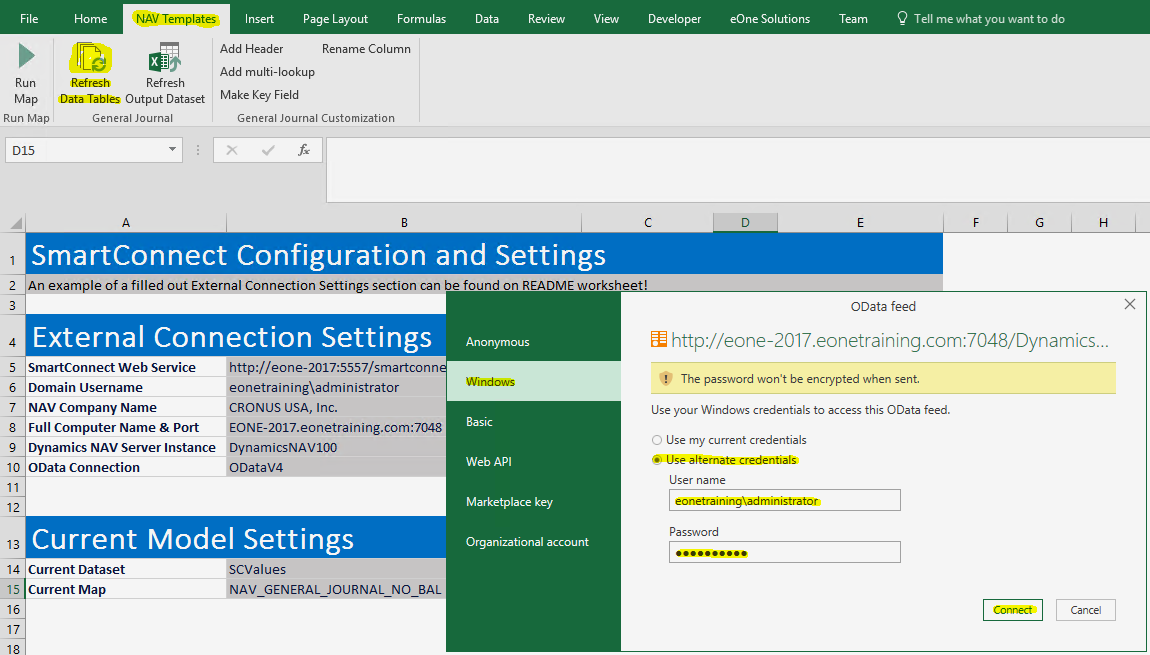
By default, the SmartConnect Config tab will have 4 placeholder values in the External Connection Settings section we need to grab (The tab is slightly different between NAV and D365 Financials Business Edition, but the setup is the same). Below I’ll give detailed instructions on how to find each field. The image above shows the section with placeholders and the image below shows a fully filled out connection settings section.
SmartConnect Web Service
The SmartConnect Web Service settings can be found in the SmartConnect Setup window within SmartConnect.
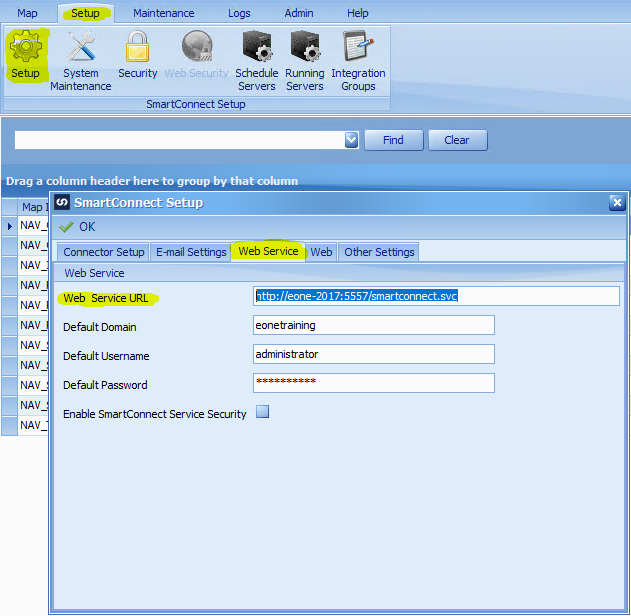
From the SmartConnect main interface:
- Click the setup tab
- Click the Setup cogwheel
- Click the Web Service tab from within the SmartConnect Setup window
- Copy the Web Service URL and paste this into the “SmartConnect Web Service” box in Excel
Domain Username & NAV Company Name
We can see the default domain and default username on the Web Service tab, but this may not be the user set up specifically for NAV (though there’s a good chance they are the same). We can find NAV-specific credentials within the ‘Dynamics NAV/365 Financials Connector’ window.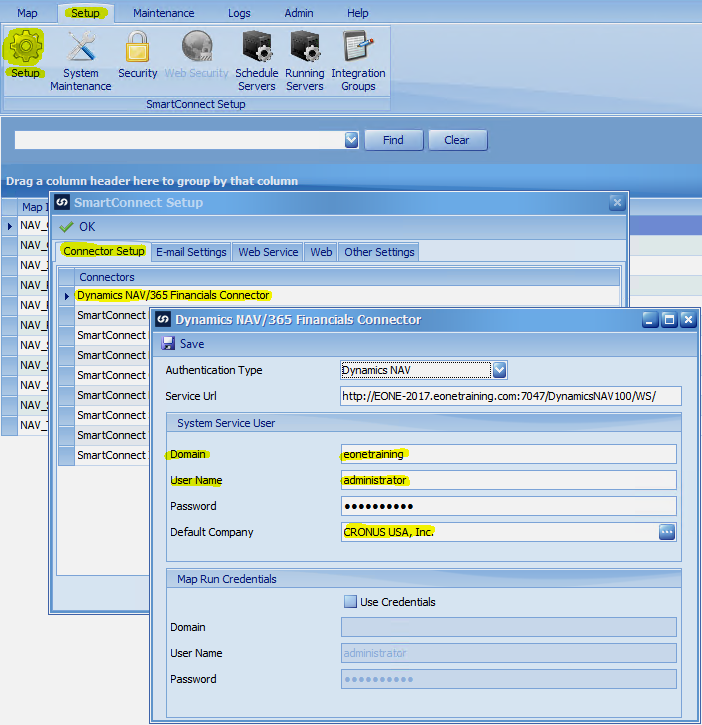
To grab the Domain Username and ‘NAV Company Name’:
- Click the setup tab
- Click the Setup cogwheel
- Click the Connector Setup tab from within the SmartConnect Setup window
- Double-click ‘Dynamics NAV/365 Financials Connector’ to open the connector
- Enter the domain and username into Excel. The image above has ‘eonetraining’ as the domain and ‘administrator’ as the username, so I would enter ‘eonetrainingadministrator’ into the ‘Domain Username’ box in Excel
- Enter the ‘Default Company’ into the ‘NAV Company Name’ box Excel EXACTLY as it appears here
Full Computer Name & Port
The template needs to re-create the URL of each published page in NAV, so we can find the base of that URL on the web services page.
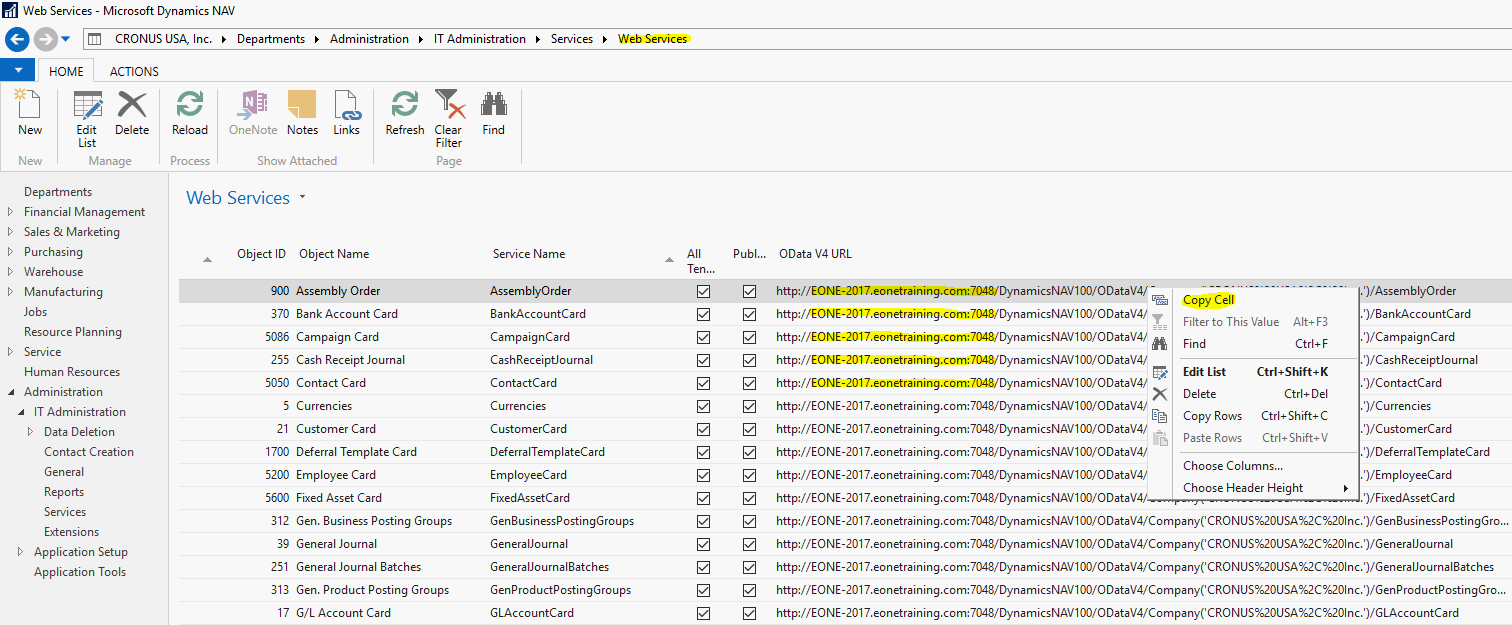
- In NAV, Open the Web Services page
- Copy an OData URL. We only need the computer name up through the port number, so any row will work and either OData or OData V4 will work. The picture above shows exactly what to enter in Excel. The highlighted part is “EONE-2017.eonetraining.com:7048”
2. Publishing All Pages
Each page we download needs to be a published page with a specific page name. The table of pages to be published for each template is on the README tab in Excel.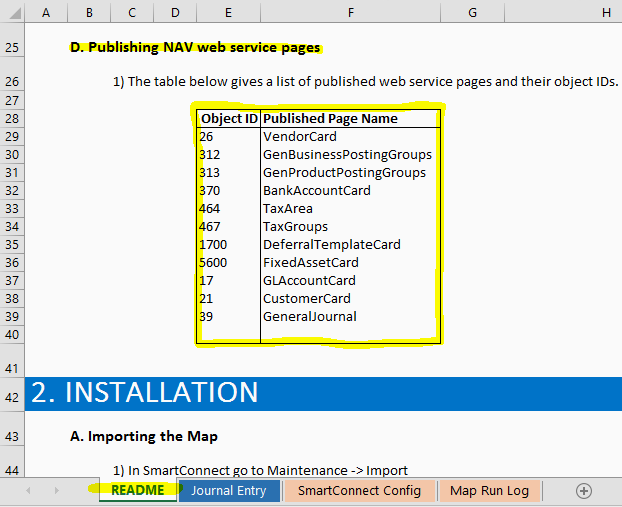
To publish every required NAV page:
- In Excel, go to the README tab
- Scroll down to right around line 25 labeled ‘D. Publishing NAV Web Service Pages’
- Every item in this table needs to be published with the exact name given!
- On the web services page, publish each page above. The object ID tells NAV what page to make visible, and the name tells Excel what that object is called. If you have a published page that matches the Object ID but the name isn’t the same IT WILL NOT WORK!
3. Entering Page Credentials
The credentials used are a bit different between Dynamics NAV on-premise and the hosted D365 Financials Business Edition. I’ll show the on-premise version first, then the D365 Financials Business Edition version.
To enter the page credentials in NAV:
- Click the ‘Refresh Data Tables’ button from the ribbon to refresh all data tables. If this is the first time refreshing the tables, Excel will prompt for credentials.
- Select Windows for the authentication type
- Select ‘Use alternate Credentials’
- Enter the same username as the ‘domain username’ entered in cell B6.
- Enter the password for the user and click connect.
If you are using Dynamics 365 Financials, use the steps below instead. To enter the page credentials in Dynamics 365 Financials:
- Click the ‘Refresh Data Tables’ button from the ribbon to refresh all data tables. If this is the first time refreshing the tables, Excel will prompt for credentials.
- Open the User Card page in NAV and choose a user that has web service access.
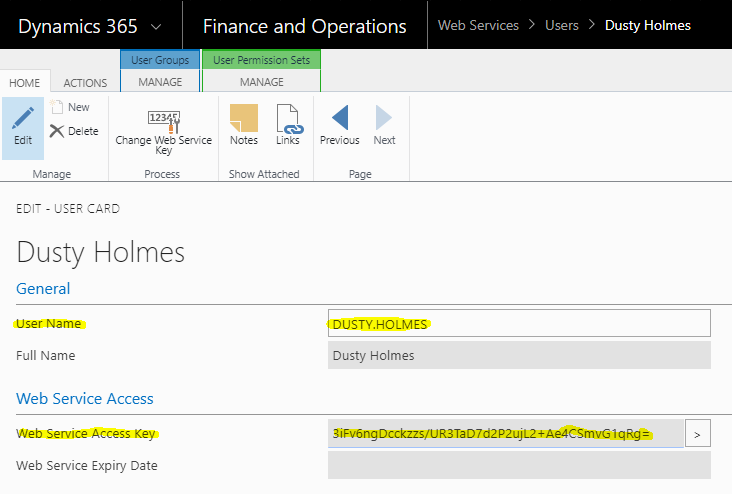
- From the user page, the username is used as the username, and the Web Service Access Key is used as the password (highlighted above)
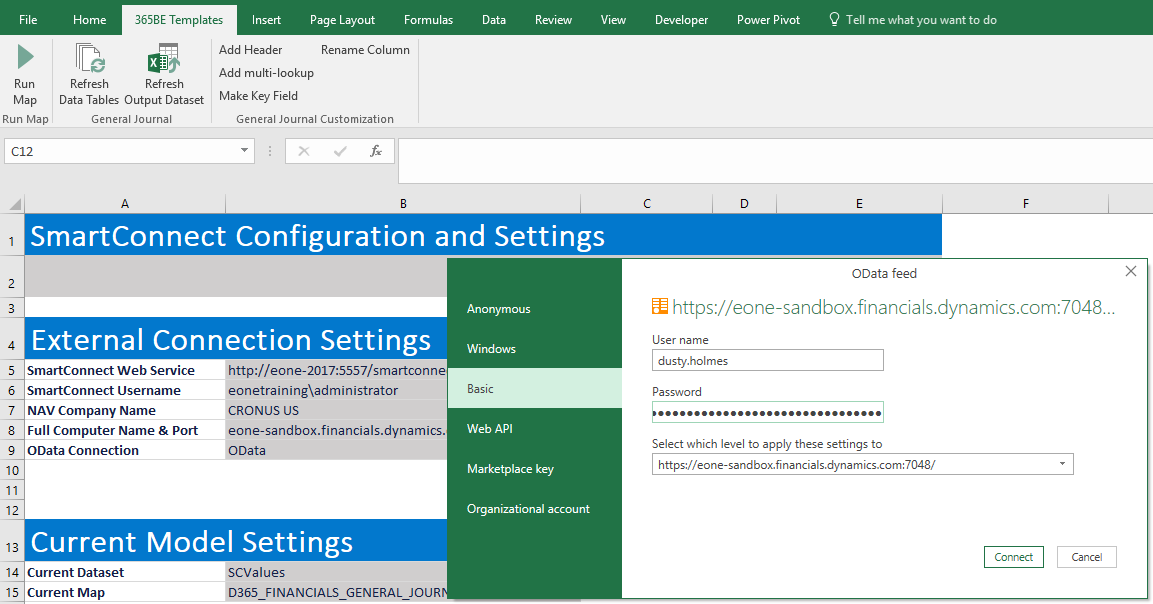
- Select Basic for the authentication type
- Enter the username and password, but leave the ‘Select which level…’ drop-down the same. Click Connect.
This should be everything you need to set up the template!