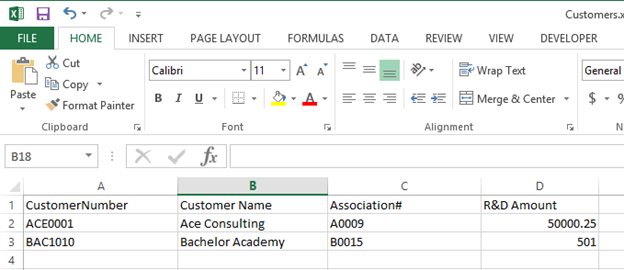
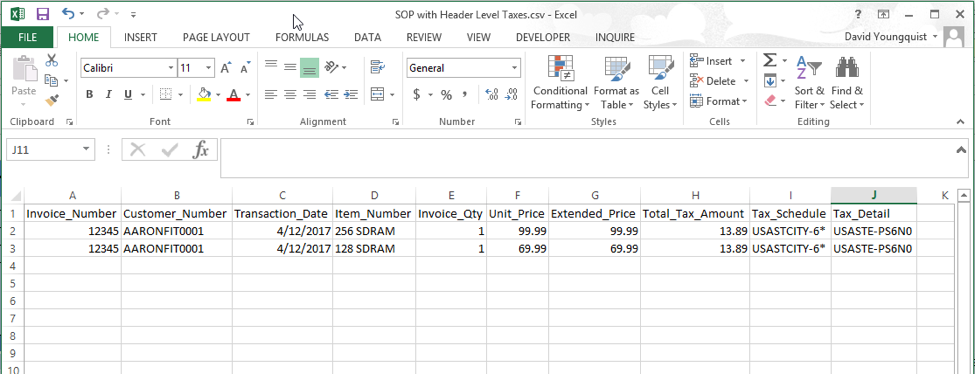
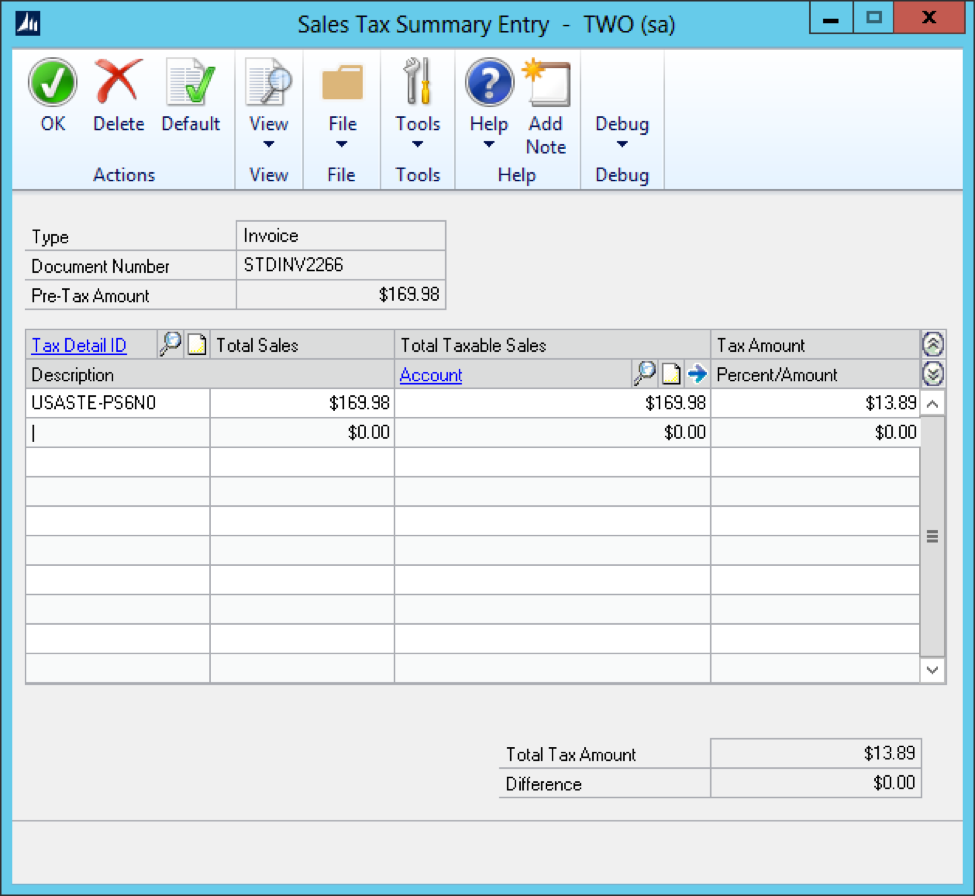
This week’s Tech Tuesday will give an example of how to do a SOP Transaction with header level taxes. The most common scenario we run into is allowing the sales transaction to use the default tax engine inside of GP. However, the second most common request is how to import a sales transaction with header level taxes. When using header level taxes you have one tax amount that applies to the entire transaction. This means that in the source file the tax amount will need to be the same for every line of the transaction. The grouping that we place on the “Create Sales Transaction” mapping will cause the amount to only get entered 1 time on the header. Here is a screenshot of what my sample file looks like, I have 1 invoice in this file with 2 line items on it. My total tax amount will be $13.89 to a single tax detail USASTE-PS6N0
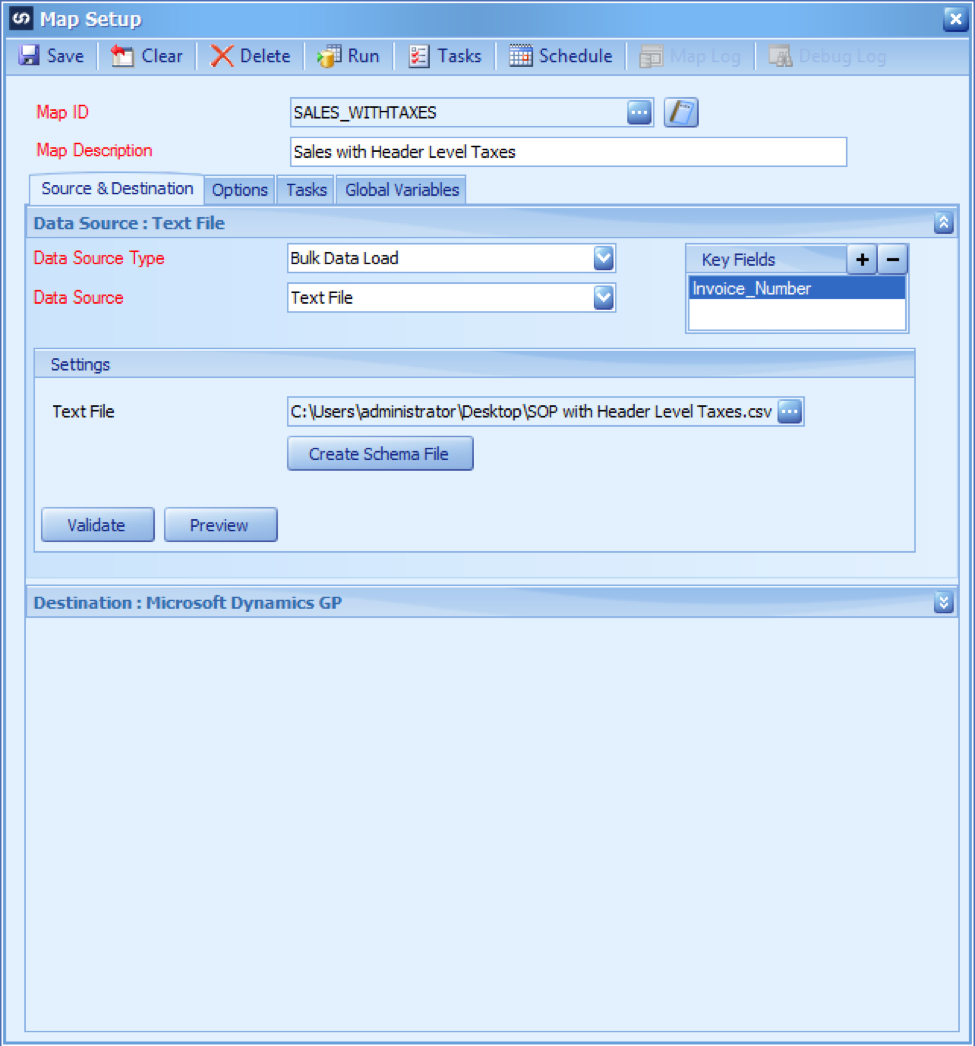
When we create the mapping, I am selecting Invoice_Number as my key field. I will also be grouping by my Invoice_Number field so that both line items get assigned to the same transaction. My data source will look like this when I have selected it.
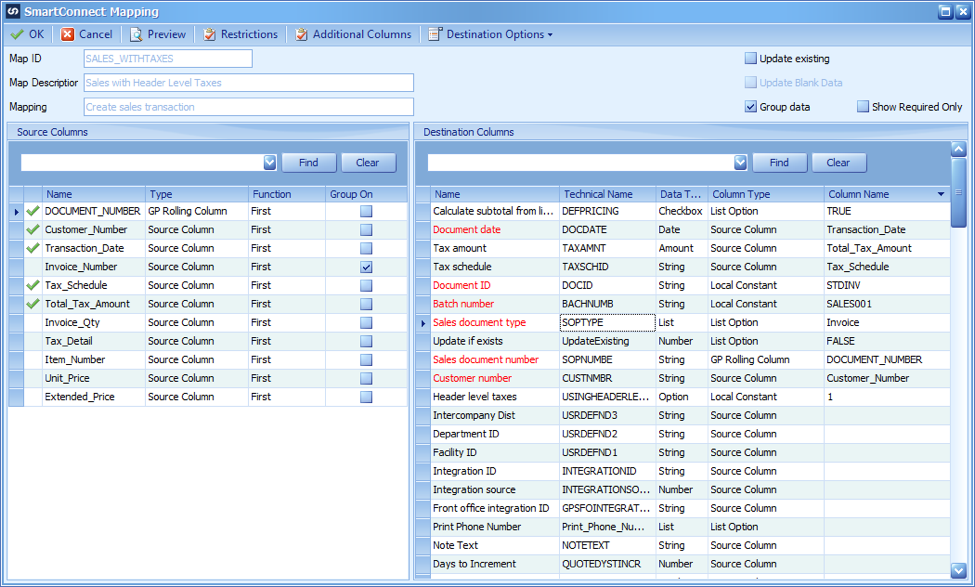
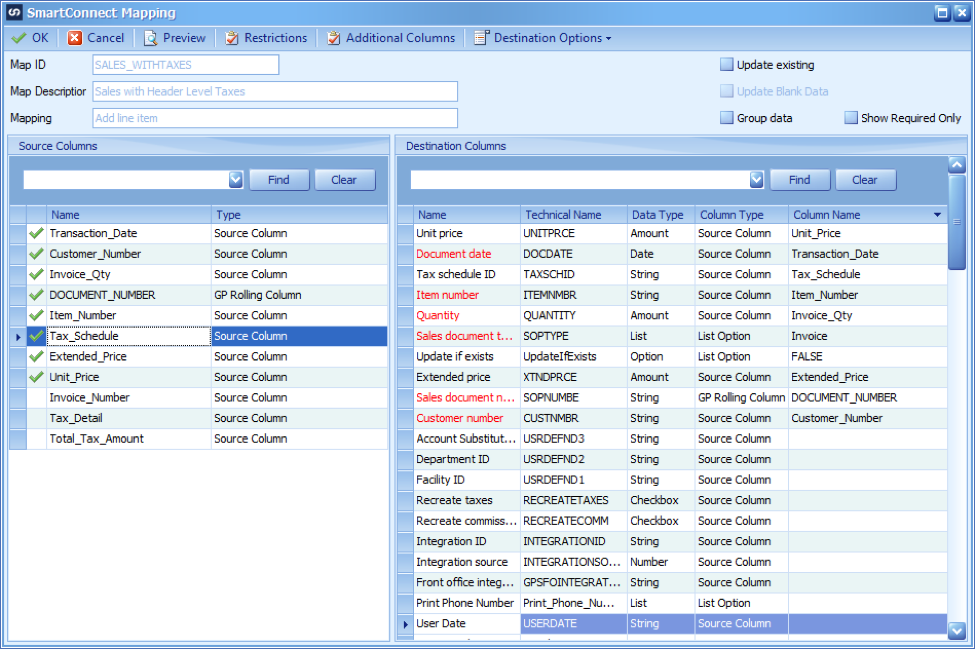
When mapping the header information, your grouping should always be on the same field as you selected for your key field, in my case I have selected Invoice_Number. The mapping of the Create sales transaction is the same as any other standard SOP mapping, however, there are a few fields that you need to pay special attention to for header level taxes. You need to map the Tax Schedule to the Tax Schedule mapping, the Total Tax Amount to the Tax amount mapping, and you need to set Header level taxes to a local constant of 1. This tells the eConnect node that I am bringing in a single tax amount on my sales document. In my example here I have allowing the document total to be calculated, and I am pulling the next default document number from Dynamics GP by using a GP Rolling Column in my mapping, here is a screenshot of all the fields I have mapped in my Create sales transaction mapping.
The next mapping will be the line item mapping. When mapping the line item, you do not want to group this mapping because you want all the line items with the same invoice number to end up being on the same sales invoice inside of Dynamics GP. The only tax specific field in the line item mapping is the tax schedule needs to be mapped to the Tax schedule ID mapping, here is a screenshot of what my Add line item mapping looks like.
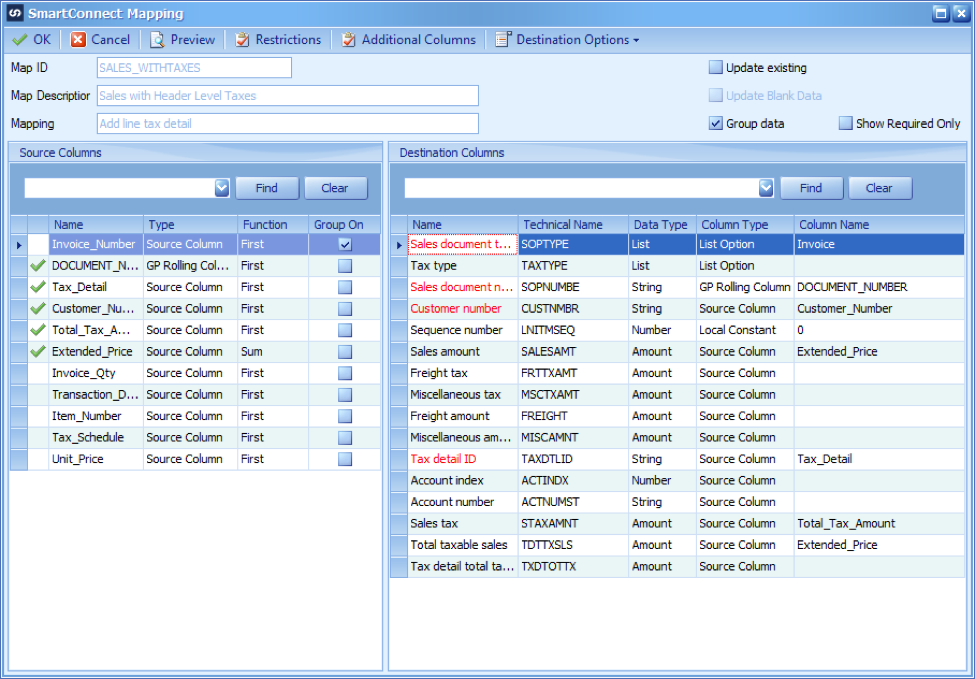
The last mapping is the Add line tax detail. This is the mapping that will get your taxes added to the document. Since we are using header level taxes, we only want the total tax amount to go in one time. This means that we need to group the Add line tax detail mapping by the same exact fields as our Create sales transaction mapping. So is this mapping I am also grouping by the Invoice_Number just like I did in my header mapping.
The most important field in this entire mapping is the Sequence Number field. When you are using line item taxes, this tells the eConnect procedure which tax goes with which line item. When you are using header level taxes, you need to set this to a local constant of 0. This is what tells the eConnect procedure that it’s a header level tax, so it only will expect to receive one tax amount, here is what a screenshot of my Add line tax detail mapping looks like.
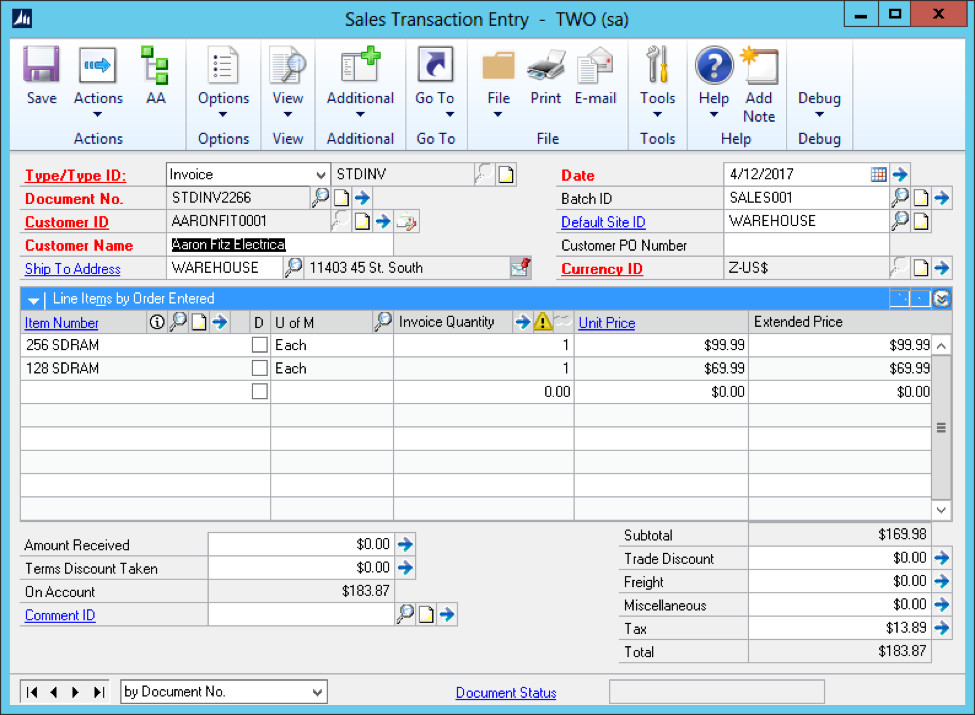
Now when I run my map, I get one document with 2 line items on it. My document total is set to automatically calculate, so it’s summing my extended prices, and adding my tax amount to it. This is what my sales document looks like after I import it.
If I expand my tax detail, I can see that I have 1 tax amount that applies to the entire document.
I have also attached a copy of my CSV source file, and my SmartConnect map so that you can import it into your system and run the map yourself.