While there are a lot of applications that use XML files as a way to describe the data that is being exported out of their system there is no industry standard on the format in which XML documents are created. I have seen some pretty crazy file layouts that make it almost impossible to import using SmartConnect. This is typically due to the layout of the XML file that prevents it from being read with a consistent set of header/rows that SmartConnect uses for processing such as duplicating node names at different header and child levels as well as nodes not always being included in the export.
I will go through an example of one such document and how we are able to transform the source XML file into another XML format making it possible for SmartConnect to handle the data properly.
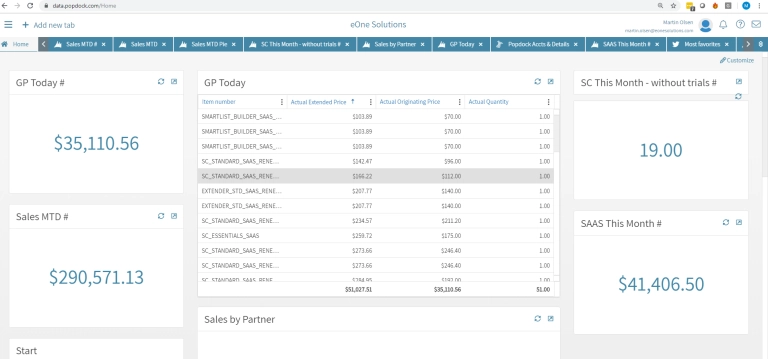
Resources
To begin, I am including some useful links that discuss XML rules and XSL rules. This web site is very helpful in understanding how to create your XSL Transformation file to get the desired XML format.
|
XML |
Introduction on XML files and formats |
|
|
XSL |
Introduction on transforming XML files into another format |
|
|
XPath |
Introduction on how to traverse through an XML file. Used extensively in XSL Transformations |
Source File
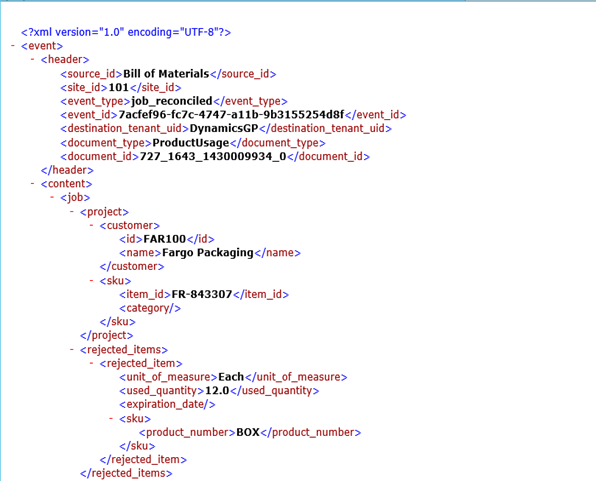
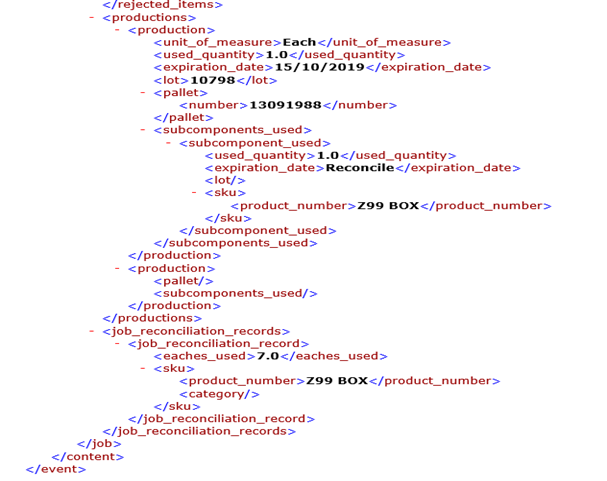
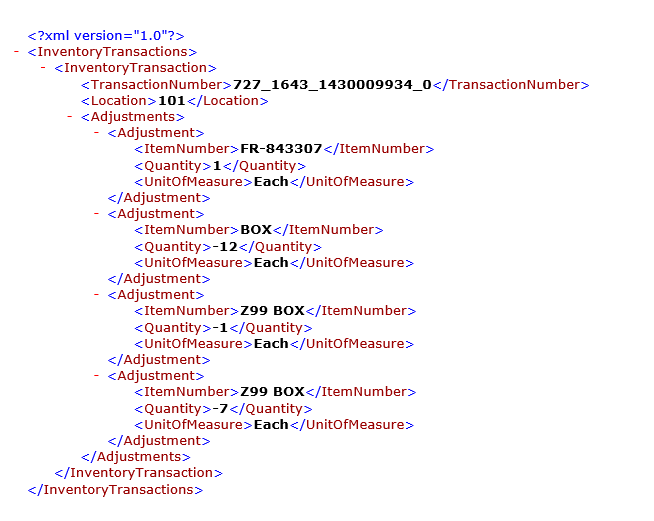
Below is the layout of my source XML file that I want to use to create an Inventory Adjustment with Dynamics GP. I need a transaction header as well as detail lines for inventory increases and/or decreases. While it is valid XML this content cannot be read in a manner that will produce the results we need for importing. There will be too many rows of data as SmartConnect will link each node to each other or data will be skipped.
In the XML below, I need to create the following IV Adjustment lines.
An increase of 1 for the item FR-843307.
A decrease of 12 for Item BOX.
A decrease of 1 for X99 BOX (subcomponent used).
A decrease of 7 for X99 BOX (reconciliation subcomponent used).
The first item we notice is the multiple nodes containing data such as rejected_items, productions and job_reconciliation_records are at the same level which is under the Job node. SmartConnect will see two records with this files since there are multiple job/productitions/production nodes since that is deepest level within the XML file.
The second item is the repeating sku/product_number node. Due to the use of the same node names, the job_reconcilation_records/job_reconciliation_record node will be thrown out.
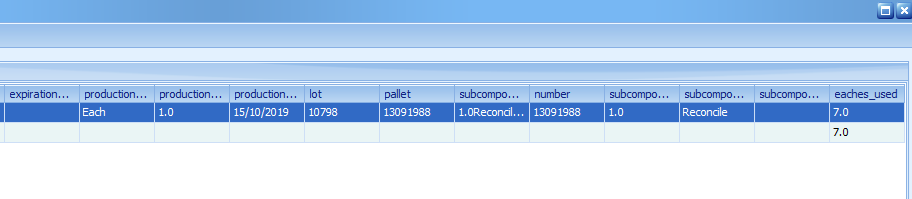
Here is what SmartConnect reads when we look at this file. There are two rows of data and we see that some of the values are blank or don’t contain the desired value.

Desired Layout
Below is the example of the desired layout so we can map and import the data we need. The great thing about XSL is you can create the file as XML, CSV or TAB delimited files.
It is very important to make sure you have your desired layout determined before you start writing your XSL Transformation to ensure success. Make sure your layout does work in SmartConnect before going through the work of doing the transformation.
In my example below, I am creating an inventory transaction document for each source XML document
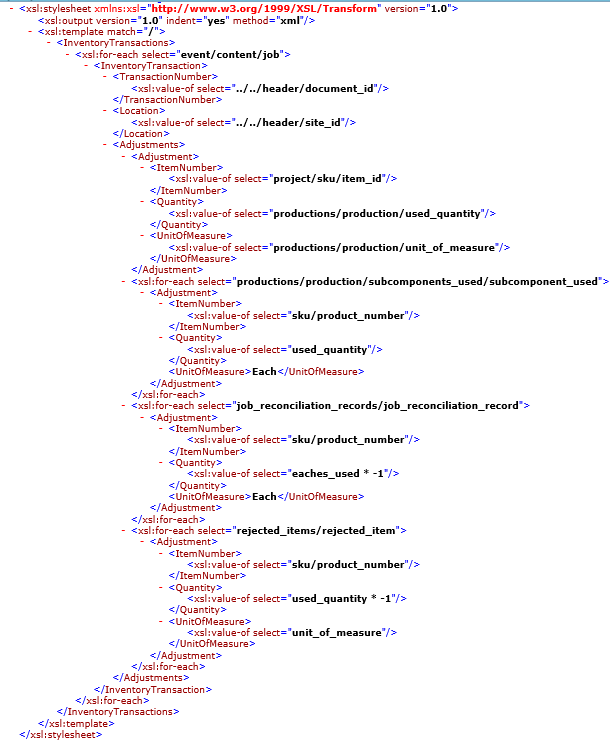
XSL Transformation
The XSL document is really just an XML document with special tags that are used during the Transformation step. I am not going to go into all of the details of writing the XSL transformation as that is out of the scope of this document.
Some items to focus on while looking at the below XSL.
<xsl:template> Determines the rules to apply when a node is matched. A “/” tells the system to look at the entire document.
<xsl:for-each> Used to loop through a set of nodes matching the given path
<xsl:value-of> Extract a value of a selected node
select=”XPATH” The value inside the quotes is the path used to traverse the XML Nodes. It is used for the for-each and value-of XSL methods.
There are some special items I have inside this transformation where I have hard-coded values between some of the XML tags. Such as the case where a unit of measure was not defined within that node.
The other special circumstance is where I multiplied the quantity by a negative one to get the negative quantity as my source data. <xsl:value-of select=”eaches_used * -1″ />
Here is the XSL document that will transform my data source into the desired XML format.
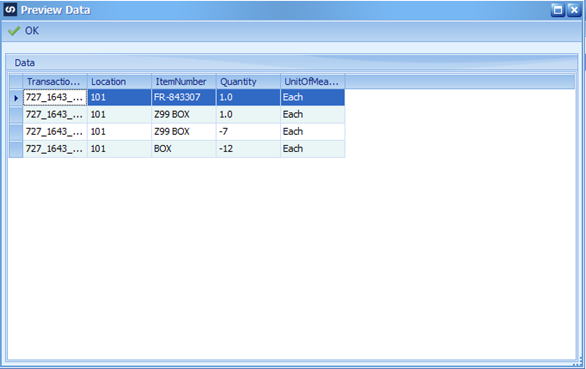
Now when I preview my data, I see the standard rows and columns that I can use to write my integration.
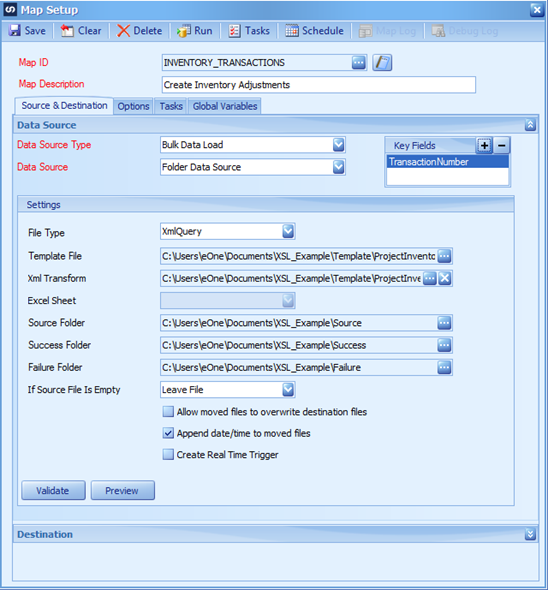
SmartConnect DataSource Setup
You can use the XSL document in either a folder data source, which I show below or with just an XML Query source type.
In this example, I am using a folder data source. I put the XSL transformation file in my template folder so that I keep it with my template file. If you click Preview at this stage, it will transform any data that is part of the XML template file.
You will note that I am able to pick the Key Field that is part of the transformed document. If the XSL file is incorrect, you will receive an XSLT Compile error.
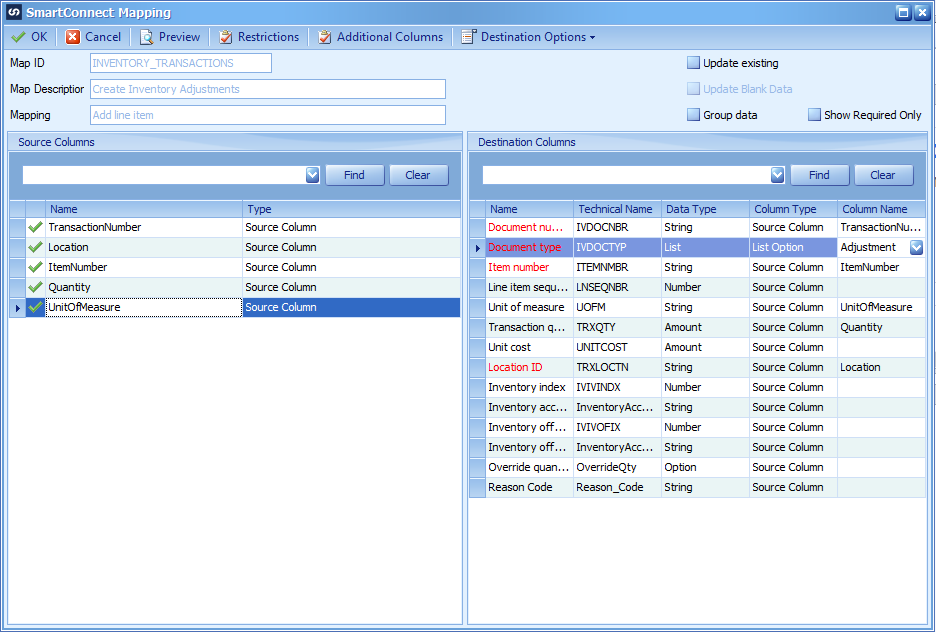
Inventory Transaction Line Mapping
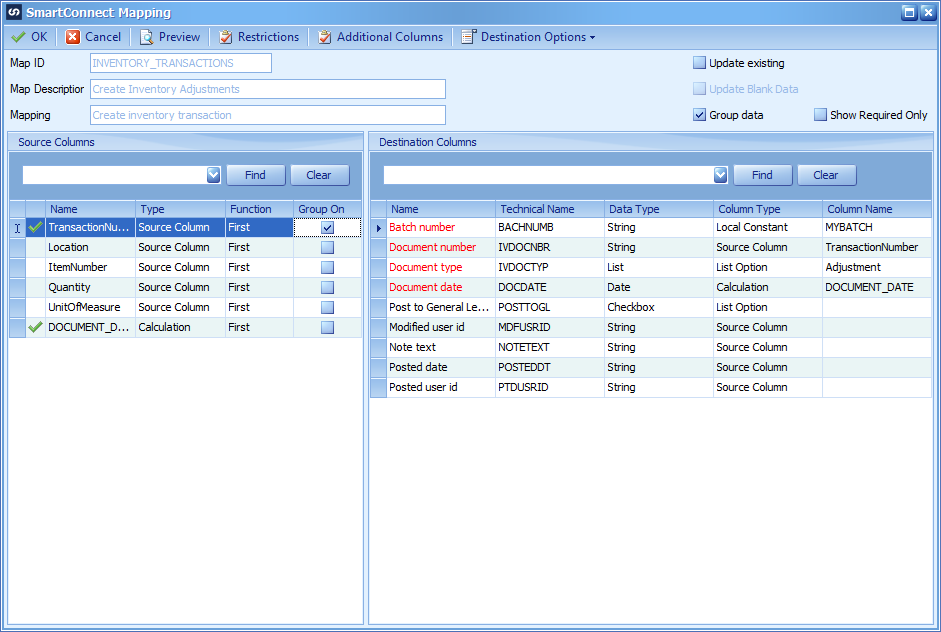
Inventory Transaction Header Mapping
When we place the source documents in our source folder, it will transform them and run the integration as we have mapped it using the format of our desired XML format.
Conclusion
Hopefully this feature of SmartConnect shows what can be done with XML files and how we can continue to write integrations that do not require manual intervention, which should be a goal for any integration you are writing.