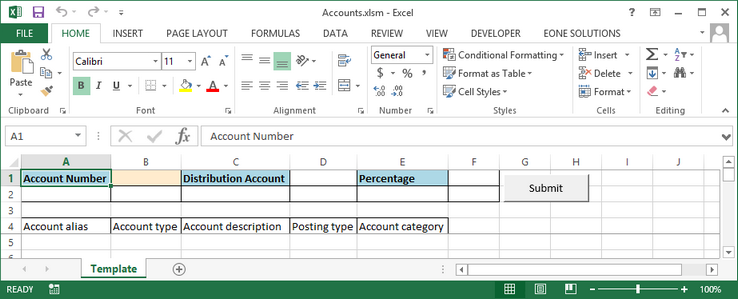
The create Excel Template option allows the creation of an Excel template to create or update Dynamics GP objects.
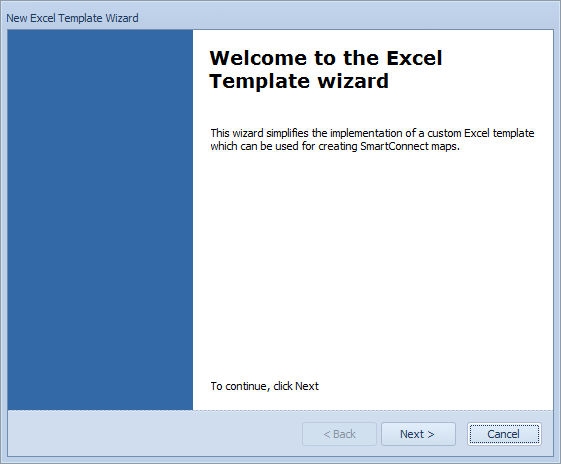
To create an excel template for Dynamics GP:
| 1. | Select the Create Excel Template option on the Maintenance tab of the SmartConnect client. |

| 2. | Select the next button. |
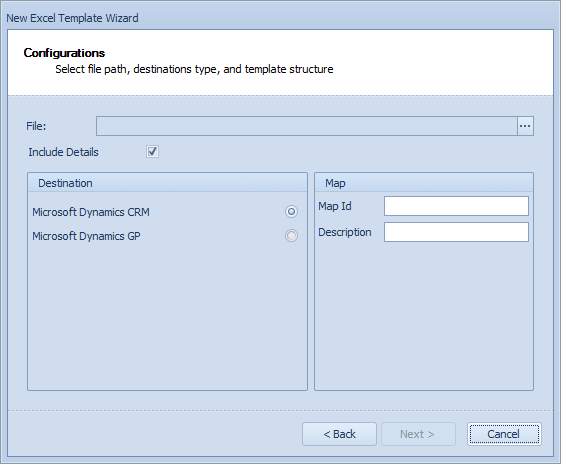
| 3. | Enter the configuration details for the template: |
| 4. | Enter a path and filename for the template file to be created. |
| 5. | Select Microsoft Dynamics GP as the destination |
| 6. | If header and detail are required for the template select the include header and include details options. If just a list of data is to be uploaded just select the Include details option. |
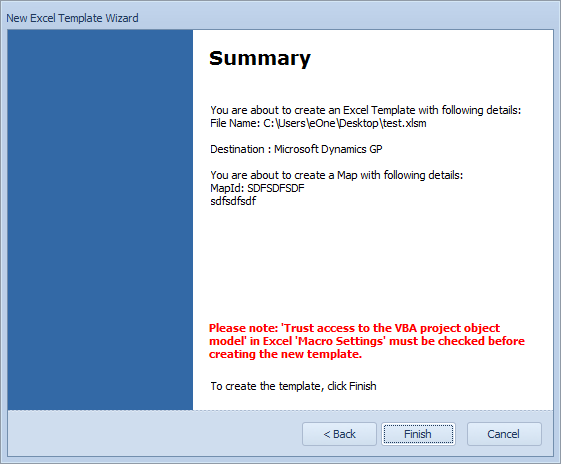
| 7. | Select create a map for this template and enter a map id and description (the map id should not already be created in SmartConnect) |
| 8. | Select next to continue. |
| 9. | Enter the Dynamics GP selections: |
| 10. | Select the Dynamics GP group |
| 11. | Select the Dynamics GP node type |
| 12. | Select the node that should be used for detail updates. |
| 13. | Select the key fields for the map. For header detail templates this field would usually be used to link the header and detail items together. For detail templates this is the field(s) that makes each record unique. |
| 14. | Select next to continue. |

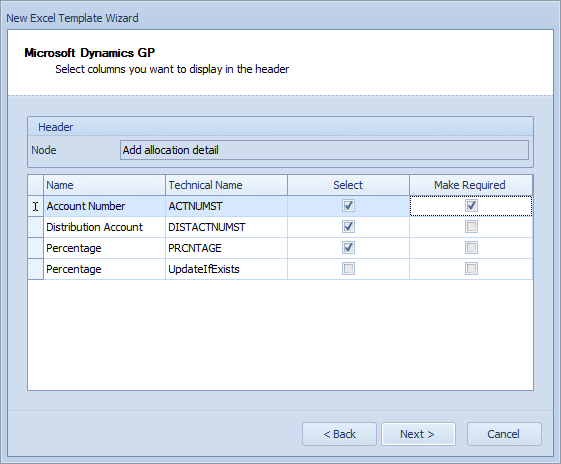
| 15. | Enter the header field selections: (only displayed if include header was selected) |
| 16. | Select the fields that should be entered for the header. |
| 17. | Fields required by eConnect are shown in red. |
| 18. | If a field should always be entered in the Excel template, make the field required by selecting the make required checkbox. |
| 19. | Select next to continue. |
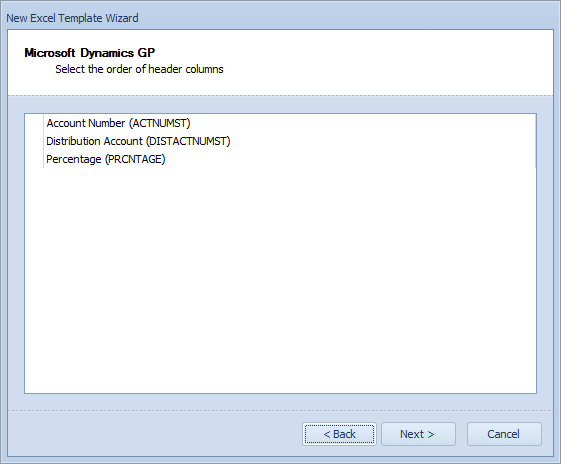
| 20. | Determine header field order: (only displayed if include header was selected) |
| 21. | The order of fields may be changed by dragging fields up or down the displayed list. |
| 22. | Select next to continue. |
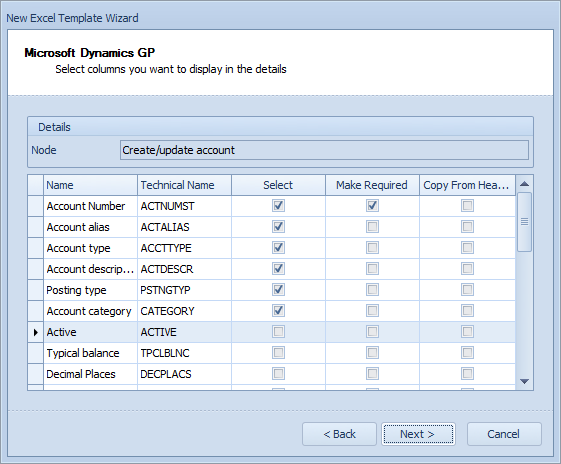
| 23. | Enter the detail field selections: |
| 24. | Select the fields that should be entered for the header. |
| 25. | Field required by eConnect are shown in red. |
| 26. | If a field should always be entered in the Excel template, make the field required by selecting the make required checkbox. |
| 27. | If a field can be read from the template header (if include header was selected) select the copy from header checkbox. This will remove the field from the detail area, and default in the entry from the header. |
| 28. | Select next to continue. |
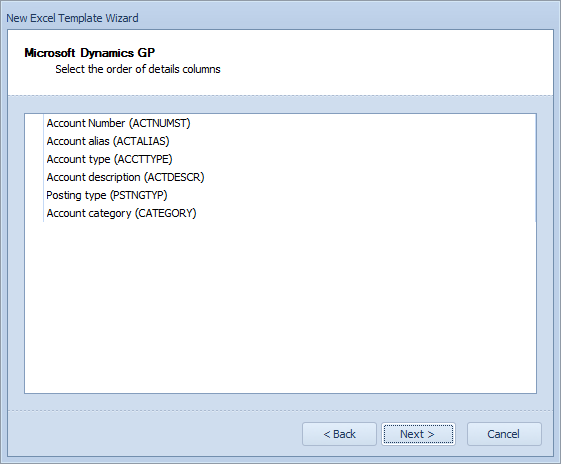
| 29. | Determine detail field order: |
| 30. | The order of fields may be changed by dragging fields up or down the displayed list. |
| 31. | Select next to continue. |
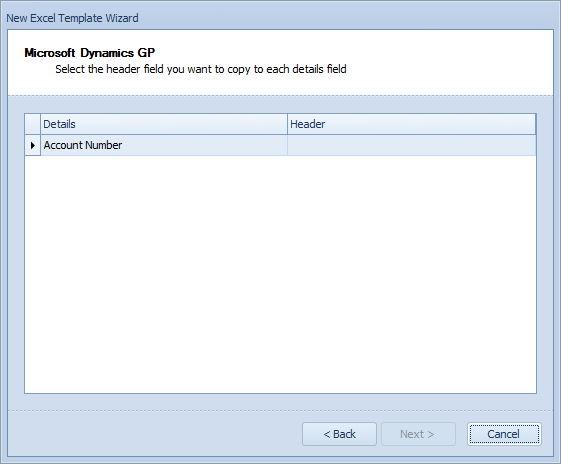
| 32. | Define defaulted fields: |
| 33. | If include header was selected, and some detail fields are to be defaulted from the header, select the header field that should be used for each defaulted detail field. |
| 34. | Select next to continue. |
| 35. | Select finish to create the template. |