A calculated column takes values, performs a calculation, then outputs the value for mapping to a destination field.
To define a Calculated Column:
| 1. | Open Map >> Create, or select the Maps Quick Link and double click on the map to be edited. |
| 2. | If creating a new map enter the map id and description. |
| 3. | If creating a new map enter the data source and key field information. |
| 4. | If creating a new map select the required destination, then double click on the mapping type required. |
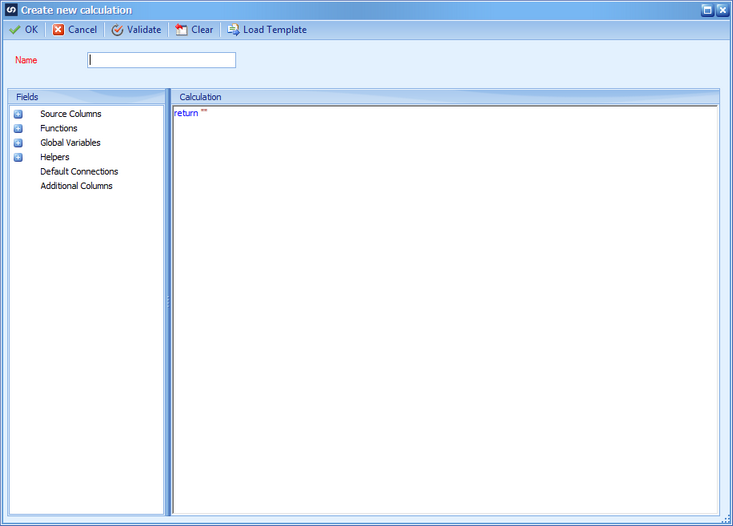
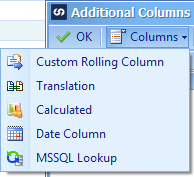
| 5. | Select Additional Columns from the toolbar at the top of the mapping window. |
| 6. | Select Columns >> Calculated from the toolbar at the top of the columns window, or double click on a calculated column to edit. |
| 7. | Enter a name for the calculated column. Names must be unique within a map. |
| 8. | Enter the required calculation in the script area. Standard scripting functionality is available within this window. Note: the return value for a calculated column is a string. |
| 9. | Select Load Template if the script may be loaded from a predefined template. Select the required template and then provide any variable values requested. Select OK to return the script details to the calculation window. |
| 10. | Select Clear to return the script to the default script. |
| 11. | Select Validate to ensure that there are no compilation errors in this script. |
| 12. | Select OK to save the script. The calculation column will now be available for mapping to destination fields. |