SmartConnect 2018
IIS 7.0
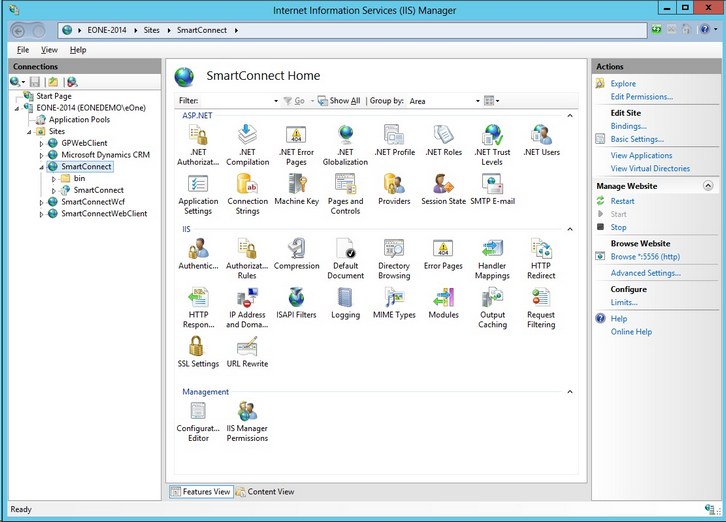
| 1. | Open IIS Manager (Control Panel >> Administrative Tools >> Internet Information Services (IIS) Manager) |
| 2. | Expand the server folder, then the websites folder. |
| 3. | Find the SmartConnect website and expand it. |
| 4. | Select the SmartConnect virtual directory under the SmartConnect website then double-click the Authentication option. It is found under the IIS area or the Security category, depending on how the Group By is setup. |
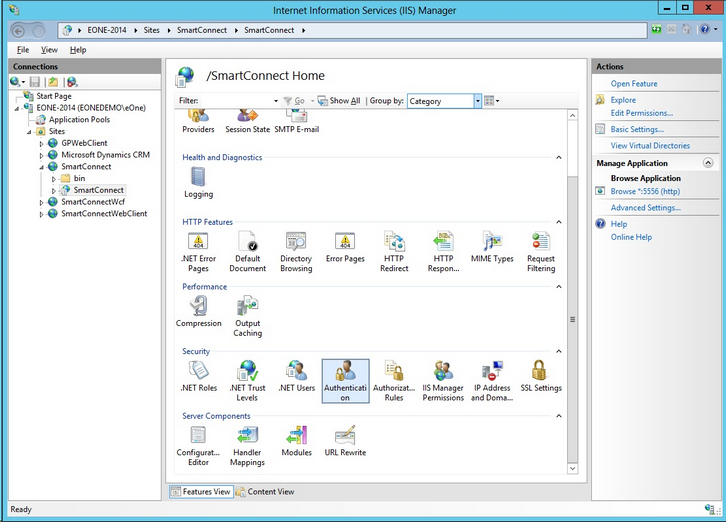
| 5. | Ensure the following authentication settings are updated correctly: |
| o | Impersonation is set to a user that is set up within SmartConnect. This is the user that will run all maps that are initiated through the web server. This user must also have access to the maps that will be run through the web service. |
| o | If strong security is required on the web service, windows authentication should be set. If strong security is not as important then allow anonymous access. Windows authentication will required users to be given access to the web service before they can access it. Anonymous authentication will allow all users to access the web service. |
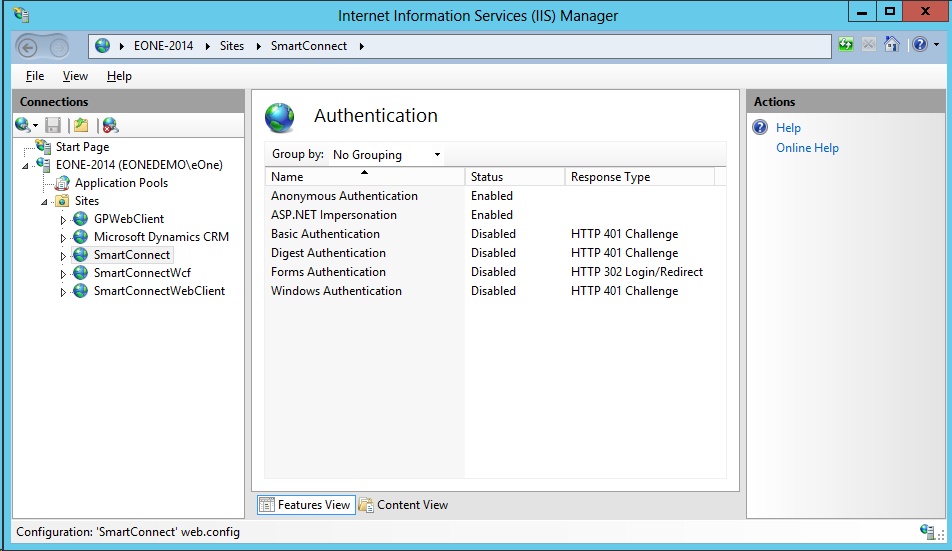
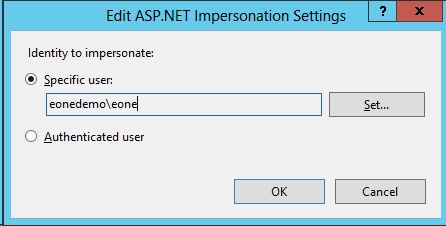
| 6. | To set ASP.NET impersonation, select the impersonation line and then select edit under the right side actions menu. |
| 7. | To enable anonymous access, select the anonymous access line and then select edit under the right side actions menu. To disable anonymous access, select the anonymous line then select disable under the right side actions menu. |
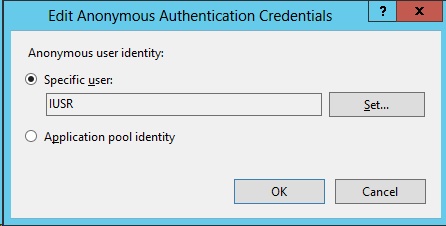
| 8. | To set windows authentication, disable the anonymous authentication, then select the windows authentication line, then select enable under the right side actions menu. |
| 9. | To verify that the web service is running correctly, click on the SmartConnect web site. |
| 10. | At the bottom of the page select the content view |
| 11. | Highlight SmartConnect.asmx and select Browse on the right side actions menu. |
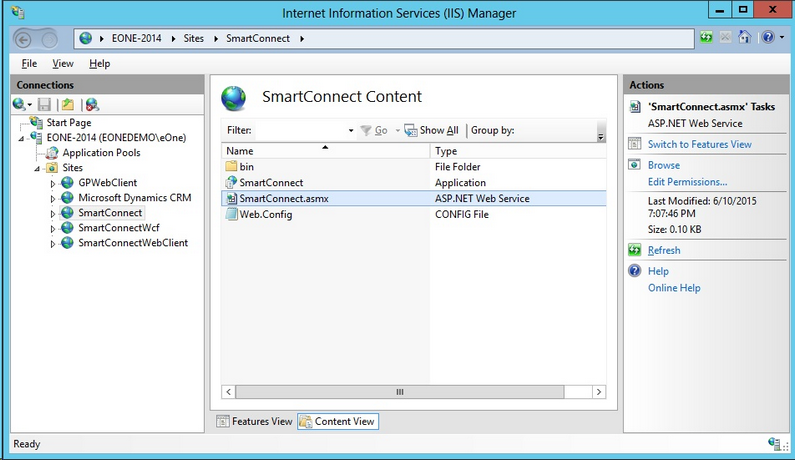
| 12. | The web page below should be shown. This means that your web service is configured correctly. |
