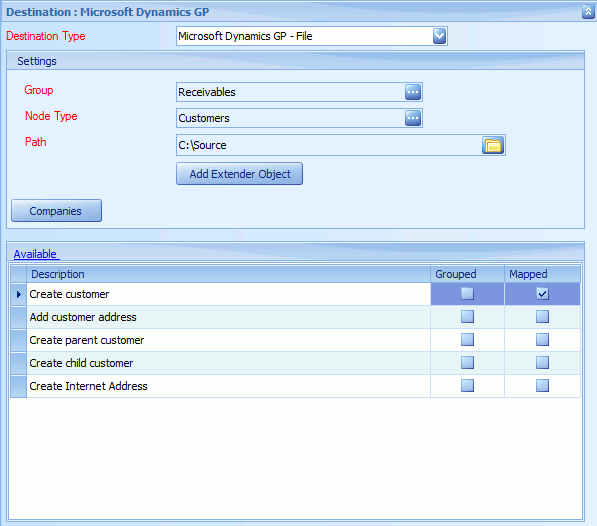
The Dynamics GP file destination takes the information that would normally be sent to GP via eConnect and instead writes it to a text file. This is especially useful when either setting up a new map or troubleshooting as the exact information that would be sent to GP can be viewed without sending the data to Dynamics GP.
To create Dynamics GP File destination:
| 1. | Select create, or select the Maps Quick Link and double click on the map to be edited. |
| 2. | If creating a new map enter the map id and description. |
| 3. | If creating a new map enter the data source and key field information. |
| 4. | Select Microsoft Dynamics GP - File as the destination. |
| 5. | Select the Dynamics node group required. |
| 6. | Select the Dynamics node type required. The valid actions that can be performed using this node group and type will then be displayed in the node mapping window. |
| 7. | Use the lookup to select a path to write the output files to. Note: an Xml file will be created for each document processed. |
| 8. | If applicable select the add Extender object button to add Extender data to the integration. |
| 9. | Select the companies button to select the GP companies that would receive the data. Note: an Xml file will be created for each document / company combination. |
| 10. | Double click the action required for this map. |
| 11. | In the mapping screen map the columns from the data source to the selected destination. |
| 12. | Select OK to save the mappings. |
| 13. | Click Save to record your map changes. |

Notes:
| • | When the map is run one file will be written to the selected directory for each company / document combination. The output files are named as: |
| o | SC-<Server Name>-<Company Id>-<Map Id>-<record number>.xml |
| • | Once a GP file destination has been tested and approved it may be changed into a Microsoft Dynamics GP or Microsoft Dynamics GP Message Queue destination without losing any map settings. |
