The NetSuite connector gives you access to all of your NetSuite data, including customers, vendors, items, sales, purchases, and accounts.
Before you add your NetSuite connector, you will need the following:
- Your Account ID.
- Create a new integration for Popdock to get a key and secret.
- Create a new role and assign permissions for the user accessing Popdock.
- Create a new access token for the user.
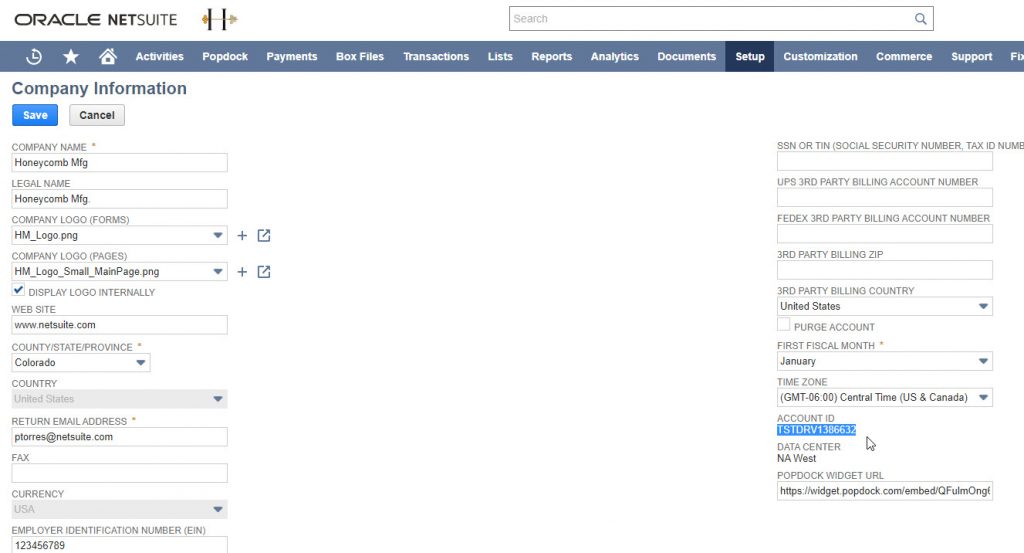
Your NetSuite account ID:
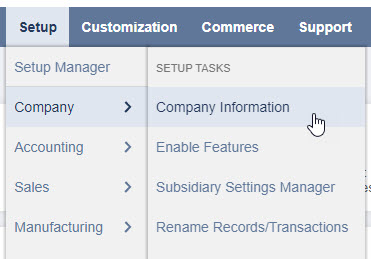
1. In NetSuite, select Setup >> Company >> Company Information.
2. Copy your Account ID to notepad for you to use later when adding the Netsuite connector settings in Popdock.
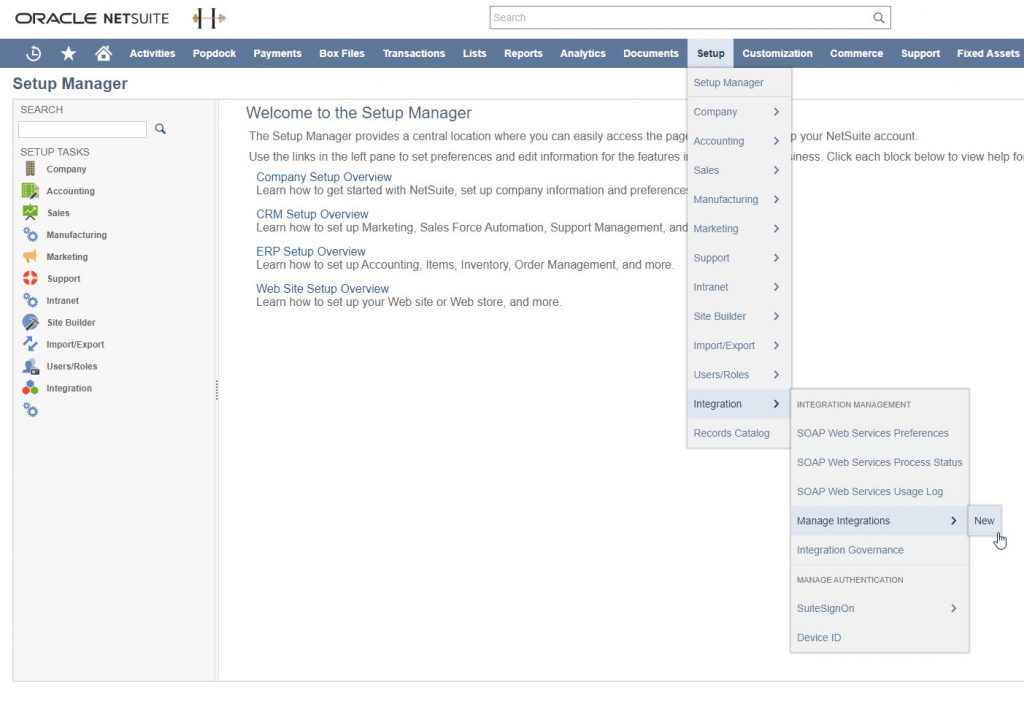
Creating a new integration in Netsuite:
1. In NetSuite, select Setup >> Integration >> Manage Integrations >> New.
2. On the Integration page, enter a name and be sure that only the boxes for Token-Based Authentication and User Credentials are checked under the Authentication section. Then click the Save button.
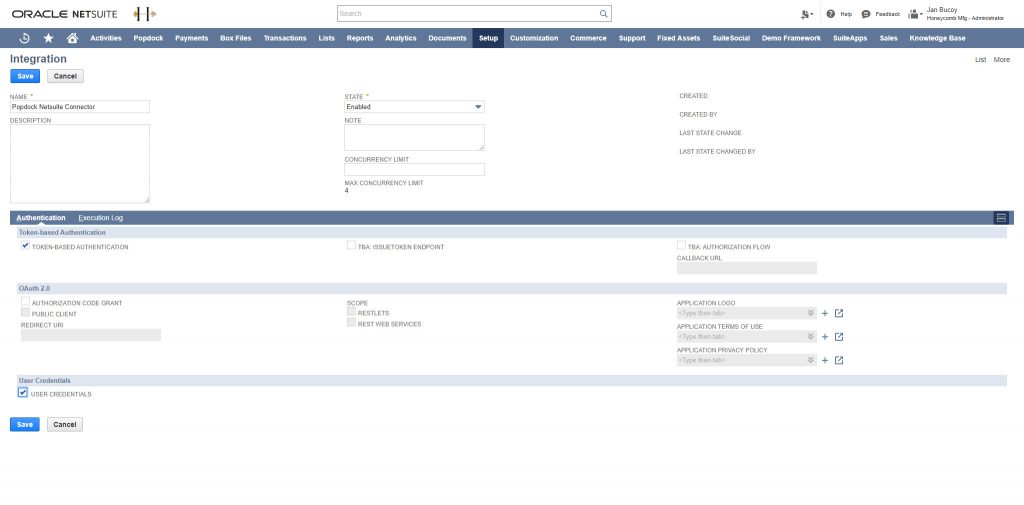
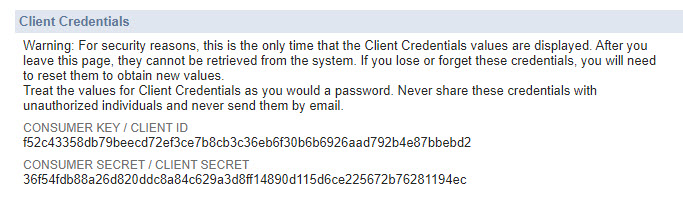
3. If you receive the confirmation that the settings were saved successfully, you should now see at the bottom of the page a Client Credentials section. Copy the Client ID and Client Secret to a notepad for you to use later when adding the Netsuite connector settings in Popdock.
Creating a new role in Netsuite:
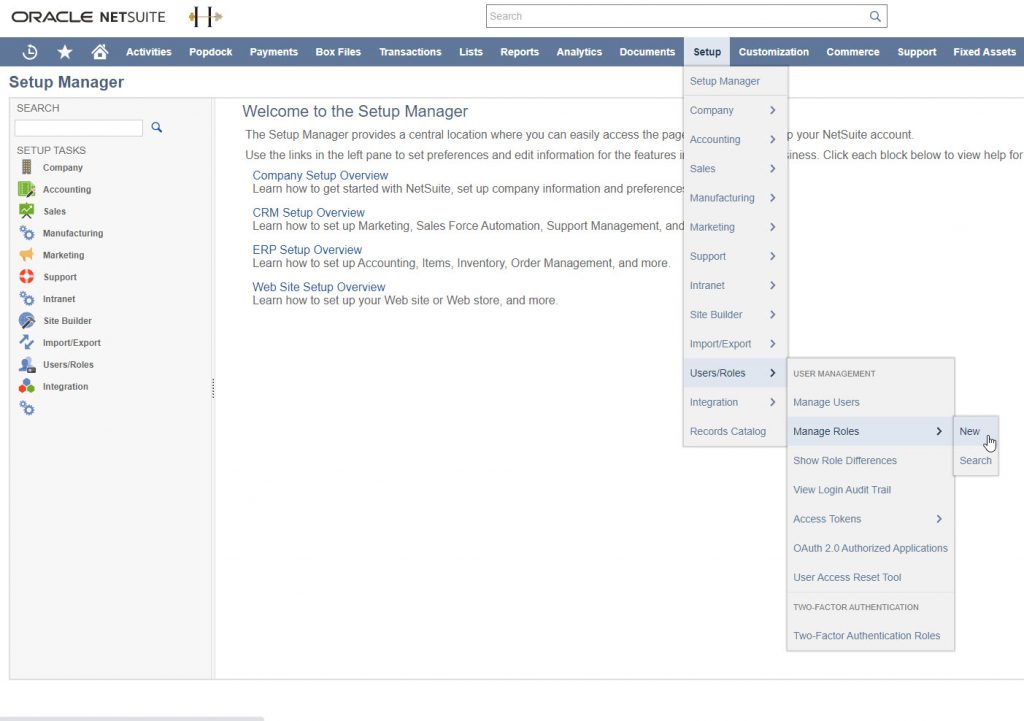
1. In NetSuite, select Setup >> Users/Roles >> Manage Roles >> New.
2. Enter a name for the new role, then give it an ID. Here I just entered the ID as the name in all lowercase with underscores for the spaces. Under Subsidiary Restrictions section, be sure to select the Accessible Subsidiaries to ALL. Nothing else here needs to be checked.

3. Next we will be adding permissions to the sub tabs under the Permissions. For the Transaction tab, add the Find Transaction permission.
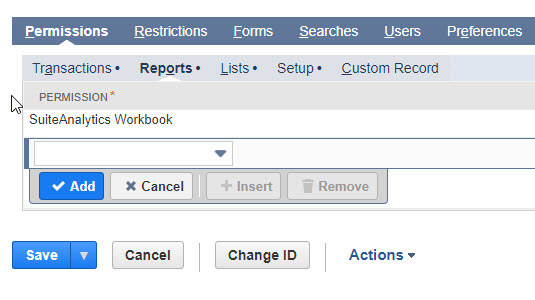
4. Next click on the Reports sub tab. Then add the SuiteAnalytics Workbook permission.
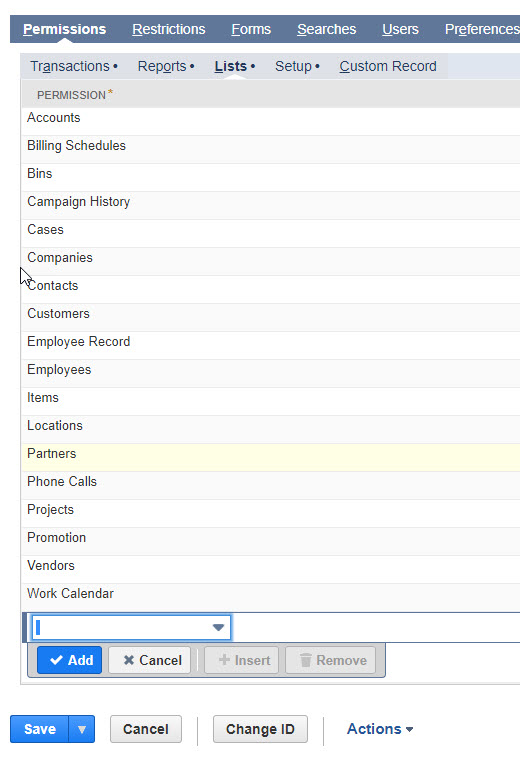
5. Now click on the Lists sub tab. Here you will add the following permissions so that Popdock has access to these default lists: Accounts, Billing Schedules, Bins, Campaign History, Cases, Companies, Contacts, Customers, Employee Record, Employees, Items, Locations, Partners, Phone Calls, Projects, Promotion, Vendors, and Work Calendar.
6. Next go to the Setup sub tab. Here you will need to add the following permissions: Manage Accounting Periods, REST Web Services, and User Access Tokens.
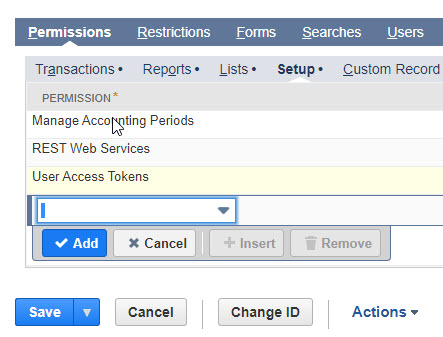
7. Now click the Save button to save your settings for this role.
Adding a role to a user in Netsuite:
1. In NetSuite: select Setup >> Users/Roles >> Manage Users.
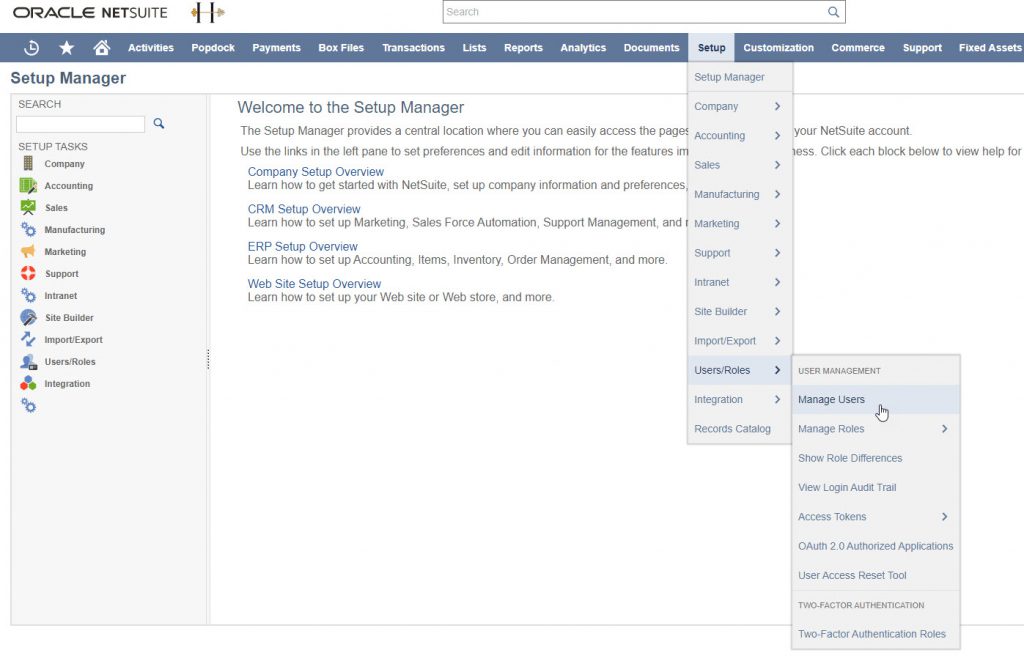
2. Locate and click on the user you want to add the new role to. Once you have the user page open, click on Edit. Then on the sub tabs at the bottom, click on Access. Here under Roles, you will want to add the new role that you just created. Select the role from the dropdown, then click the Add button.
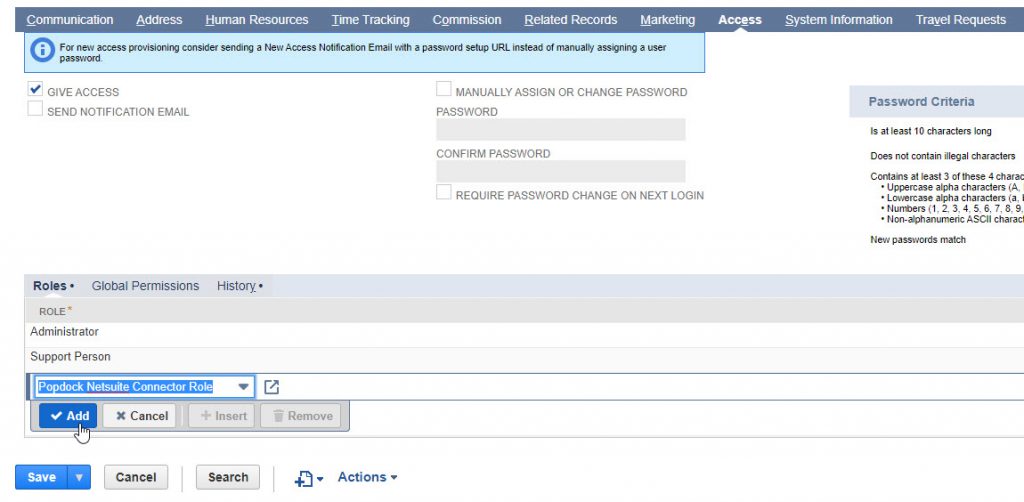
3. Now you have added the role to the user. Click the Save button.
Creating access tokens for a user in Netsuite:
1. In NetSuite, select Setup >> Users/Roles >> Access Tokens >> New.
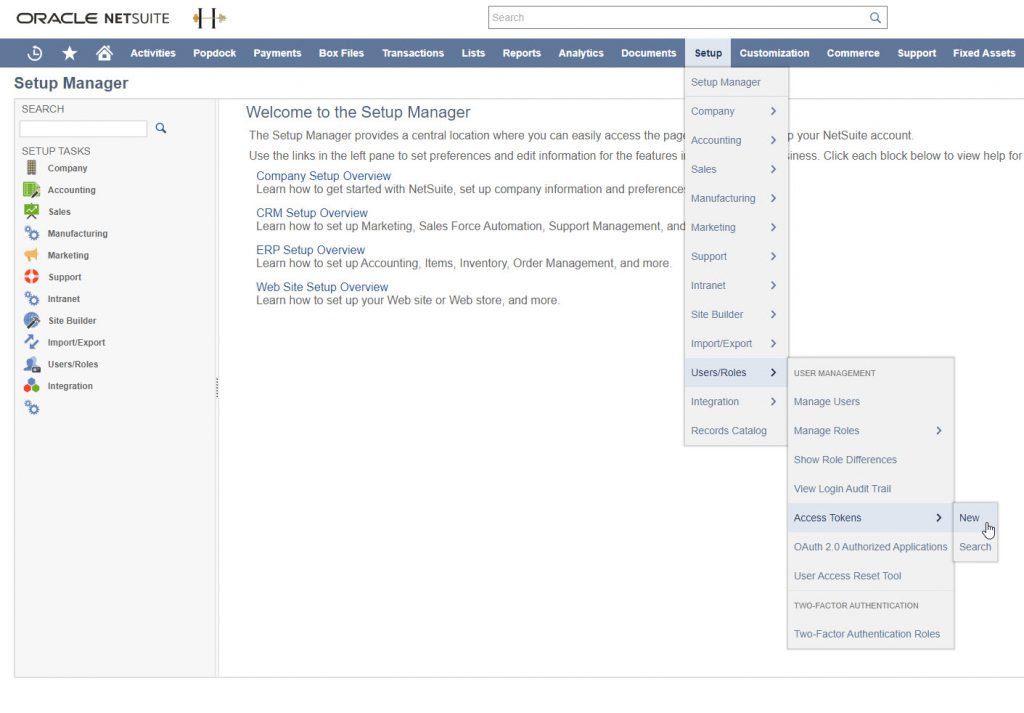
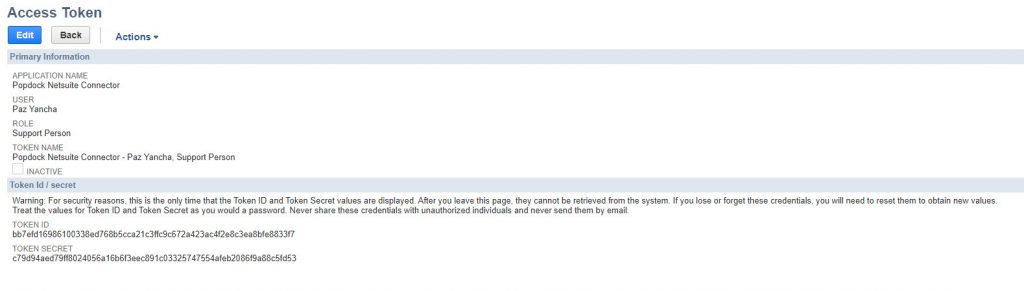
2. On the Access Token page, select the new integration you created in the Application Name dropdown. Then select the user that you have added the new role to and select that role from the Role dropdown. Token Name will auto populate.
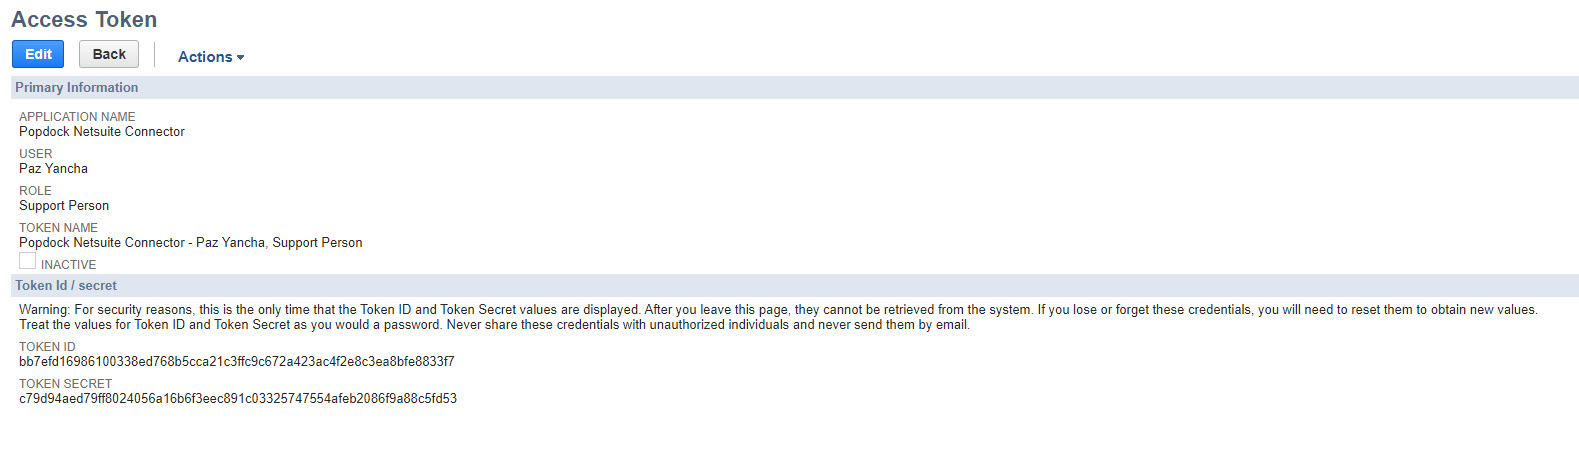
3. Now click Save. Now if saved successfully, you will have a Token ID and Token Secret. Copy these to a notepad for you to use later when adding the Netsuite connector settings in Popdock.
How to add a Netsuite connector:
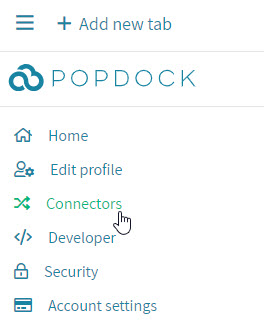
1. Go to the menu and click on Connectors.
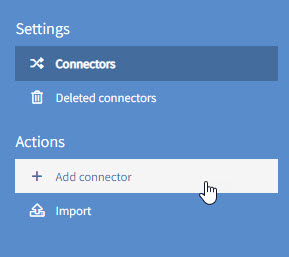
2. Under Actions in the left navigation menu, click on Add connector.
3. Find Netsuite in the list of connectors and click on the logo.

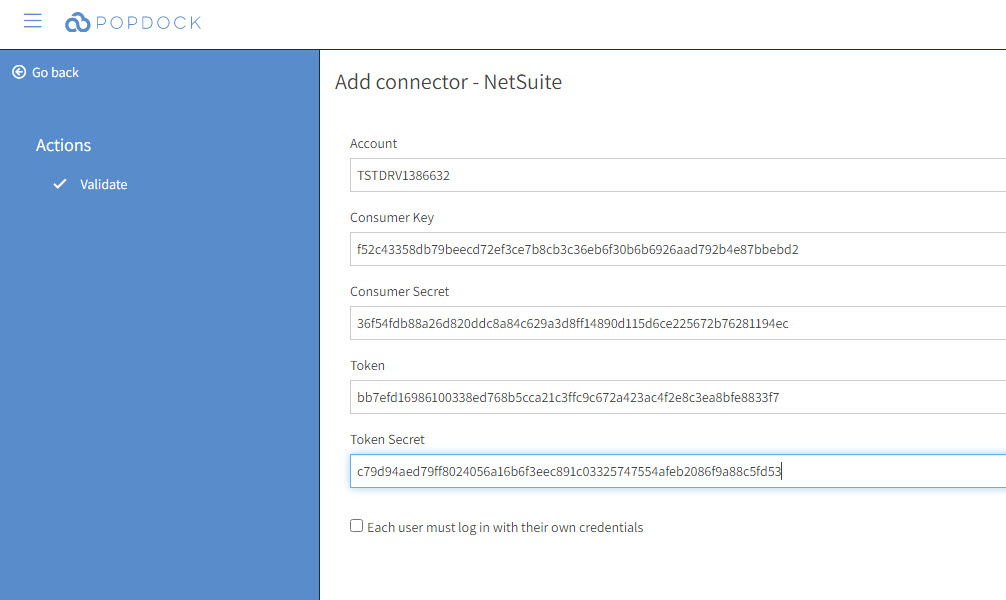
4. Now you will enter all the settings we copied to notepad from Netsuite: Account ID, Consumer Key, Consumer Secret, Token, and Token Secret. Then click Validate.
5. After the settings are validated, you will see Connect available, now click on Connect and your Netsuite connector will begin installing.

Needing further help adding your NetSuite Connector? Email support@eonesolutions.com