How to add a PostgreSQL Connector:
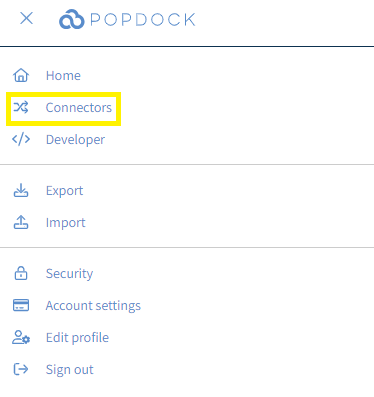
1. Click on the triple bar menu in the upper left corner of the Popdock homepage and select Connectors from the drop down menu.
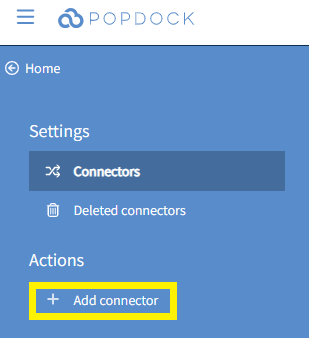
2. Select the +Add connector button under Actions.
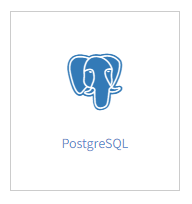
3. Select the PostgreSQL Connector from the list of connectors.
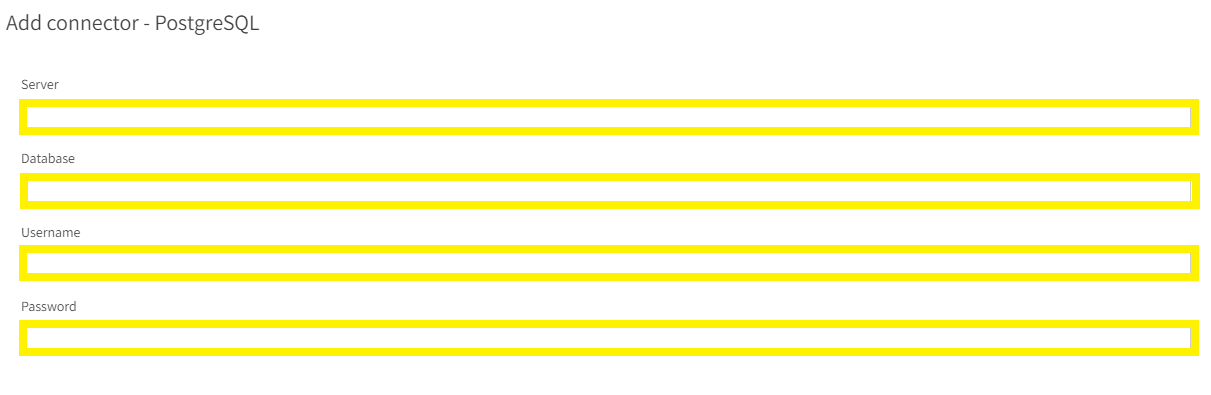
4. From within the Add connector – PostgreSQL page, use the available fields to enter in the appropriate information regarding your PostgreSQL database.
Server – The hostname of the PostgreSQL server. Following the Server name, add a comma and the port the PostgreSQL database listens on. By default, this is port 5432. (Example – YourPostgreSQLServer,5432).
Database – The name of the PostgreSQL system database.
Username – A PostgreSQL user with read access to the system database.
Password – The password for the PostgreSQL user.
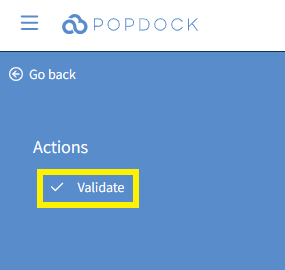
5. With all fields completed, click Validate under the left Actions menu.
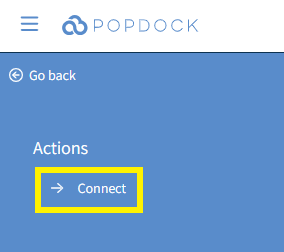
6. Once validated, click Connect under the left Actions menu.
7. You will be directed to the Select lists page. Click the box to the left of the individual lists to select your lists or you can click the Select all button to Select all lists from within the PostgreSQL database. With your lists selected, click Add lists.

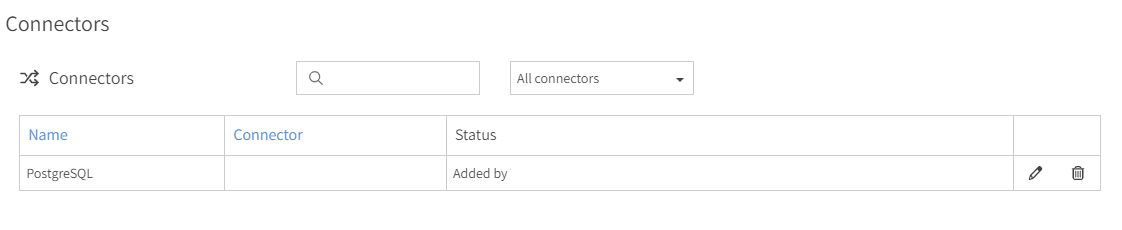
8. You will taken to your list of your connectors where your PostgreSQL connector will begin installing with the lists you added. Once complete, your PostgreSQL connector will be available within your list of connectors and available to use.
Having trouble adding this connector? Email support at support@eonesolutions.com