How to add a SmartConnect Connector:
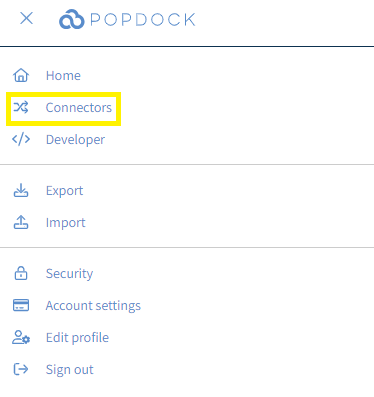
1. Click on the triple bar menu in the upper left corner of the Popdock homepage and select Connectors from the drop down menu.
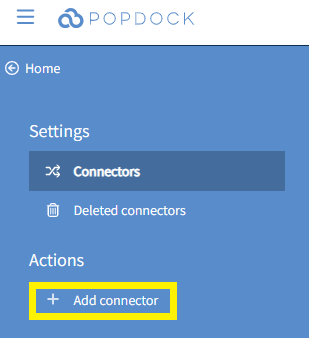
2. Select the +Add connector button under Actions.
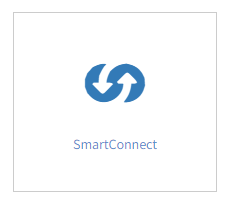
3. Select the SmartConnect connector from the list of connectors.
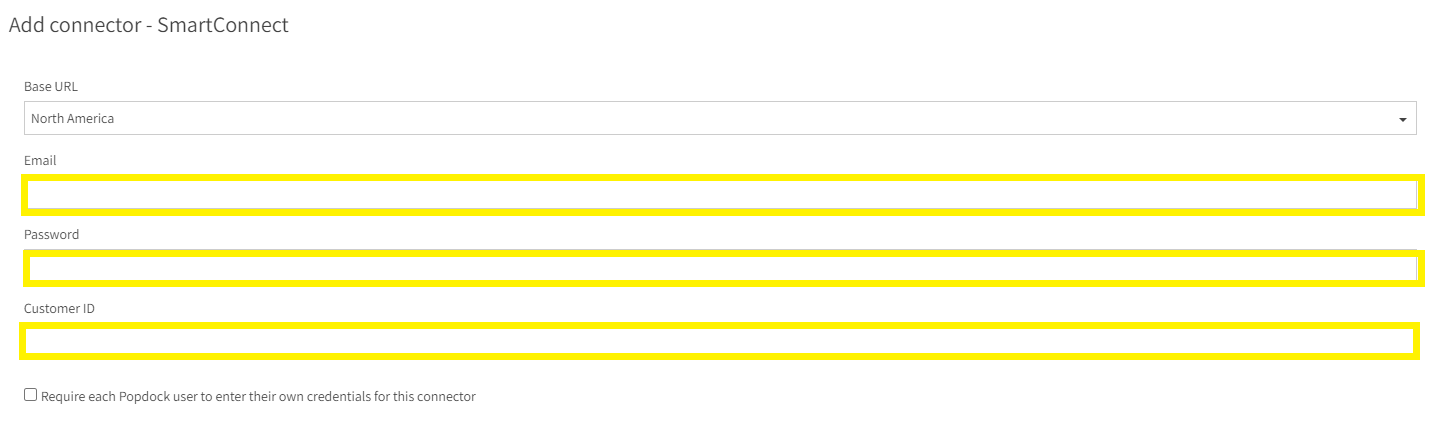
4. Using the Base URL drop down menu, select the region of the server that your SmartConnect instance runs on. The Base URL will denote this.
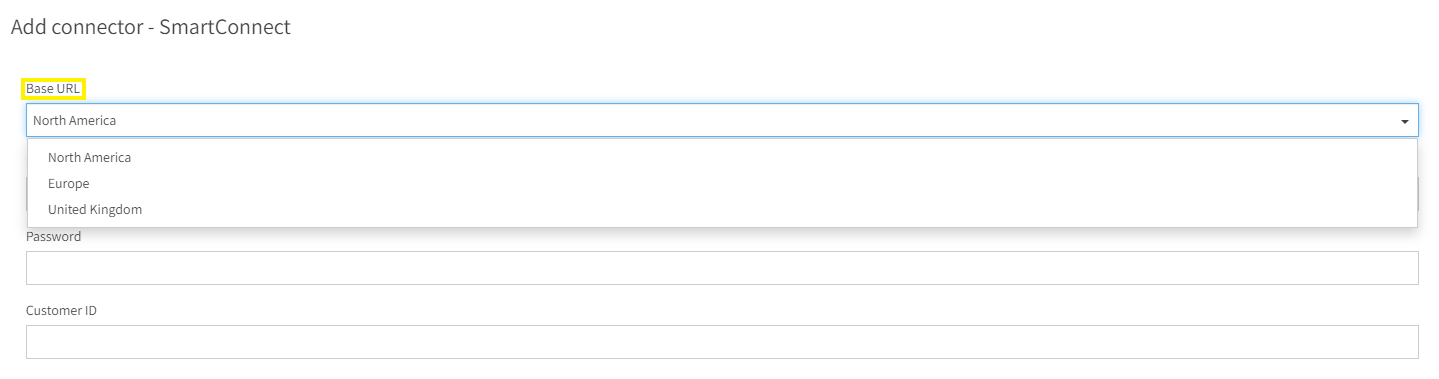
5. Using the remaining open fields, enter the Username, Password, and Customer ID associated with your SmartConnect account. To determine your Customer ID, visit How to Access Registration Keys, Account Codes, & Customer IDs.
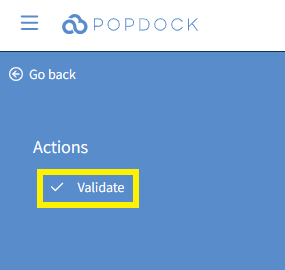
6. After all fields are complete, click Validate in the left Actions menu.
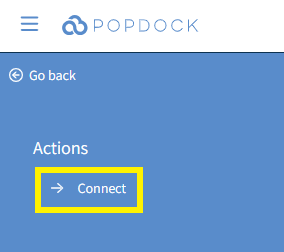
7. Once validated, click Connect in the left Actions menu.
8. You will be redirected to your list of connectors. Once your SmartConnect connector is generated, it will be available within the list of connectors and ready to use.

Having trouble adding this connector? Email support at support@eonesolutions.com