The following are the steps required to connect to your Acumatica. This will allow you to pull data from your Acumatica account and custom build your lists in Popdock.
Important Tip
In order to install Acumatica you will need:
- Client Id
- Client Secret
- Company (Tenant) Name
- Endpoint Name
- Endpoint Version
Step 1
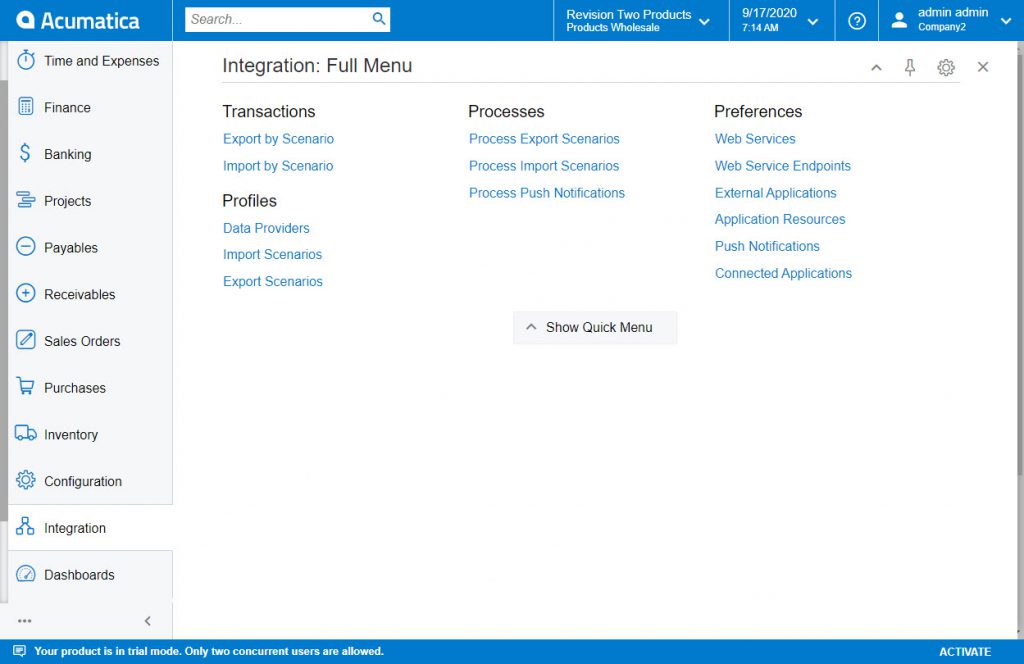
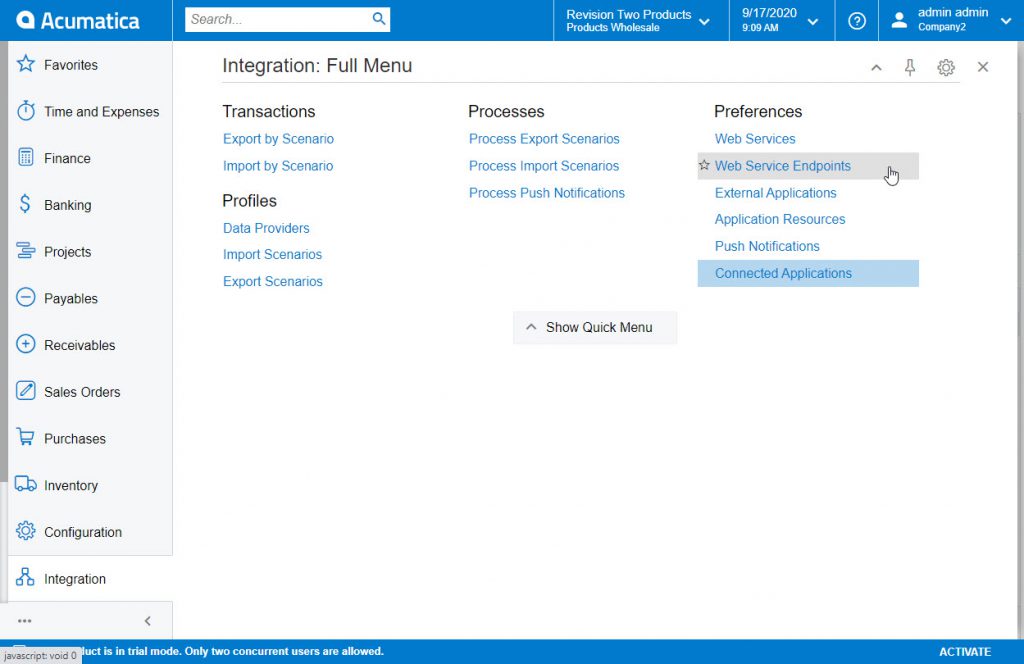
Sign in to your Acumatica site. If you have multiple tenants, sign in using the tenant you would like to install a connector for. After signing in navigate to “Connected Applications” by clicking on “Integration” in the left navigation menu, then you may need to click “Show Full Menu” to expand and see all the menu options. This is where you will see “Connected Applications.
Step 2
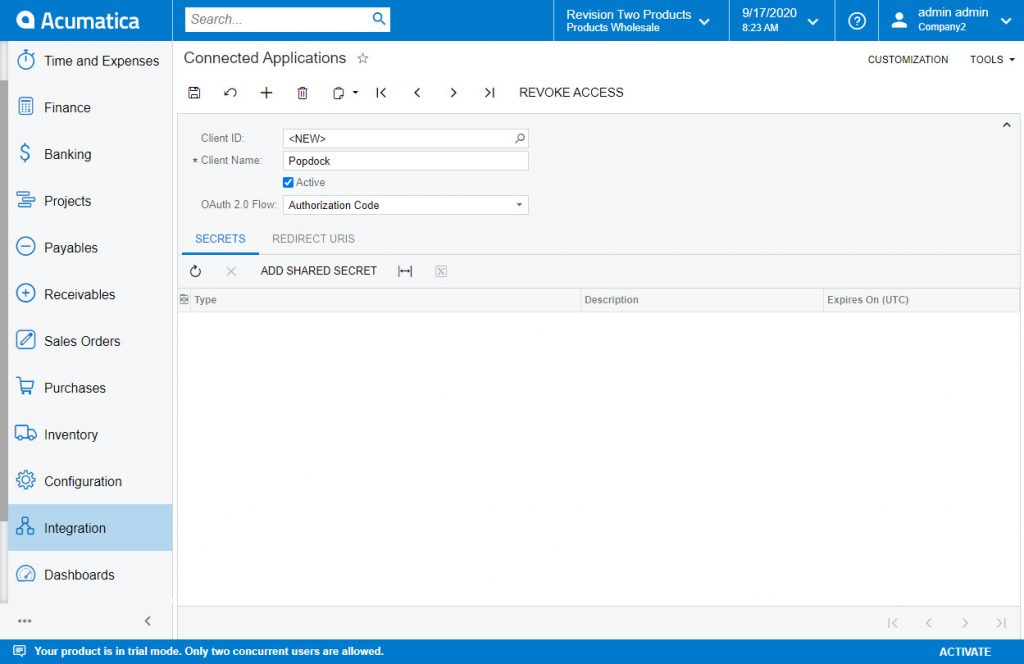
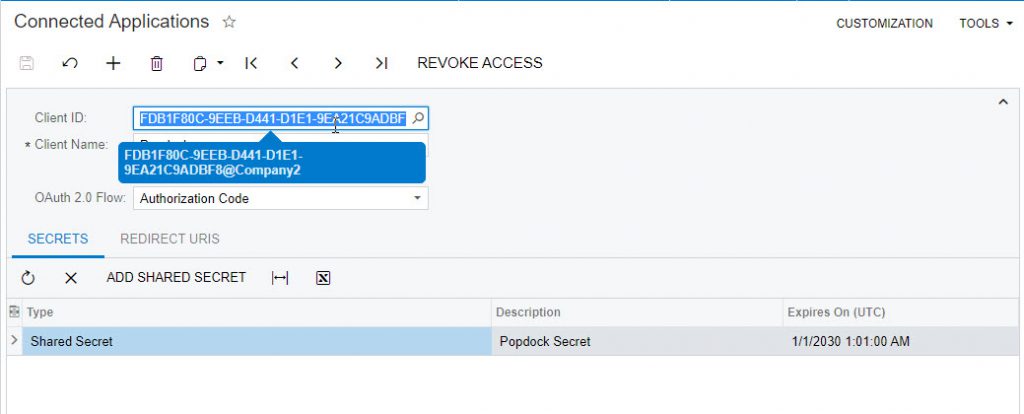
On the Connected Applications screen, it will be defaulted to a blank form. To create a new connected application, enter a Client Name, then for the OAuth 2.0 Flow select “Authorization Code” from the dropdown menu.
Step 3
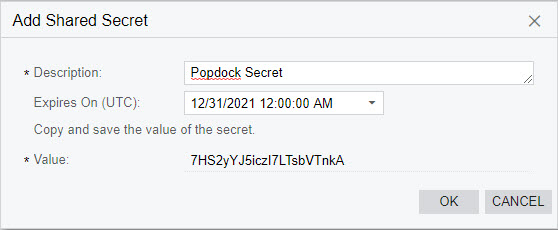
Next you will click on “ADD SHARED SECRET” button. On the Add Shared Secret window you will need to provide a description and then give the secret and expiration date. Here I have just given it a description of “Popdock Secret” and set the expiration date to the end of 2021. Now you can copy the Secret Code from the Value field and paste it to the Client secret field for the connector setup. Then click OK to go back to the Connected Applications page.
Step 4
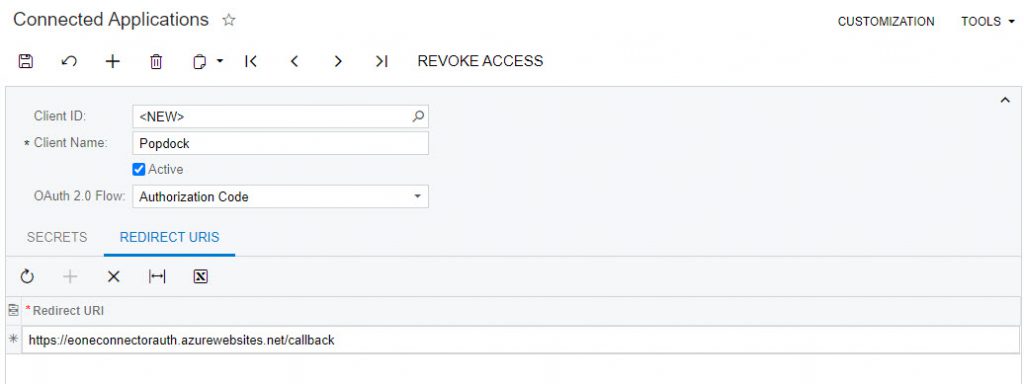
Now we want to setup the Redirect URIs by clicking on the “REDIRECT URIS” tab. Here we want to click the “+” button and enter the following URL:
Step 5
Now that we have everything configured for the connected application for Popdock, we want to click the Save icon. This saves the configured connected application and generates a Client ID. You can now copy the Client ID and paste it to the Client ID field in your connector settings. If your Acumatica system has multiple tenants the Client ID will end with “@Company” where “Company” is the tenant you were logged in with when you created the connected application client. Copy the entire Client ID including the @Company. In your connector setup, you will need to enter in the same company in the Popdock install screen as you have created the Client ID for or the install will fail.
Step 6
The last item needed is the Endpoint name and version. For this we will need to navigate to Web Services. Click on Integration on the left navigation menu, then click on “Web Services Endpoints”.
Step 7
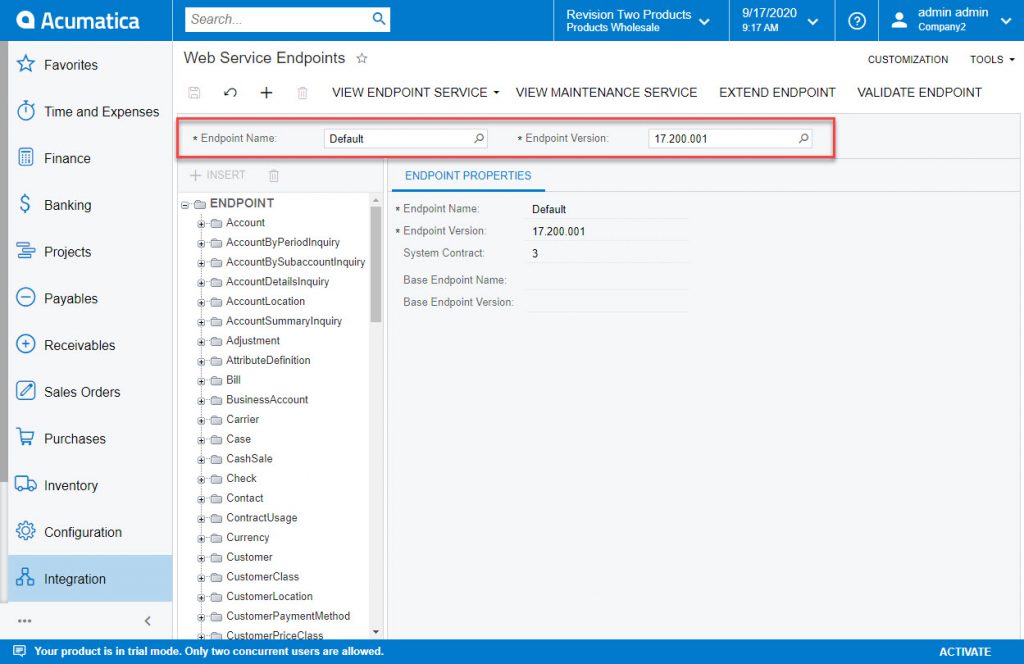
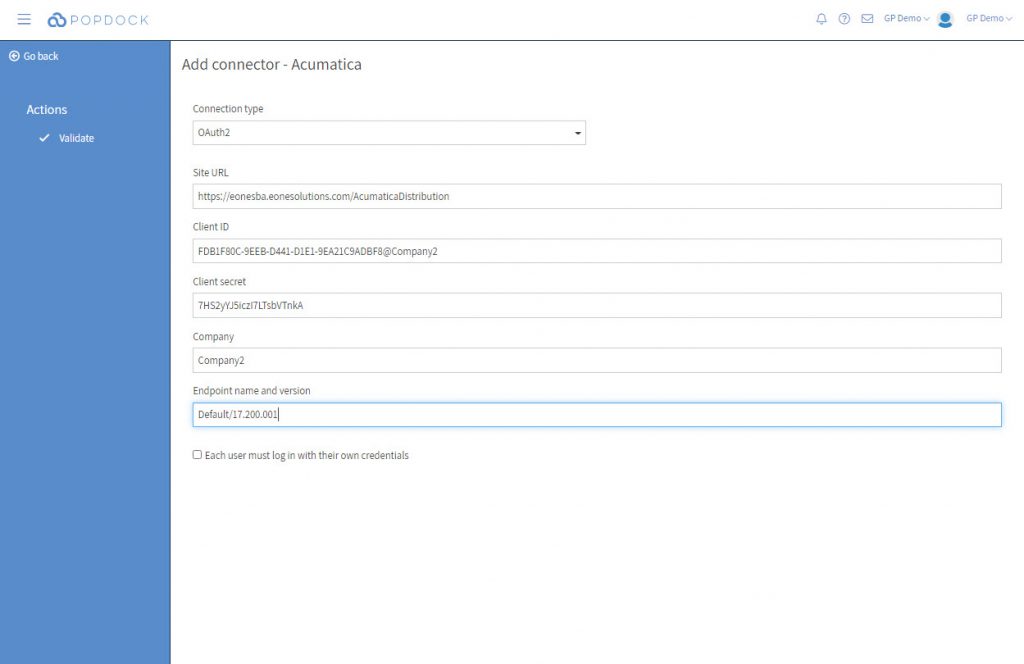
From the Web Service Endpoints page you will see the Endpoint Name and Endpoint Version, that is needed for the connector setup in Popdock. Enter the Endpoint name and version in the format example showing on the field. In the following example it would be:
Default/17.200.001
Important Tip
Adding web service endpoints:
See the Acumatica documentation for how to edit the Endpoint to add new entities, fields, actions, or create custom endpoints. If you change a endpoint you will need to refresh or reinstall the Acumatica connector before the changes take effect. It is possible that changes to an endpoint could break an existing connector if you fail to refresh the connector after changing an endpoint in Service Endpoints that is being used by Popdock.
Step 8
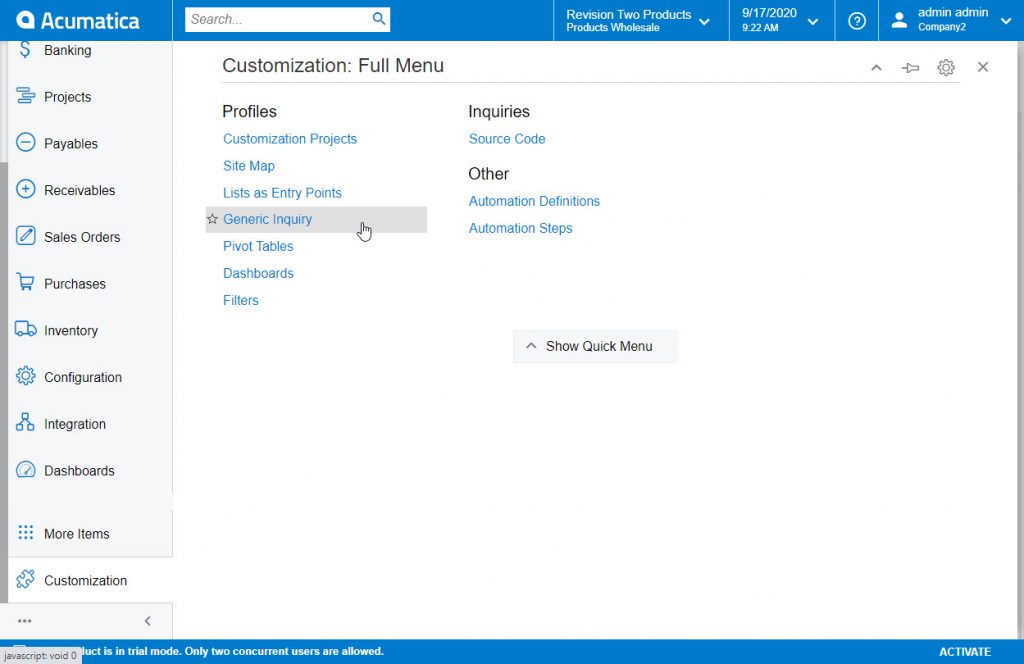
Next we need to expose an inquiry or multiple inquiries to Popdock. Click on “Customization” on the left navigation, then click on “Generic Inquiry”.
Step 9
Now you should be on the Generic Inquiry page. Here you can locate an inquiry by typing it in the Inquiry Title or click the magnify glass to see the full list.
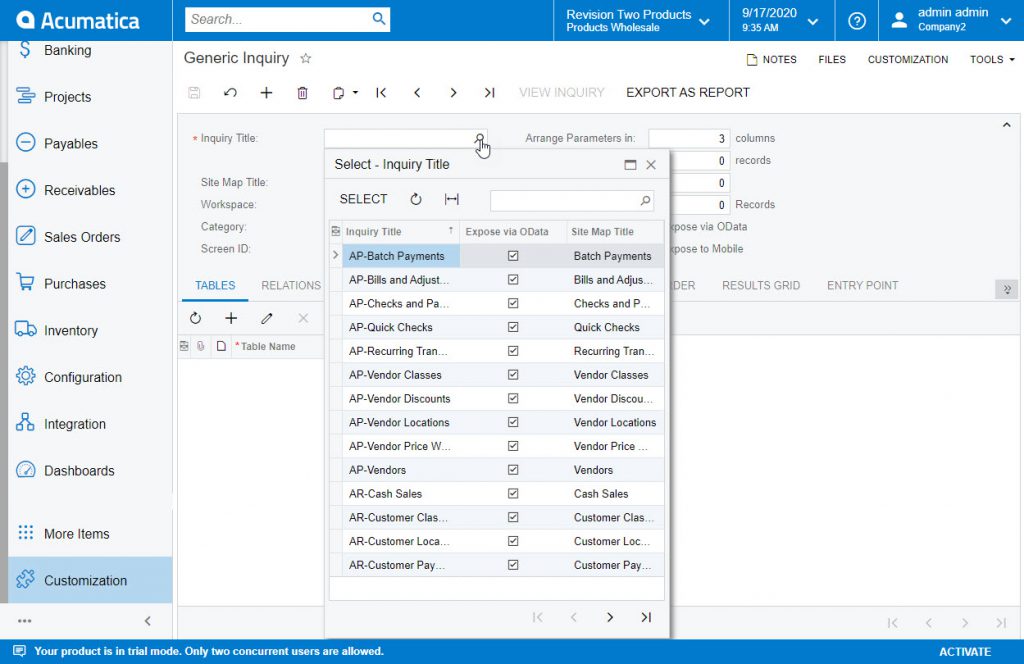
Step 10
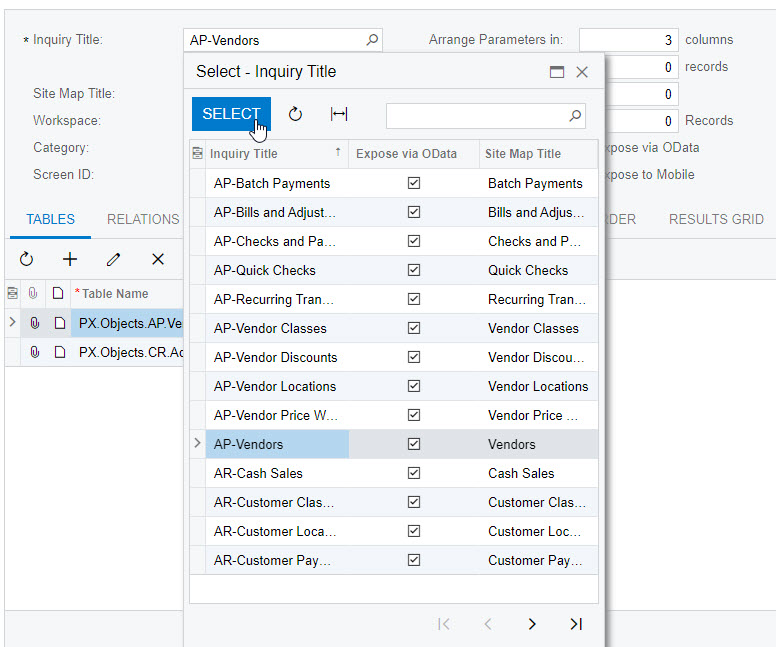
Click on the Inquiry title that you want to expose to Popdock, then click the “SELECT” button.
Step 11
Now that you loaded the inquiry to the Generic Inquiry page, you can click on the checkbox that says “Expose via Odata”. Then click the Save button.
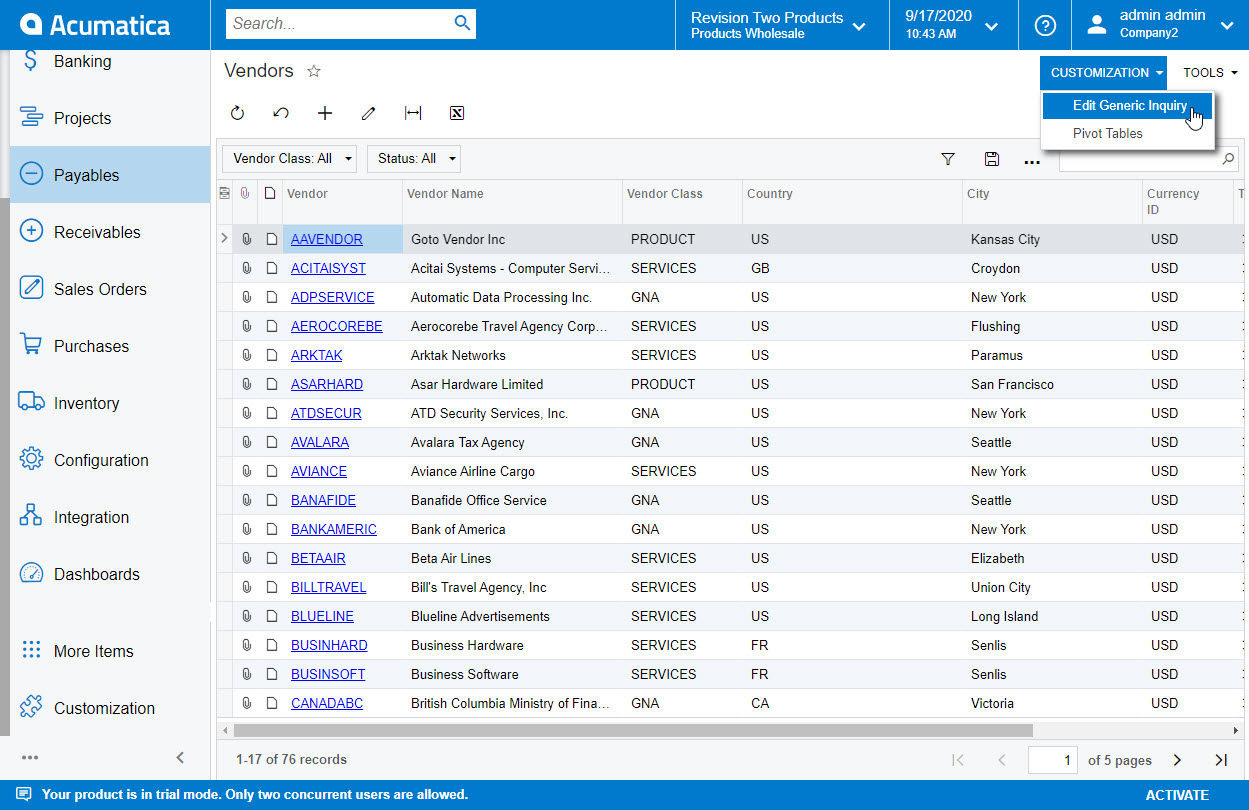
You can also add individual entities to OData from their page. When on a page, for example, Vendors that contains the “Customization” button in the upper right hand side of the screen, you can select “Customization”, from the “Customization” menu select “Edit Generic Inquiry” and from the Generic Inquiry screen select the check box “Expose via OData” then hit the save button.

Step 12
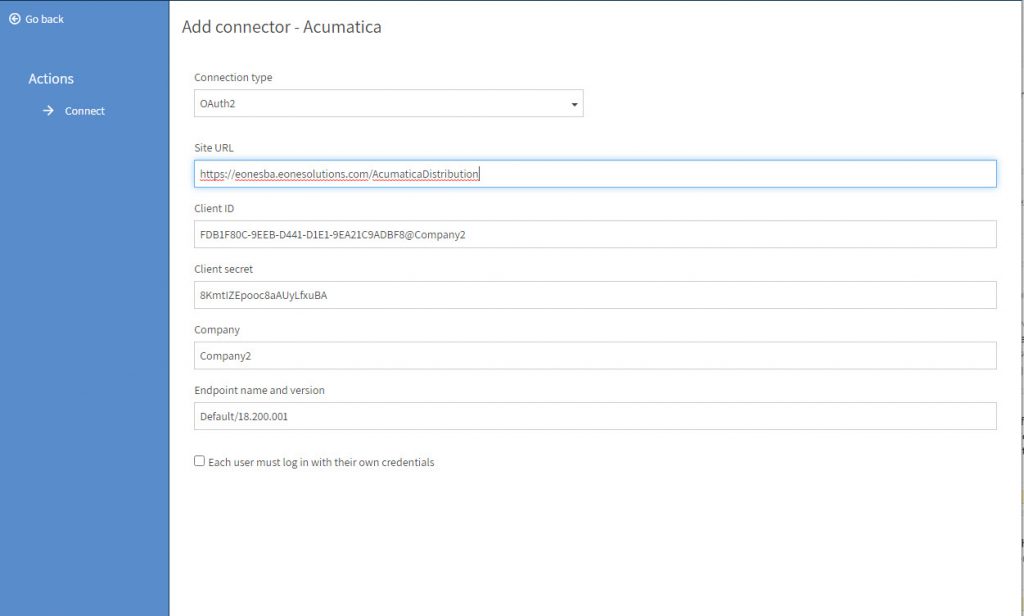
Now that you have configured your Acumatica account for Popdock, you can add your connector simply by going to Connectors and click Add new connector. Then complete the required fields and click on “Validate” on the left navigation menu.
Step 13
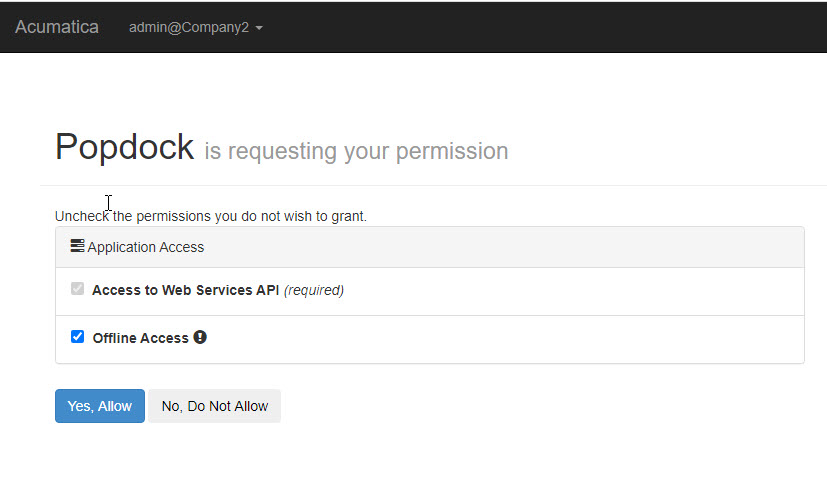
Acumatica will ask if you want to grant Popdock access to your Web Services API, which is required, and/or Offline Access. Click “Yes, Allow” button to grant the permissions and complete your Acumatica setup.
Step 14
After Popdock can validate the connector settings with your Acumatica, you will return to the connector setup page with the left navigation showing “Connect”. Now you can click Connect to add your Acumatica connector.
Step 15
Acumatica will ask again if you want to grant Popdock access to your Web Services API, which is required, and/or Offline Access. Click “Yes, Allow” button to grant the permissions and complete your Acumatica setup.
Finally Acumatica will show in your Connectors list with a status of adding lists. Once it completes you are ready to add a new tab and test out your new Acumatica connector.

Need further help with adding your Acumatica Connector? Email support@eonesolutions.com