1. Click on the Tasks tab.
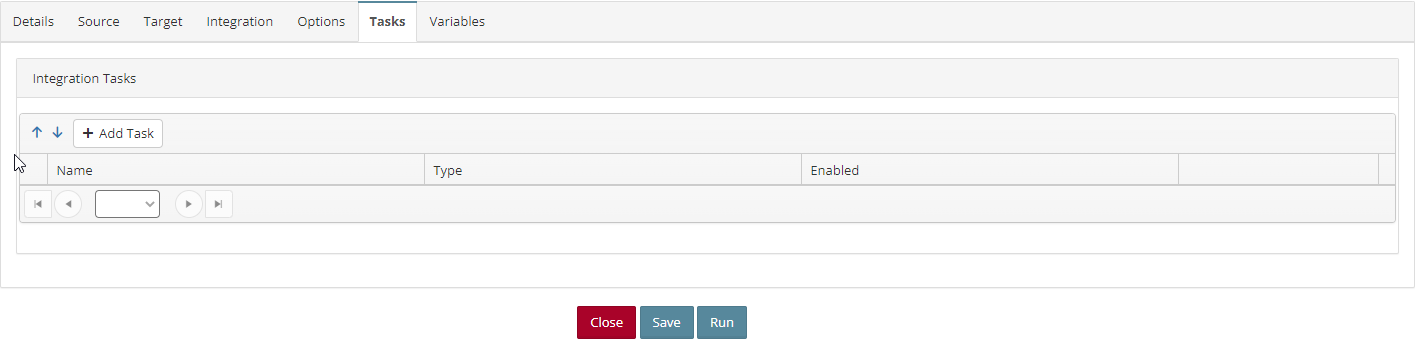
2. Click the Add Task button to open the Map Task window.
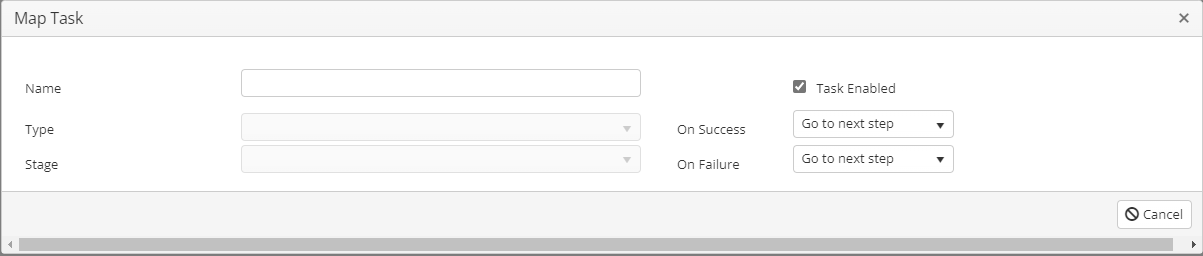
3. Name – Enter a name for the task.
4. Type – Select Send Email, this will add additional fields to the window.

5. Stage – Select which stage the processes will run. The options are:
- Integration Pre Tasks
- Document Pre Tasks
- Document Post Success Tasks
- Document Post Failure Tasks
- Integration Post Success Tasks
- Integration Post Failure Tasks
6. Email To Address – Enter the email to receive the task message.
7. Email Cc Address – Enter an email to receive a cc of the task message.
8. Subject – Enter a subject for the email.
9. Message – Enter a message for the email.
10. Task Enabled – Use this checkbox to enable or disable the task.
11. On Success – Select the required action if the send email task succeeds.
- Quit – Will halt map processing.
- Go to next step – Will continue to the next step in the map processing.
- Cancel processing – Will stop map processing but will not return an error to the user.
12. On Failure – Select the required action if the send email task fails.
- Quit – Will halt map processing.
- Go to next step – Will continue to the next step in the map processing.
- Cancel processing – Will stop map processing but will not return an error to the user.
13. Include Process Errors – Mark this checkbox if any errors should be included with the message when the email is sent.
14. Click Save to save the task and return to the Integration Process window.