If you use dimensions within Business Central, you have the ability to add either the dimension value, description or both to any Business Central Popdock list. In order to view Business Central Dimensions within a Popdock list, your list must have a Dimension Set ID and the Dimension Values list added to your Business Central connector. This article will outline the steps for both adding dimensions and viewing them on your Business Central lists in Popdock.
Note: If you do not have the Dimension Values List inside of your Business Central Connector, you first need to add the list using the instructions below.
Adding the Dimension Values list to Your Business Central Connector
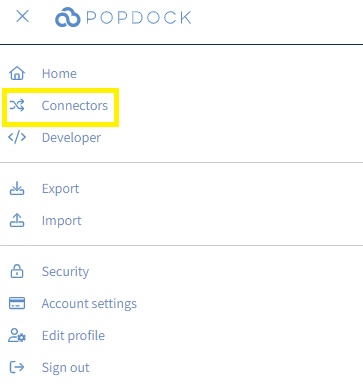
1. From your Popdock homepage, click on the triple bar menu in the upper left corner of the page and select Connectors from the drop down menu.
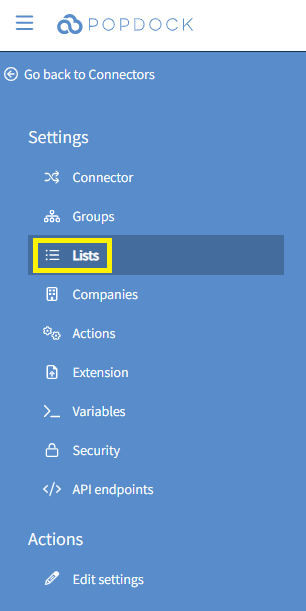
2. Locate your Business Central Connector from your list of Connectors and click on the Pencil Icon to the right of the connector. From within the Edit connector, click on Lists under the Settings menu.
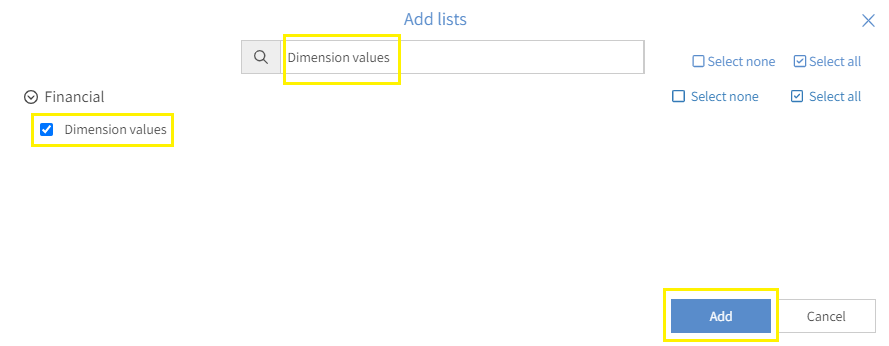
3. Click on + Add Lists in the top right corner of the page. From the Add lists window, type Dimension Values into the search box. Check the box next to the Dimension Values list and then click the Add button.
4. Popdock will then populate this list into your Business Central Connector. Once available, it will appear under your lists.

Adding Business Central Dimensions to a List
1. From within the Lists section of your Business Central Connector, select the Pencil Icon next to the list you would like to add Dimensions to. For this example, we will use the General Ledger Entries list.

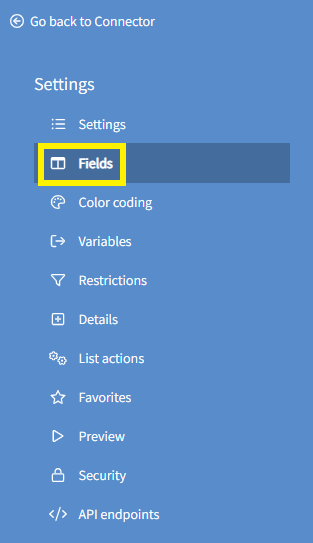
2. Click on Fields from the Settings menu.
3. Click on Add dimensions in the upper right corner of the Edit list page.
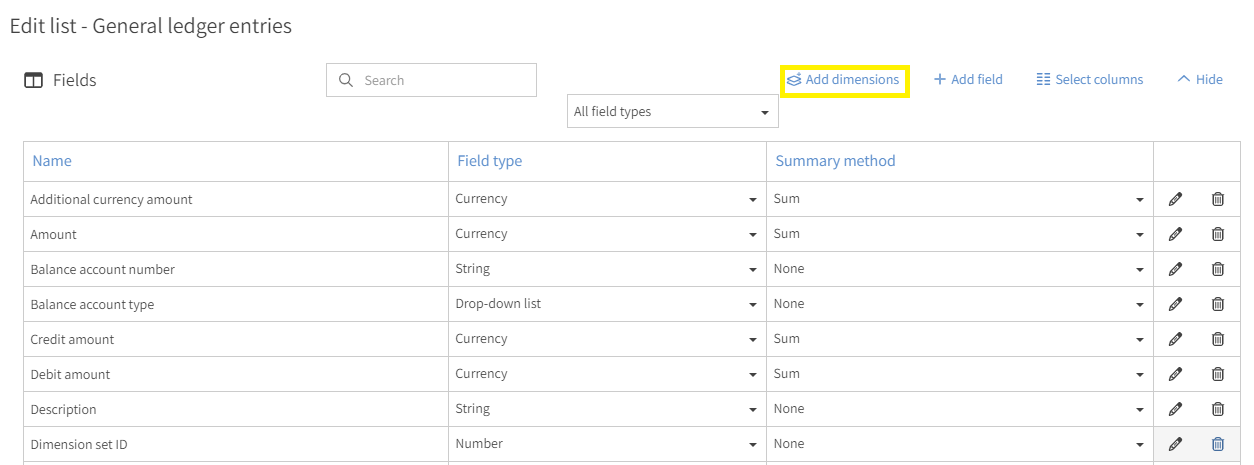
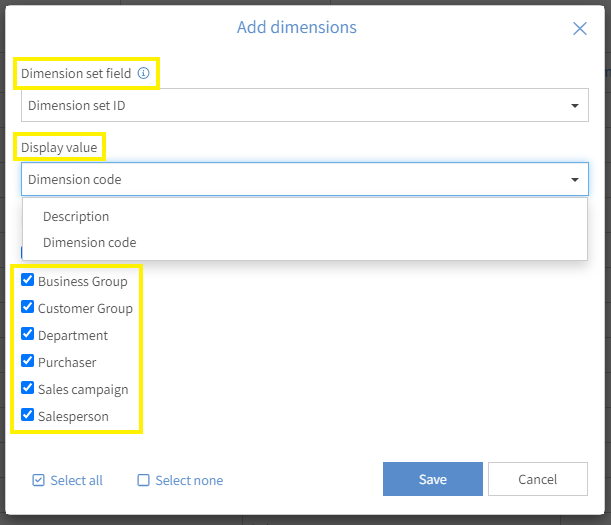
4. The Add dimensions window will appear. Using the Dimension set field drop down menu select Dimension Set ID. The Display value dropdown will determine if you want to display the Dimension Descriptions or the Dimension Codes in the list. Once you have the dropdowns set, select the dimensions you want to bring into your list in Popdock, then click Save to add those dimensions into your list.
Note: If you would like both the Dimension Descriptions and Dimension Codes in your list, you can run this process twice. In this instance, we recommend editing the field name once added to avoid confusion (ex. Business Group Description or Business Group Code).
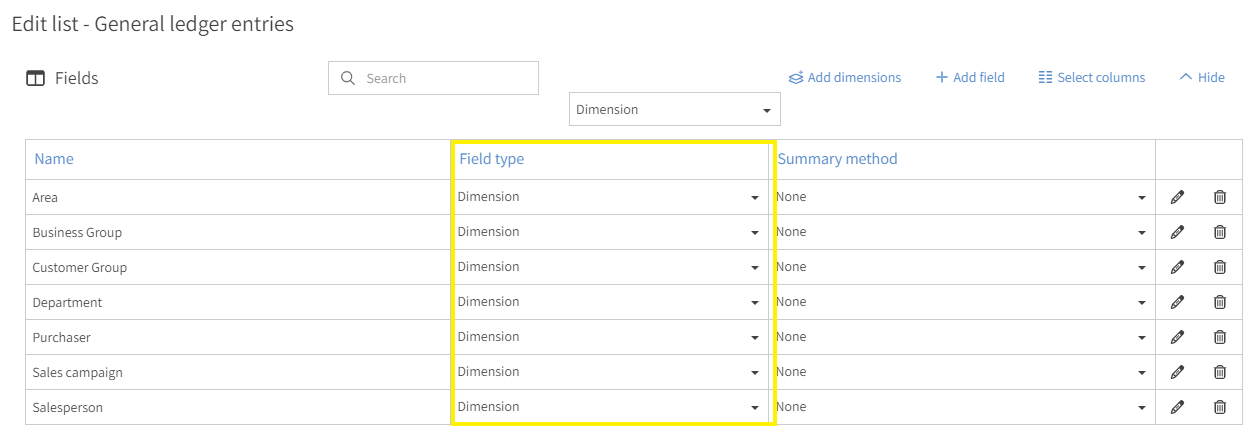
5. Once the fields have been added in, they will be available within the list of fields with the field type Dimension.
Displaying the Dimensions in Your List
Now that the dimensions have been added to your list, you will then be able to view them inside of the list in Popdock.
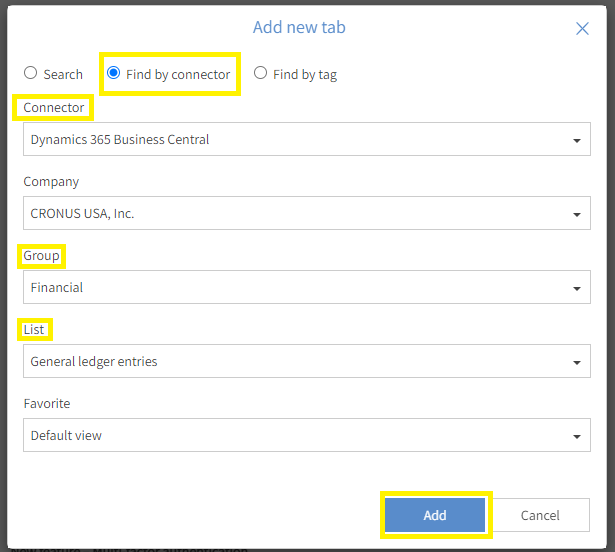
1. From the Popdock homepage select + Add new tab in the top center of the page.
2. In the Add new tab menu, select the Find by connector option, and complete the required fields to select your General Ledger Entries list. Once the fields are selected, click Add.
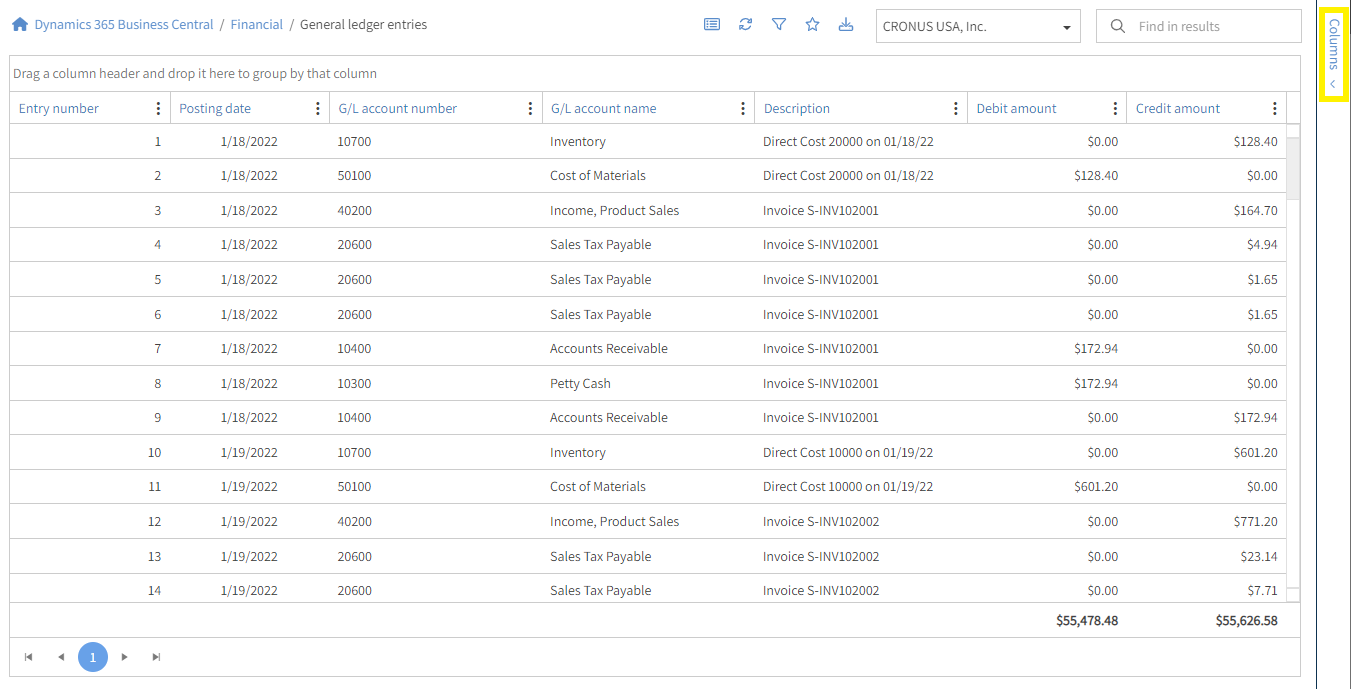
3. With your General Ledger Entries list displayed, click Columns in the upper right corner of your list.
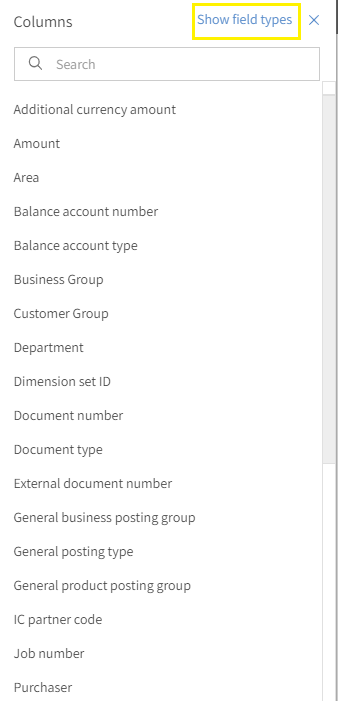
4. Click on Show field types in the Columns menu. This will categorize the available fields by their field type.
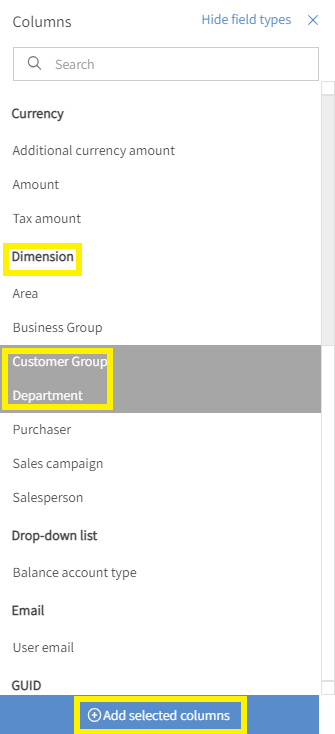
5. The Dimension fields will be grouped together. Select which dimensions you would like to add to your list and then click + Add selected columns.
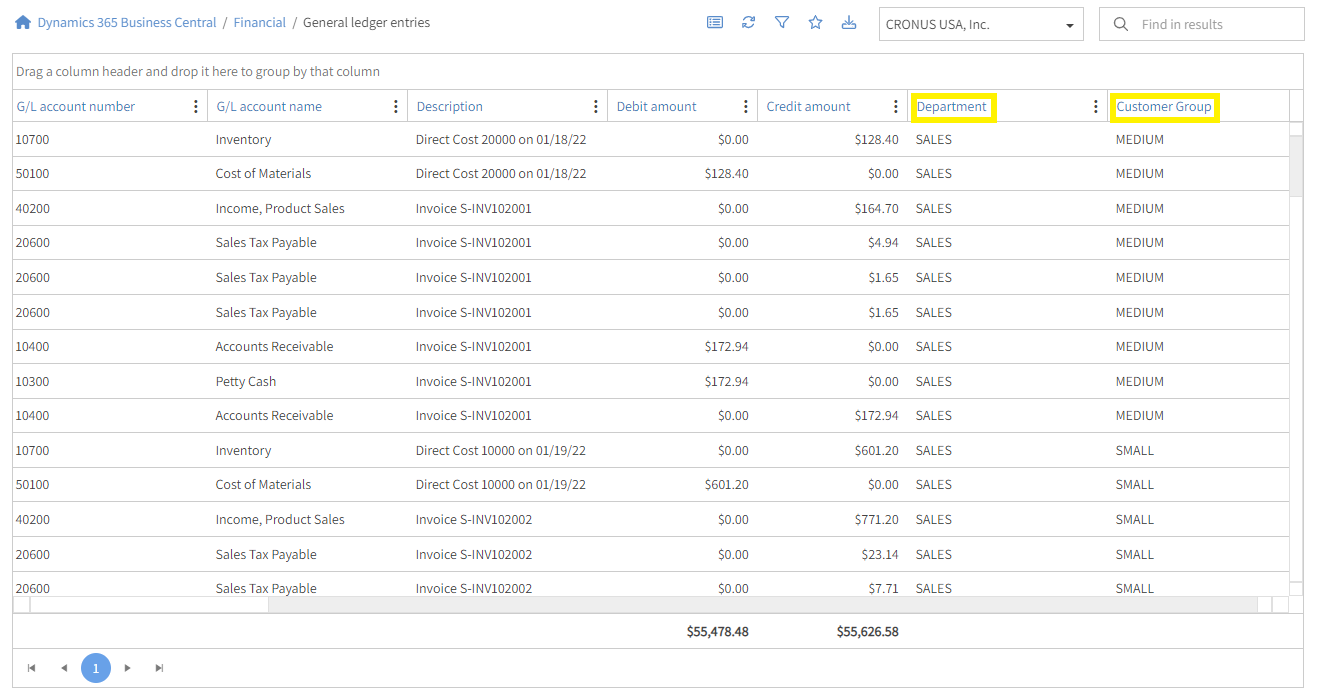
6. Popdock will retrieve the fields/dimensions and add them to your list.
NOTE: Dimensions will need to be added on a list-to-list basis. There is currently no process for bringing in all dimensions for all lists at one time. The process shown is the same for all lists that contain dimensions.
Questions regarding adding dimensions to your lists? Contact support@eonesolutions.com.