Configuring Exchange Token Authentication
Published: Jul 11, 2023
Configuring Exchange Token Authentication
Published: Jul 11, 2023
Exchange Token Settings within SmartConnect Rest Service Maintenance
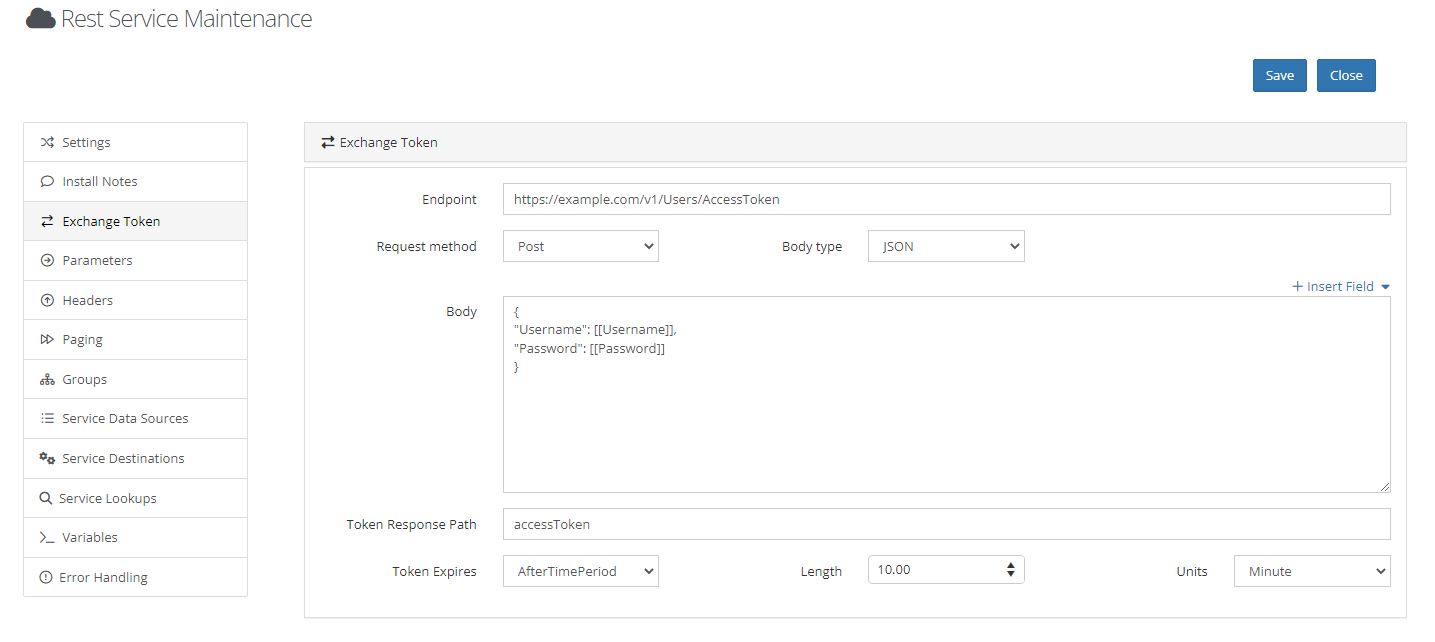
- Exchange token settings will need to be configured by navigating to Maintenance>>REST Services>> on the main navigation and then click the edit service button for the rest service setup.
- Navigate to Exchange Token within the rest navigation page. This page stores all the Exchange token configurations for the service being used.
-
- Endpoint – Enter the authorization endpoint that will return a token.
-
- Request Method – Set the method required by the authorization endpoint.
-
- Body type – Choose the format the body will be sent as to the authorization endpoint.
-
- Body – Enter the body that will be sent to the authorization endpoint.
Use the insert field option to use variables that will be available when setting up the connector.
-
- Token Response Path- Enter the field name from the response that holds the token as documented in the service api.
-
- Token Expires- Choose the option that matches when the token expires from the api.
-
- Length- Enter the length of time the token is valid for.
-
- Units- Select the unit of time.
Connector Setup using Exchange Token
- From the main Navigation Menu, select Connections.
- On the Connections page, click the Create Connection button.
- Click the Rest Service that was named and had an image set in the first section.
- Enter a name for the connection.
- Enter the Username and Password. These values will be passed into the body variables set up while defining the exchange token definition.
- Click Save to complete the connector setup.
Content
Exchange Token Settings within SmartConnect Rest Service Maintenance
Connector Setup using Exchange Token