Configuration in Business Central
- Install the SmartConnect Change Tracking Extension from AppSource.
- In the Global Search in Business Central search for “Change Log Setup”.
- Change Log Activated – Verify flag is turned on.
- Then navigate to Setup > Tables
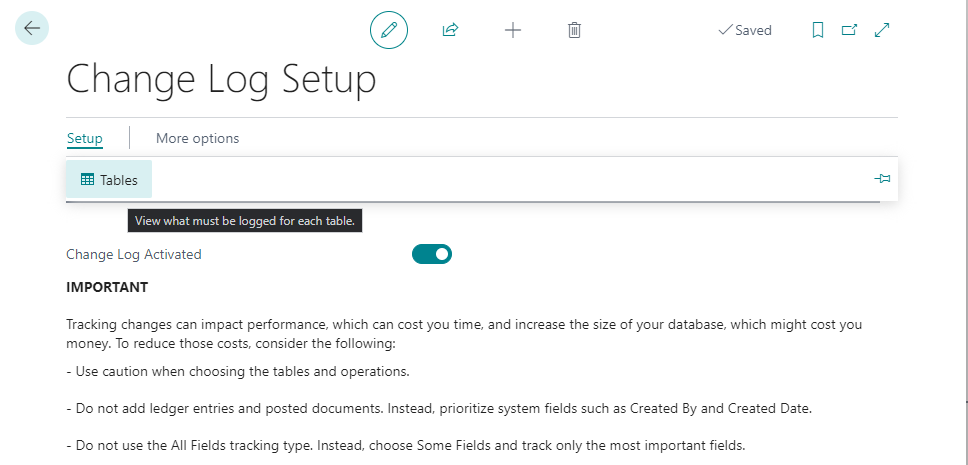
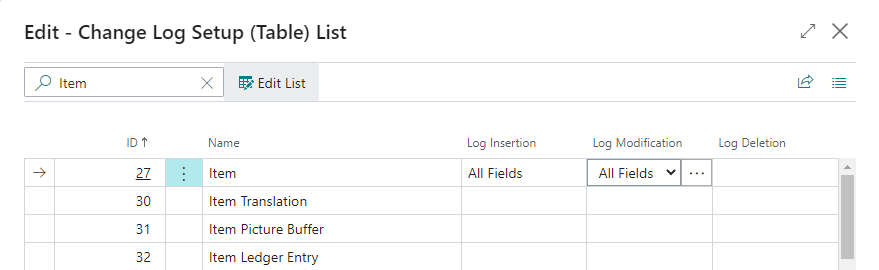
- On the ‘Change Log Setup (Table) List’ page, turn logging on for any tables that will be used as a Change data source.
Configuration in SmartConnect
- From the main Navigation Menu, select Data Sources > Change Triggers > Trigger.

- On the Change Triggers page, click the “Create Change Trigger” button.
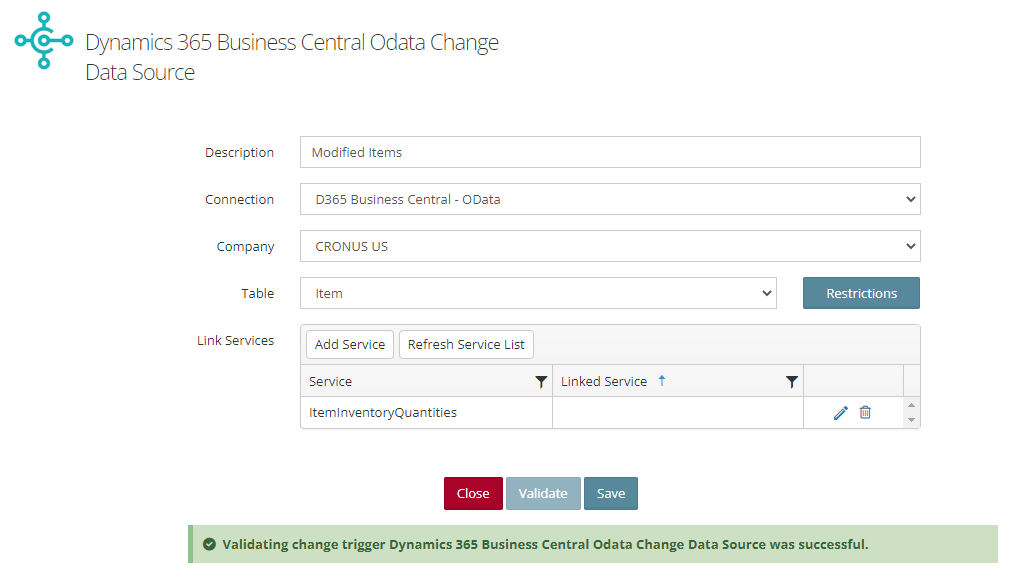
- On the New Change Trigger page, Select Dynamics 365 Business Central Odata Change Data Source.
- Description – Friendly for the Dynamics 365 Business Central Change Data Source.
- Connection – select a Dynamics 365 Business Central connection.
- Click Validate.
- Company – Select a Dynamics 365 Business Central Company.
- Table – Select the table to monitor for changes.
- Note: The source will include all fields on the tracked source table.
- Restrictions – Optionally add filters based on source table fields.
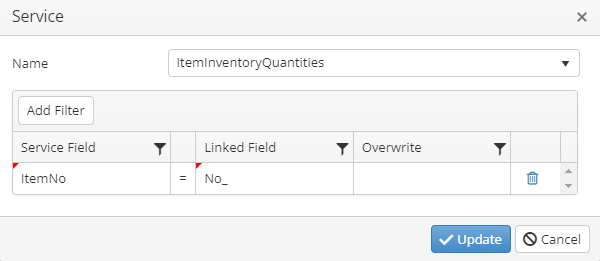
- Link Services – Optionally add detail from a related web service.
- Click Add Service.
- Select the Service URL to return data from.
Note: The services in this list will match the published page and query services that exist within the Dynamics 365 Business Central environment. Additional web services can be published as outlined in this Microsoft Article.
- Link the web service to a field(s) on the tracked table.
- Click Update to save the join.
- Click Save.
- Navigate to Processes > Integration Processes and click ‘Add New’.
- Provide a name and description for the integration.
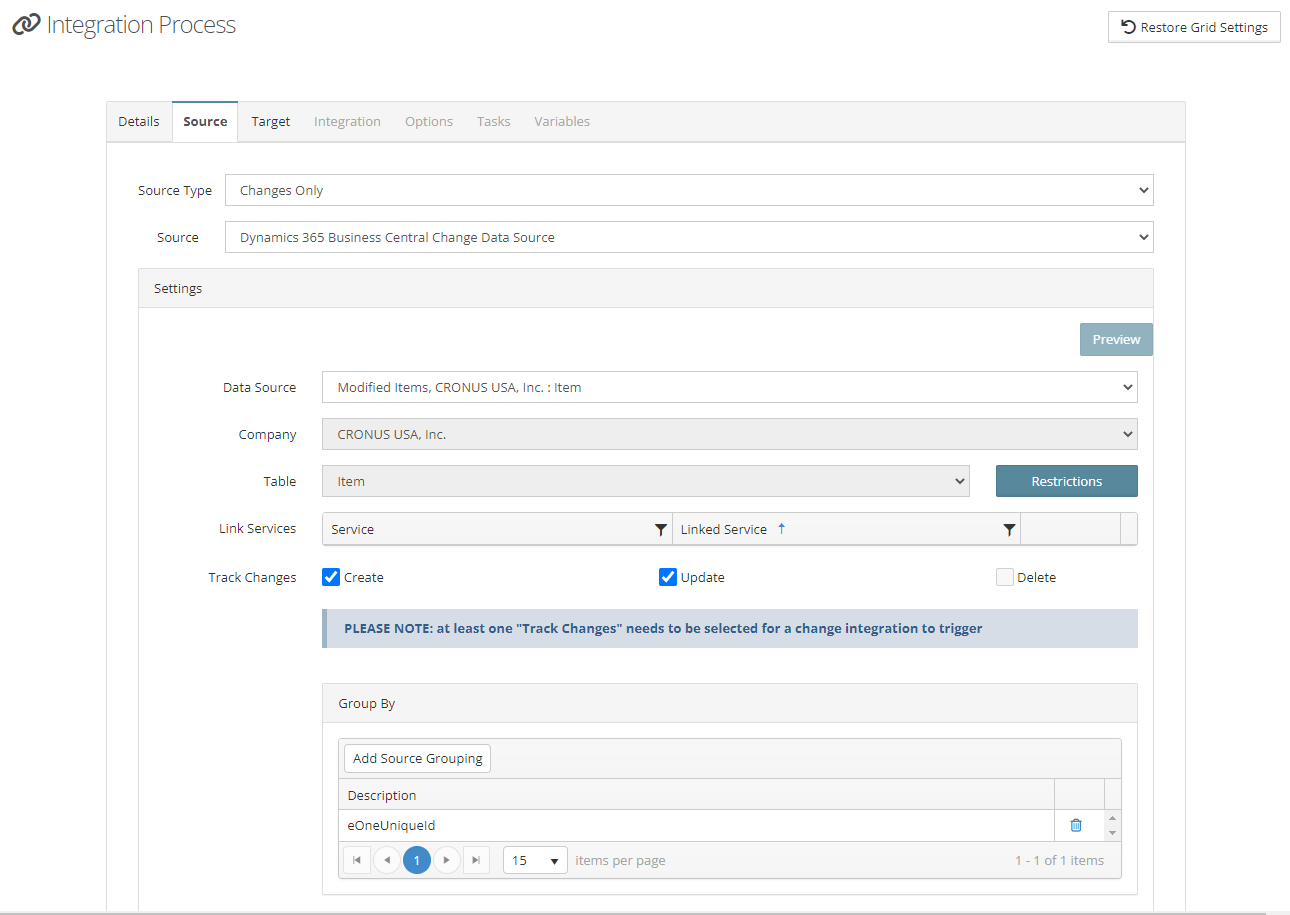
- Click on the Source tab.
- Source Type – Select ‘Changes Only’.
- Source – Select ‘Dynamics 365 Business Central Change Data Source’.
- Data Source – Select the previously defined data source.
- Preview – Preview first 5 records from the change table for this integration.
- Company – Read-only view of company defined on the data source.
- Table – Read-only view of tracked table defined on the data source.
- Link Services – Read-only view of linked web services on the data source.
- Restrictions – Read-only view of restrictions defined on the data source.
- Group By – SmartConnect will automatically add the ‘eOneUniqueId’ field to the Group By list. This field will already be unique for each record so it is not required to add additional fields to this list.
- Track Changes – Select the type of events to track by checking the Create/Update/Delete boxes.
- Note: Changes are tracked at the integration level. These flags can only be set on the integrations.
- Map at least one field to the desired destination then save the integration.
- The integration is now registered and tracking changes.
*If you need help troubleshooting a Dynamics 365 Business Central change data source please reference this help article.