- In SmartConnect navigate to Data Sources > Realtime Triggers.
- Click ‘Create Realtime Trigger’ in the top right of the screen.
- Select ‘Dynamics 365 Business Central Odata Real Time’ from the list.
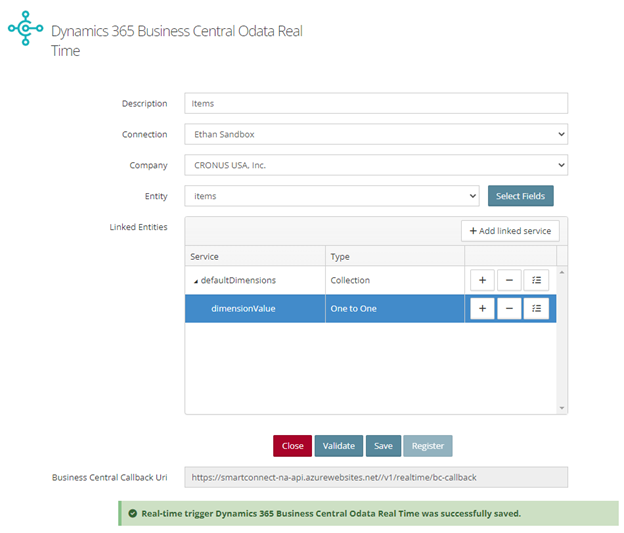
- Description – Friendly description for data source.
- Connection – Select a Dynamics 365 Business Central connection
- Company – Select the Company to track.
- Note: If this trigger is needed on multiple companies, a separate data source will need to be created for each company.
- Entity – Select the table to track.
- Click ‘Select Fields’ and select the desired fields to add to the source query.
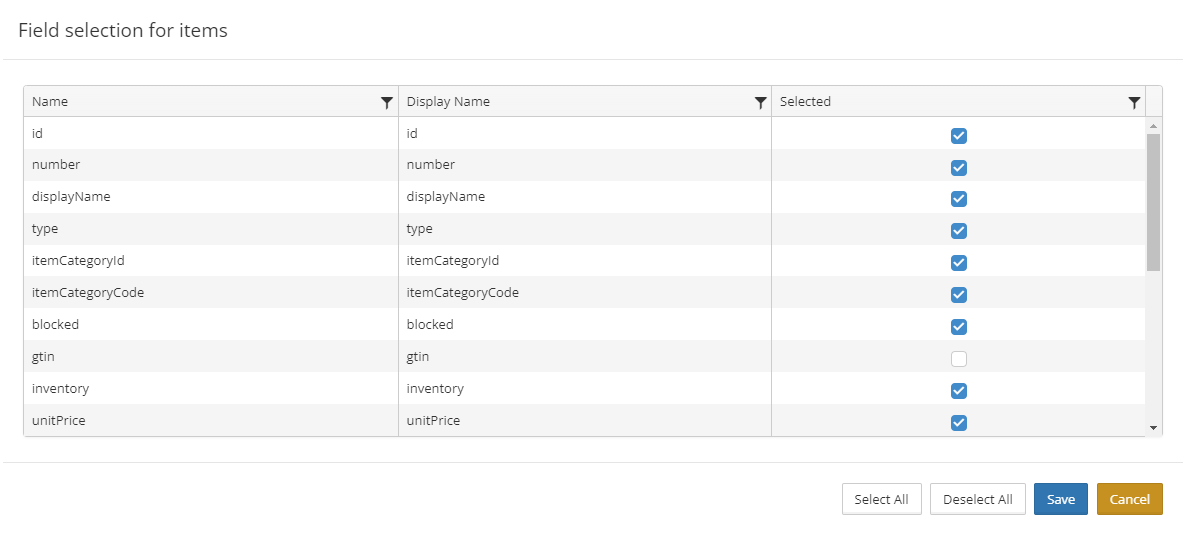
- Click ‘Save’ to close the window.
- Optionally, click ‘Add linked service’ to include additional details beyond the standard fields.
- In the Linked service selection window select the service to link.
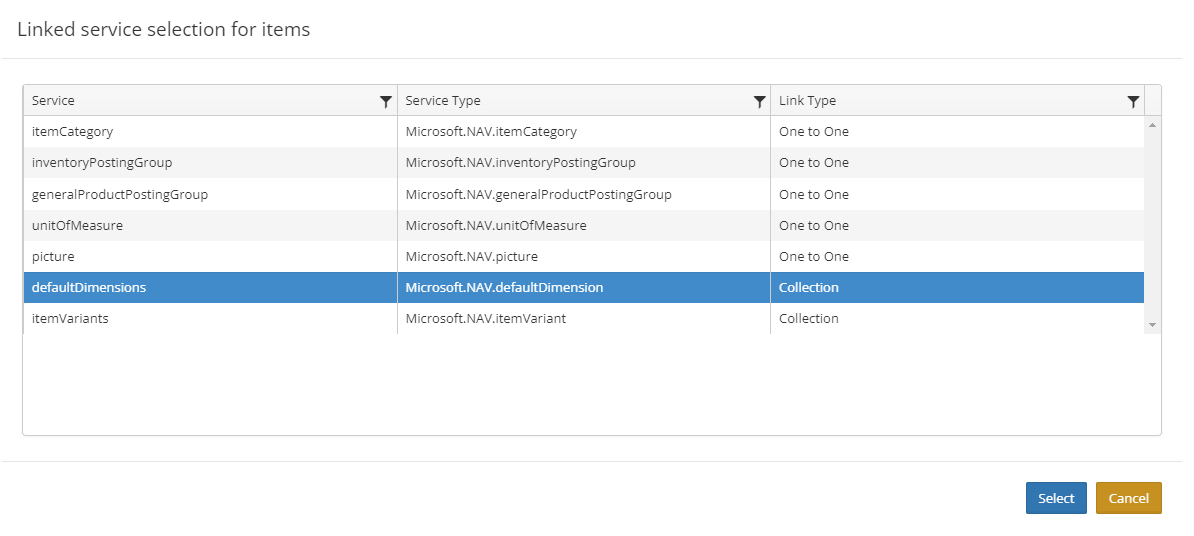
- Click the ‘Select fields’ button on the linked service to add desired fields from the linked service.

- Optionally, add additional fields from a child service of the linked service by click the ‘Add child service’ button.
- Click ‘Select fields’ to select any fields desired from the child service.
- Repeat steps a-c for other Linked Entities as desired.
- Click Save.
- Navigate to Processes > Integration Processes > Click Add new.
- Provide an Integration Id and Description.
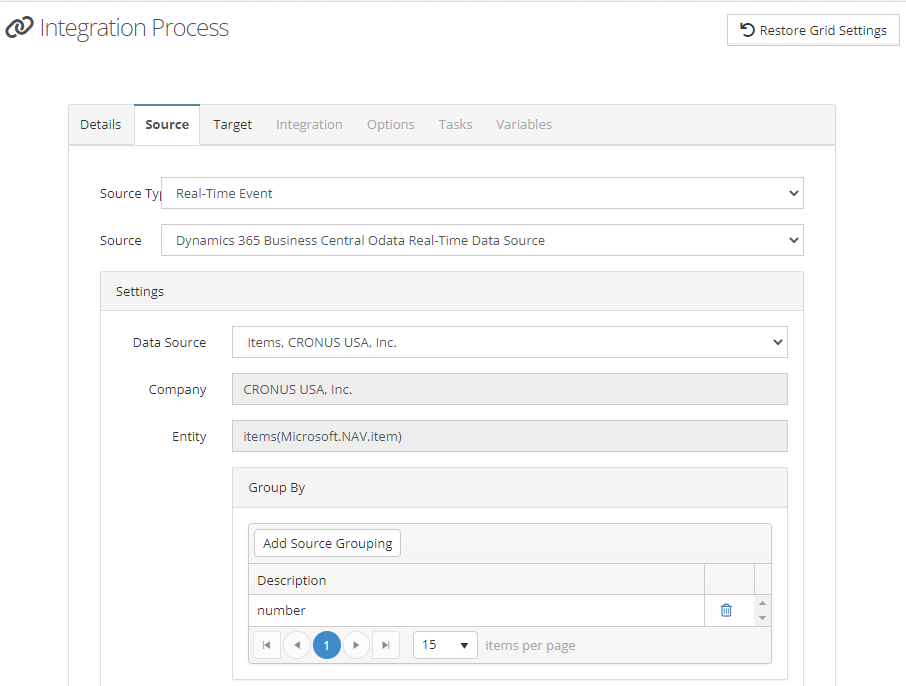
- Click on the ‘Source’ tab
- Source Type – Select ‘Real-Time Event’.
- Source – Select ‘Dynamics 365 Business Central Odata Real-Time Data Source’.
- Data Source – Select the previously configured data source.
- Entity – Will automatically populate with the Entity to which the source is linked.
- Add at least one field to the Group By list
- Map at least one field to the destination to save the integration.
- Click Save.
- Click Register.
- At the bottom of the screen check the boxes for events that will trigger the integration.
- Click Register.
- Trigger is now registered in Business Central.