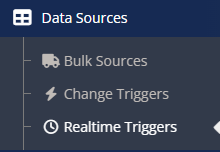
- On the left side options column expand Data Sources and click on Realtime Triggers.
- On the Realtime Triggers page click the Create Realtime Trigger button.

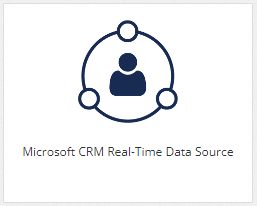
- On the New Realtime Trigger page click the Microsoft Dynamics CRM Real-Time Data Source button.
- The Microsoft Dynamics CRM Real-Time Data Source page opens.
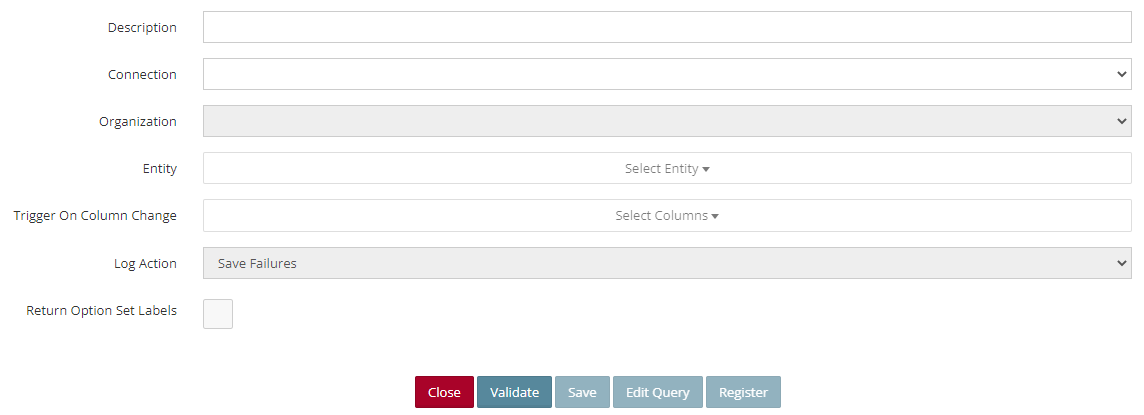
- Enter a Description for the data source.
- Connection – Select the connection to be used from the dropdown list.
- Click the Validate button – This will verify the Connection is successful and enable the Organization and Entity fields.
- Organization – After the connection is validated, the Organization field becomes active. Select the organization to be used from the dropdown list, the default organization setup on the connection will automatically be selected.
- Entity – From the dropdown list select the CRM entity to be updated.
- Trigger On Column Change – Select the column(s) that will cause the trigger to run when changed.
- Log Action – Use this option to select what should be logged when the trigger runs. The options are:
- Always Save
- Save Failures
- Save Successes
- None
- Return Option Set Labels – Option sets within CRM have a value (held in the database) and a label (shown to the end user). Default queries to CRM return the value for option sets rather than the label. The return option sets as label checkbox on CRM data sources will return the label linked to the option set instead of the value.
- Click Save – This will save the data source and enable the Edit Query button if the user needs to edit the query.
- Edit Query – Opens the Query Builder to edit the query.
- After the query has been created click on Save Query to return to the Microsoft Dynamics CRM Real-Time Data Source window.
- IMPORTANT: In Order to save the data change source at this point, the user must click on Validate. Once the connection has validated, you can save the source.
- Click Save to save the real-time data source.
- Register button – This button will become active after an Integration Process (mapping) is created that uses the data source. After the Integration Process is created, the user will need to go back to the data source in order to do the registration.