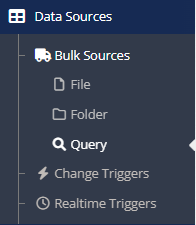
1. On the left side options column expand Data Sources, expand Bulk Sources, and click on Query.
2. On the Query Data Sources page click the Create Bulk Query button.

3. On the New Query Data Source page click the Microsoft Dynamics NAV OData Query button.

4. The page to configure the Dynamics NAV OData Query opens.

5. Enter a Description for the query.
6. Connection – Select the NAV OData connection to be used from the dropdown list.
7. Click Validate. If the connection is successful, the Company field becomes active.
8. Company – Select the company to be used from the dropdown list, this will activate the Services button.
9. Services – Click the Add Service button to select the name of the web service to be used in the query. A filter can also be applied at this time if the data needs to be filtered down.
10. After a service has been selected, the save and preview buttons will be enabled.
11. If multiple services have been selected, then click on Edit Query to join the services together.
12. Preview button – Allows the user to preview the data that will be returned with the query.
13. Click Save to save the query source.