- On the left side options column expand Data Sources, expand Bulk Sources, and click on Query.

- On the Query Data Sources page click Create Bulk Query button.

- On the New Query Data Source page click the NetSuite Query Data Source button.

- The page to configure the NetSuite query data source opens.

- Enter a Name for the query.
- Connection – Select the NetSuite connection to be used from the dropdown list.
- Click Validate, this will enable the Query Type field.
- Query Type – Select the query type, either Saved Search or Custom Filter. Each option has a different setup.
Saved Search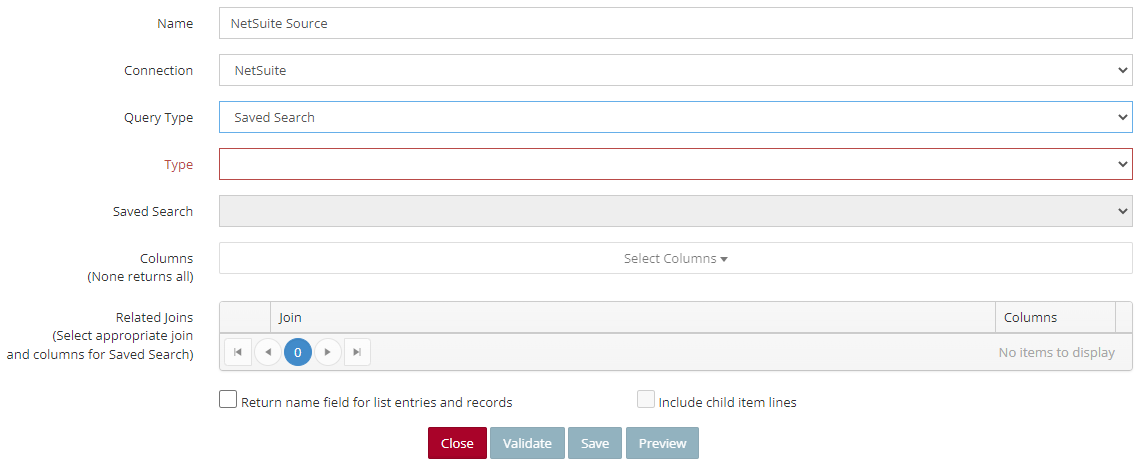
- Type – Select the Role Type for the Saved Search you will be using.
- Saved Search – Select the Saved Search to use as your data source. NOTE: Save searches are created in the NetSuite application.
- Columns – Select the columns you want returned for the data source. NOTE: Only columns added to the Saved Search in NetSuite will return any data. If you select a column that isn’t added to the Saved Search, then it will display a blank field. That column would need to be added to the Saved Search in NetSuite to be able to preview the data.
- Related Joins – Select any related joins that you need to get data from. Then select the fields for that join. NOTE: The fields you select will also need to be added to the Saved Search in NetSuite for any data to show. If the fields are not added to the Saved Search, then they will display as blank.
- Return name field for list entries and records – Mark this checkbox if you would like a name field returned instead of the Internal ID for list entries and records.
- Include child item lines – Not available for Saved Searches.
- Click Save.
Custom Filter

- Click the Add Filter button to open the Filter window.

- Category – Select the category for the filter. Options include Activities, Communications, Customization, Entities, File Cabinet, Items, Lists, Marketing, Support, Transactions, and Website.
- Type – Select the Role Type the filter will be using. These will differ depending on what category was selected.
- Columns – Select the columns needed for the data source. NOTE: Selecting no columns will return all columns.
- Add Filter Row – If the data source needs to be filtered down, then click Add Filter Row to add a filter. NOTE: A filter does not need to be added and the source can be Saved at this point.
- Field – Select the field to use for the filter.
- Operator – Select the operator for the selected field. The operators will change depending on what type of field is selected.
- Value From – Enter the value for the filter field.
- Value To – This option is only available for specific operators.
- Click Update to go back to the data source setup.
- Return name field for list entries and records – Mark this checkbox if you would like a name field returned instead of the Internal ID for list entries and records.
- Include child item lines – Mark this checkbox if you want child item lines to also be available to select for the Columns on the Filter.
- Click Save.